

An essential skill for any photographer to know is how to export photos from Lightroom. As you may have already discovered, Adobe Lightroom does not work like a regular photo editor such as Photoshop, Photoshop Elements or Affinity Photo. One of the main differences with Lightroom is the lack of a Save function. In all other software packages, you will find a Save and Save As option under the File menu. However, this Save option is conspicuously absent in Lightroom.
Rather than saving your photos, you export them. You can export your photos in a variety of different file formats and dimensions. Exporting provides the opportunity to create different versions of the same photo. So, you can have a high-resolution version for printing and a low-resolution version for sharing by email or uploading to the internet. The main advantages of exporting versus saving are:
- Being able to “save” new versions of many edited images at once. Exporting automates the process of saving images, allowing you to save any number of images in one go. You no longer need to save one image at a time;
- The exporting dialogue provides you with far more options than a Save As dialogue. During an export process, you can change filenames, sequentially number images, alter metadata, add watermarking, change file dimensions and quality as well as several other parameters;
- Exporting ensures that you can never overwrite the original image. Exporting can only create copies of the edited images.
There are many options for exporting your photos from Adobe Lightroom Classic and in this article, I’ll walk you through the process for:
- Exporting a high-resolution image, suitable for printing;
- Exporting a low-resolution image, ideal for sharing via email or the internet.
When you export photos from Adobe Lightroom Classic, you create new files that include all the adjustments you made in the Develop module as well as any changes you made to the metadata in the Library module.
First, let’s take a look at the Export dialogue box.
Export Dialogue Box
The Export dialogue box in Adobe Lightroom contains all the panels and options available for exporting photos. The vast choice of export options can make this dialogue box overwhelming, but I will step you through the two export options. The two export scenarios I have chosen are the most common export options.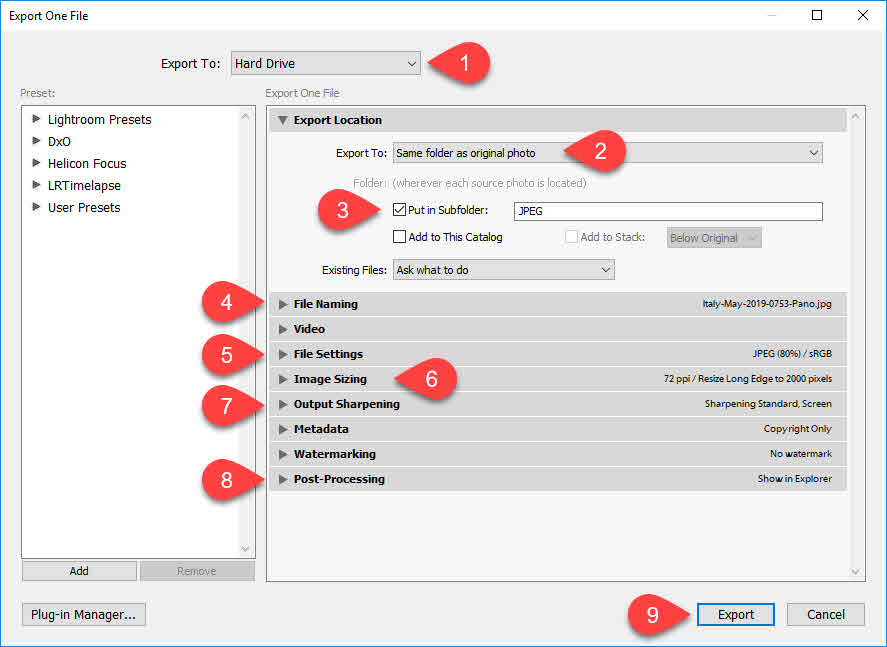
- The location photos will be exported to;
- The folder on the hard drive that the images will be exported to;
- Option to create a subfolder of the one selected in option 2 above;
- Here you can rename the files as they export;
- This section allows you to pick the file type;
- You set the photo dimensions and quality in this tab;
- You can add output sharpening here;
- This section will enable you to select an action to perform after the photos have been exported;
- Finally, the Export button.
Each of these panels will be explained in the sections below. In the last section, I will encourage you to explore some of the other panels in more detail.


Leave A Comment