
Export Photos from Lightroom Suitable for Printing
When you export photos from Lightroom intended for printing, you want them to be very high quality. High quality and high-resolution files will yield better prints. The majority of the time, you will export in the JPEG format. Let me show you.
To export high-quality print images:
Select the photos you want to export by clicking once on each thumbnail. You will find it easier to select your images if you view them in the grid view. You can easily switch to the grid view by pressing G on the keyboard.
With your images selected, choose File > Export, or click on the Export button at the bottom left of the Library module. Ensure that Hard Drive is selected in the pop-up menu at the top of the Export dialogue box. The dialogue box will also display the number of files you have chosen for export.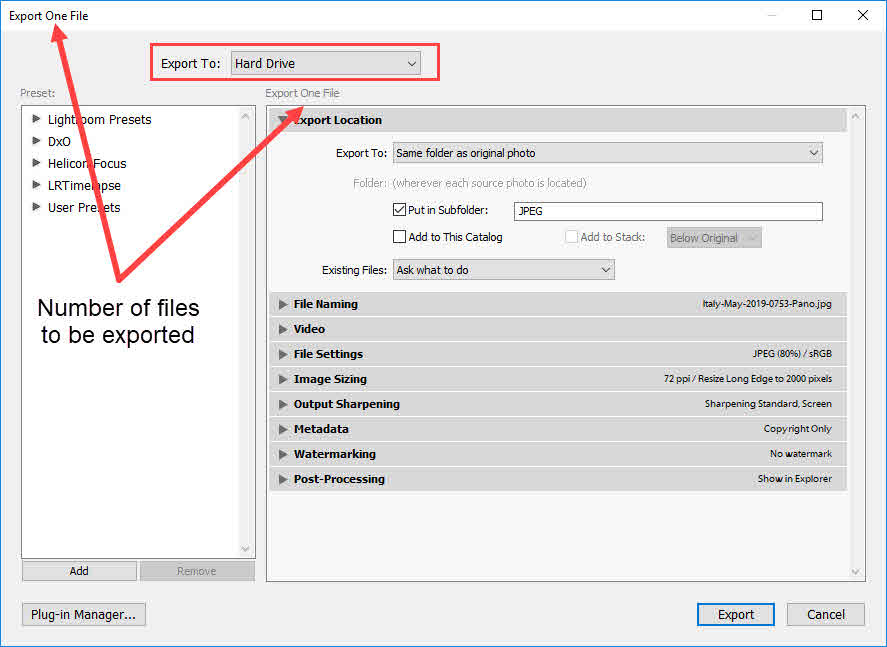
In the Export Location panel, click on the drop-down box to select from one of the location options.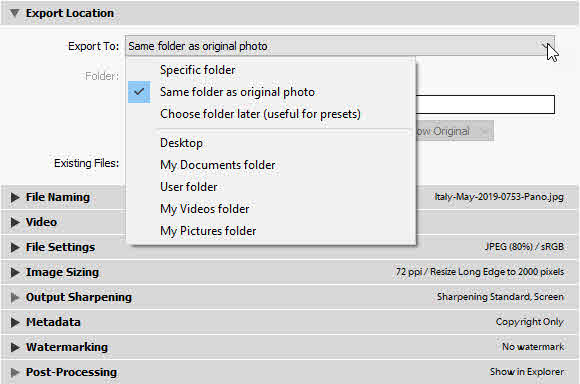
The first two options (Specific folder and Same folder as original photo) are the most useful and the most used.
- Clicking on the Specific folder option will open your computer’s file browser where you can select any folder on any connected drive;
- If you choose Same folder as original photo, the exported image will be saved alongside the original(s). Selecting this option can result in a disorganised folder structure on your computer, but it is the option I often prefer, with one addition;
- Choose Same folder as original photo and select the Put in subfolder option.
Type a name for your new subfolder. Creating subfolders is my preferred option because it keeps the Raw files and the edited photos in the same location but separated. However, you are free to create your own filing system.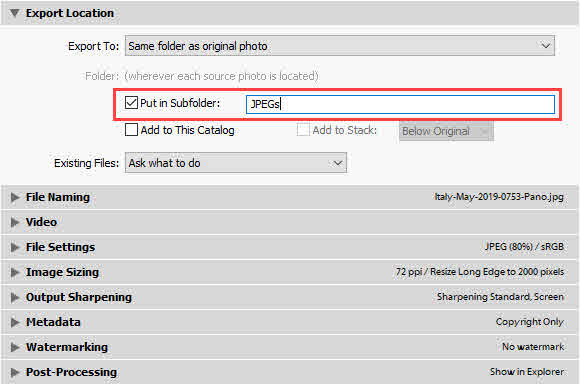
To rename all of the selected images as you export them, open the File Naming panel, and select Rename To. Now from the drop-down list, select Custom Name – Sequence.
With Custom Name – Sequence chosen, you can now type in the Custom Text field and change the Start Number to any number you wish.
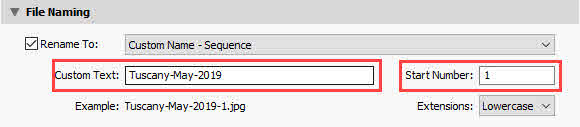
As the selected image files are exported, they will be renamed to match your custom text, and each will have a sequential number added to the end of their file name. At the bottom of the File Naming panel, Lightroom shows you a sample of how the files will be named after export.
We will skip the Video panel and open the File Settings panel. The File Settings panel is where you will choose the file type and adjust the settings associated with your selected file type. Each file type has different settings. We will select JPEG as the Image Format and 100 for the Quality. 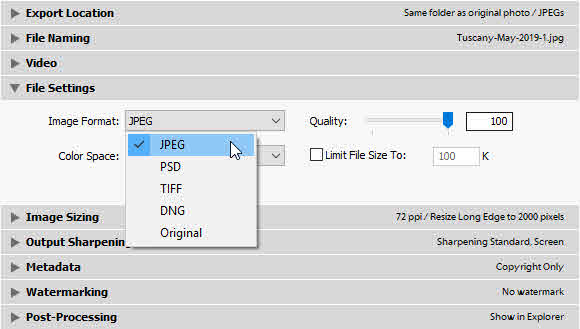
The Color Space will be set to sRGB, and the Limit File Size To box will be left unchecked. These JPEG settings will give us the highest quality file for printing.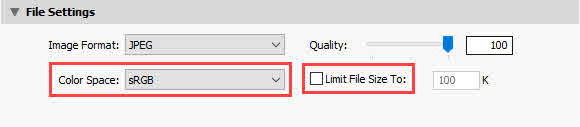
The next step is to ensure we are not resizing the image. Keeping the image at its full resolution will also ensure we get the best possible print. In the Image Sizing panel, ensure Resize To Fit is unchecked and the Resolution is set to 300 and pixels per inch is selected from the drop-down box.
In the Output Sharpening panel, check the Sharpen For box and select the appropriate output media. In this example, we are exporting for printing. Choose either Matte Paper or Glossy Paper.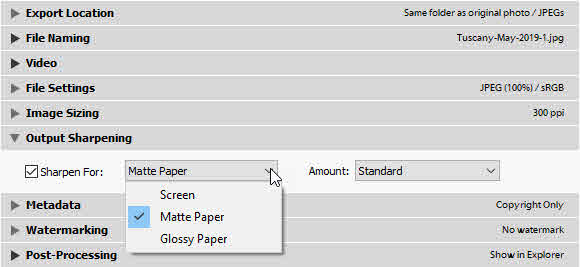
Do not confuse Output Sharpening with the sharpening you may have applied during the developing process. Output Sharpening will determine how much sharpening should be applied to an image after it has been resized and converted to a specific file format. For our example, Lightroom will apply the appropriate sharpening for our JPEG image at 100% quality with 300 pixels per inch. Had we chosen different settings, Lightroom would apply a different amount of sharpening. In short, Lightroom calculates the correct amount of Output Sharpening based on all the export settings.
We will skip Metadata and Watermarking and move directly to Post-Processing. In the Post-Processing panel, select Show in Explorer (Windows) or Show in Finder (MacOS).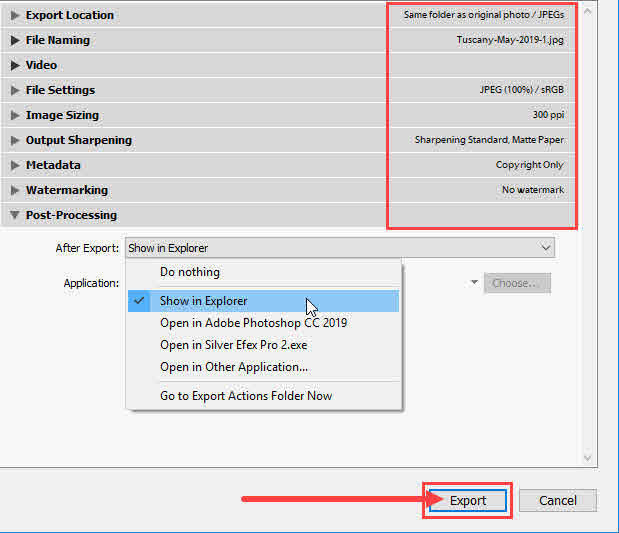
Click on Export. Your selected images will export with all the settings we chose. When the export task completes, your computer’s operating system will open Explorer (Windows) or Finder (MacOS) at the selected export location.
The JPEG images can now be printed or uploaded to a lab for printing. However, the file sizes will be too big for sharing. So let’s have a look at the different export settings for creating images that are good for sharing.


Leave A Comment