

I wonder how many of us actually think seriously about how to resize images for internet sharing? Sharing our images on the internet is something that we have all done at some time or other. Even if you have not yet shared any of your images on the internet, I’ll bet you’ve thought about it. In this article, I’m going to discuss the best settings to resize images that will provide a balance between quality, download speed and security.
Firstly, when I use the term internet sharing, you should understand that I am not referring to any one particular platform. Rather, I am referring to every form of sharing over the internet; email, social media or even your own website. The guidelines in this article will apply to most situations on most internet sites. An exception I would like to mention here at the outset, is the many photography speciality websites, such as 500px, Smugmug, Zenfolio, have optimised their sites to handle images with higher than normal settings. Each of these sites offers guidance on how to optimise images for their own particular site. Once you have worked through this article with the generic settings, you will be able to easily set up additional settings to match any speciality website.
Always Use the sRGB Colour Space
The colour space you chose is, without a doubt, the most important setting you should set for all images being shared over the internet, and that’s why I’m mentioning it first.
The web is optimised for using the sRGB colour space and it is vitally important that all your images are saved in this colour space before you share them on the web. If you’re unsure what sRGB colour space means, don’t worry. For now, it’s enough to know the importance of this and how to save your images in the sRGB colour space.
Size Really Does Matter
Even today with ever increasing broadband speeds and 4G mobile connections, it’s essential that you reduce the size of your images. Having images that are small enough to download quickly on all devices will greatly increase your users’ experience. Regardless of the method of internet sharing (social media, email or website), users will usually get fed up if they have to wait for your image to load. Strangely, faster internet speeds have resulted in a lack of patience with load times.
Worse than download times, are the upload times. Normal domestic internet connections will favour download speeds over upload speeds. This will mean that you will spend much more time uploading your images than your users will spend downloading them if the file size is overly large.
Additionally, if your images are too big and have a high resolution, they can be easily taken by others and printed or used for a wider range of uses. So by keeping the resolution low, you limit their theft value.
I have found that a good size, that balances screen clarity with load times, is somewhere between 800 pixels and 1024 pixels along the longest side. This can usually keep the file size under 200 KB.
Shrinking Made Easy
I’m going to show you how to use Photoshop and Lightroom to resize your images. I will cover the Photoshop method first and then move on to Lightroom.
The Photoshop method is good if you only have one or a few images to resize, and the Lightroom method is best if you have a lot of images. The Lightroom method can also be saved as a Preset which I’ll also show you how to do in this article.
So, let’s get started.
Using Photoshop to Resize Images
The best way to save images in Photoshop that are resized and optimised for the web, is to use the Export command.
This Export command used to be called Save For Web. In this article, I’m going to cover the new Export command because, while Save For Web does still exist inside Photoshop, it is undoubtedly going to disappear in a future update.
With your chosen image open, select File > Export > Export As…

In the dialogue box that appears, we will only be using the settings on the right-hand panel.
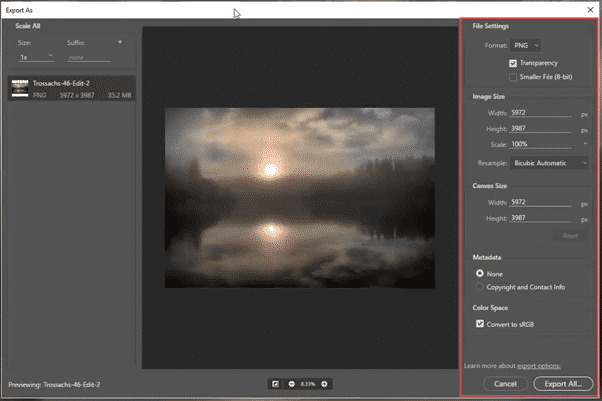
The best way to use this dialogue box is to start from the top of the right-hand panel and work our way down.
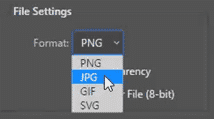
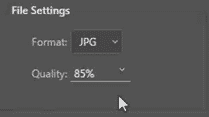
Under File Settings, select JPG and set Quality to around 85%. This will ensure your image still retains detail and quality.
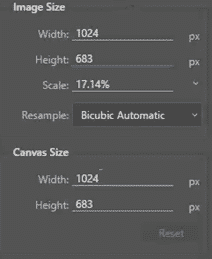
Now let’s change the dimensions of the image. Set the Width to 1024 and the Height and Scale settings will adjust proportionately. I normally leave the Resample at its default of Bicubic Automatic.
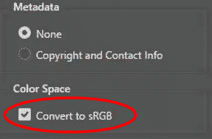
Now move down to the Metadata section at the bottom and ensure Convert to sRGB is checked.
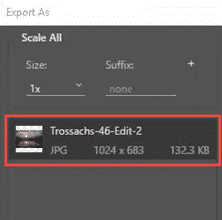
With all these adjustments made, the left-hand panel will show you what the final file size will be. In this case, 132.3 KB.
Now select Export All… and you’ll be taken to your file system to pick a name and location for your image.
The Lightroom Method
Lightroom is far better at resizing a batch of images. For example, you may wish to send a collection of images to a friend, relative or client. Or you may have a collection that you want to upload to your own web gallery. Whatever the reason, Lightroom is designed for this.
In this example, I have 7 images I want to resize and make “web ready”. The first thing to do is select all the images and, making sure you are in the Library Module, click on Export… at the bottom left of the window.
![]()
Note, you can easily get to the Library Module by pressing the G key. Alternatively, you can right-click on any of the selected images and select Export… from the top of the dialogue box. Either method will open up the Export dialogue box. Again, let’s start at the top and work down.
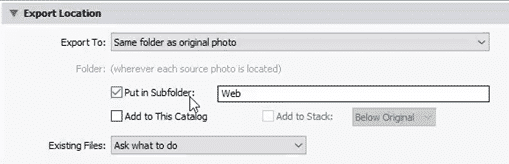
The first thing we need to decide is the location for the files. I normally chose to store them in a subfolder of the original folder. I call this subfolder, “Web”.
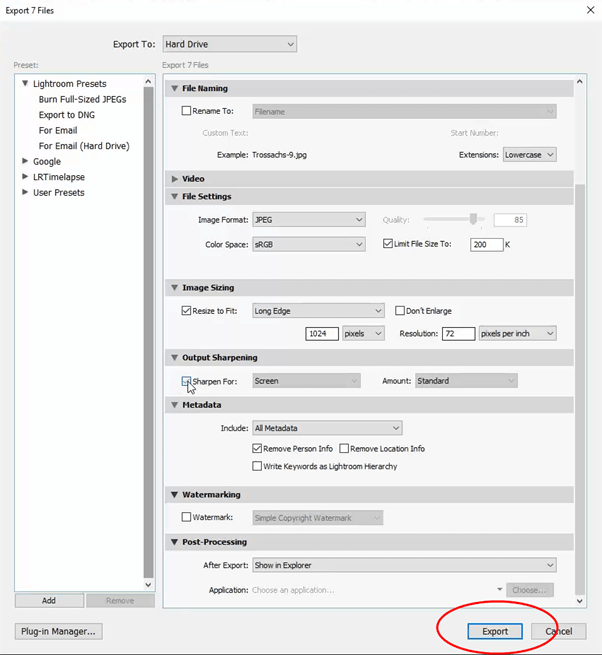
Now, I’m going to skip File Renaming for this example, and move down to File Settings and Image Sizing.
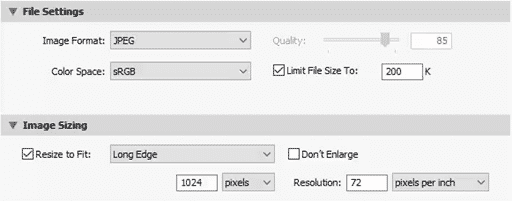
Copy the settings shown here and now the only setting left to change is Output Sharpening.

Output Sharpening is not essential if you have already applied a lot of sharpening to your images, but I find Sharpen For Screen at the Standard setting, produces a good result when the images are designed for viewing on a screen.
Below the Output Sharpening option, you can see Watermarking. This allows you to easily add text, or a graphic, to each image as a watermark. Have a look at it, but for now, I’ll leave that option off.
And that’s it done. We just click Export and Lightroom will apply the resize settings to each image and save them to the location we specified.
Creating a Preset
The settings we have taken the time to set can be saved as a Lightroom Preset. This means that all future exports for internet sharing can be done with a single click.
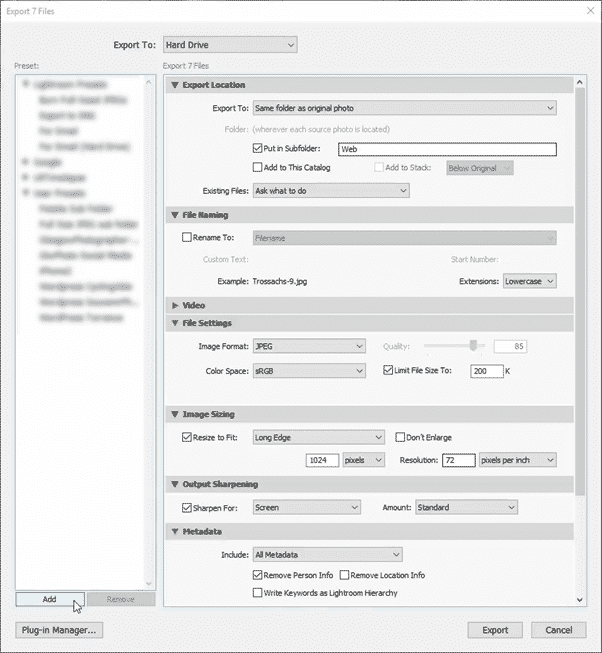
With all your settings in place, click on Add and this will bring up a small dialogue box.
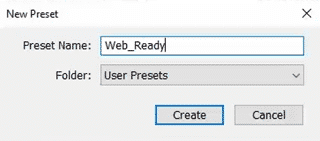
Decide on a name for your Preset the click Create.
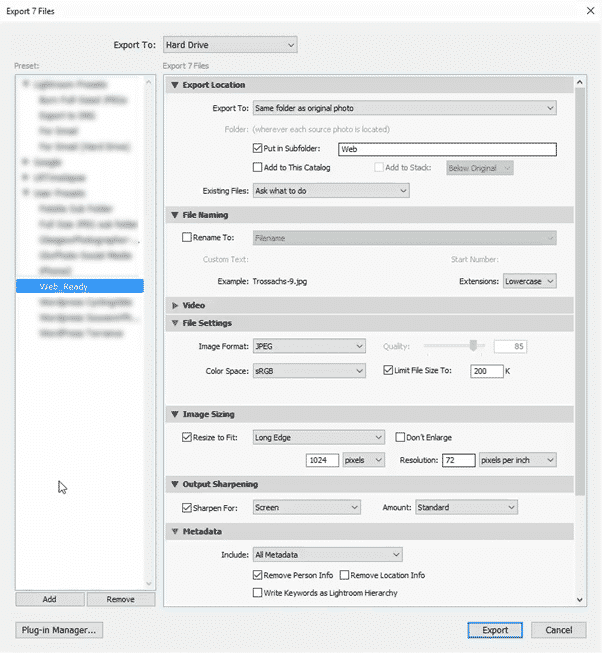
Done! From now on, all you need to do in the Export dialogue box is click on the name of the Preset and all the settings will be set automatically. Click Export.
Conclusion
Size really does matter for images that you are going to share on the internet. Keep them between 800 and 1024 pixels and the JPG quality setting around 85% and they should usually be less the 200 KB in size.
Let us know what you think and, as always, get in touch if you have questions or wish more information. Thank you.


Leave A Comment