
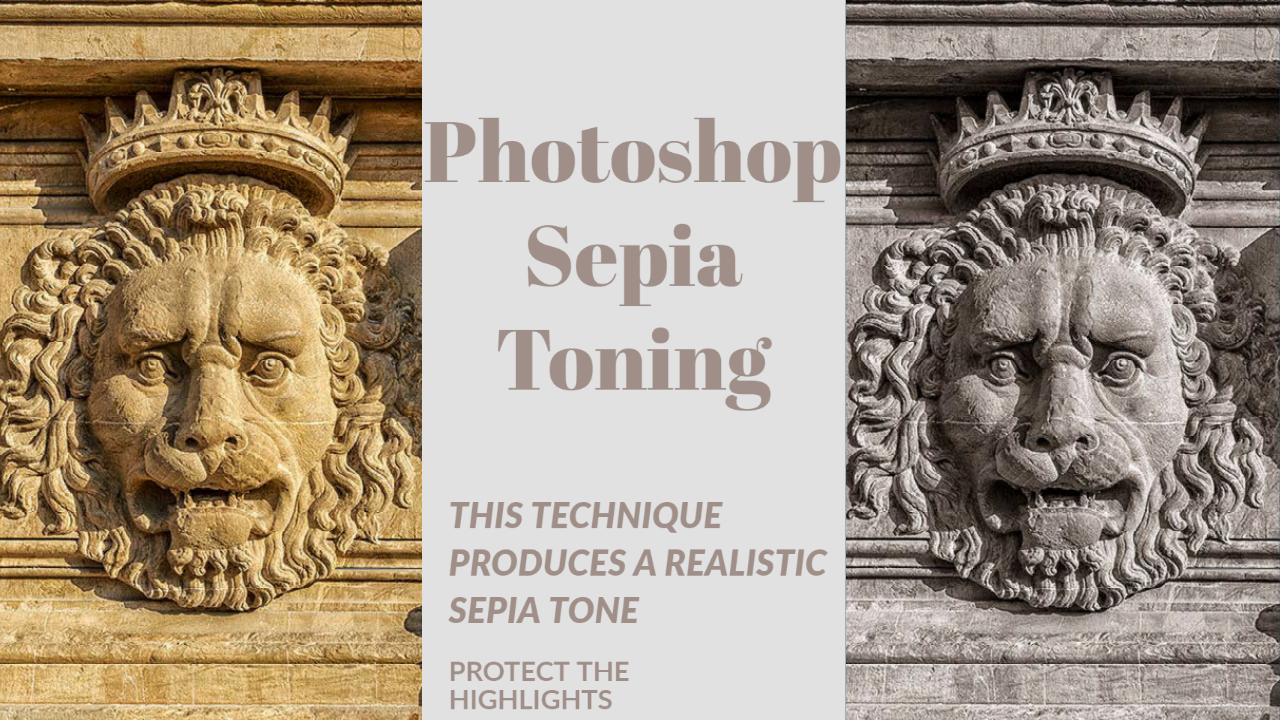
In this article, I am going to demonstrate a way to create a professional sepia tone effect in Photoshop. We normally add a sepia tone colour effect to our black and white images. One of the main problems with adding a colour tone to an image is the highlights and shadows also become toned. Toning the highlights and shadows will flatten the contrast of the image, which is often not what we want to do with our black and white photographs. This technique will show you how to create a sepia tone in Photoshop while protecting the highlights and shadows from the colour toning.
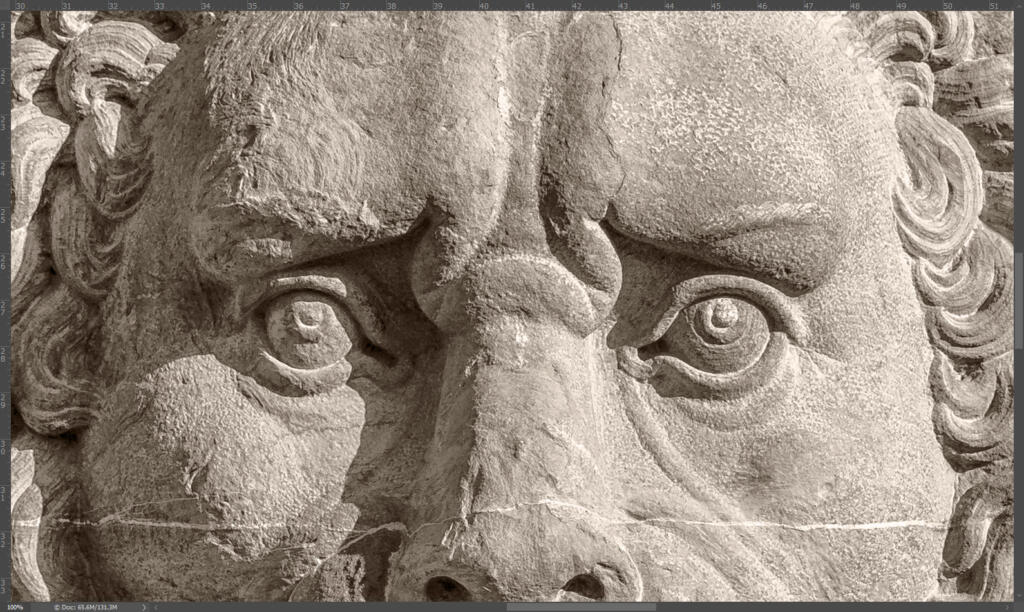
The image I am using to demonstrate this sepia toning effect was taken in Florence, Italy. It is a shot of one of the many lion carvings on the wall surrounding the Piazza Pitti Palace in Florence. The wall is constructed from sandstone, which when lit by the evening sunlight turns this vibrant colour of orange. I took the photograph with the intention of converting it to black and white and adding a gentle sepia toning.
To further demonstrate the effectiveness of this professional technique, I am going to create two versions of a sepia-toned black and white image. The first version will be the basic and simple method for toning an image. In fact, it is so simple that there is no requirement to create a black and white conversion before applying the colour toning. You can add colour toning directly to a colour image. The second method is the professional and advanced method of colour toning. This professional method will retain the contrast of the black and white image and protect the highlights and shadows for the colour toning.
Adding the Sepia Tone Effect (Simple Method)
This is a quick and basic way to add a sepia tone, or any other colour tone, to an image. It can be applied directly to a colour image, and even although it is a basic technique, it is still non-destructive. Being non-destructive means you always have the option of changing your mind after applying the effect. To apply a sepia tone to an image using this basic method: –
- Open an image into Photoshop. The image can be colour or black and white;
- If the image sits on the Background Layer, you will need to convert the layer to a normal layer by either: –
- Clicking once on the small padlock icon, or;
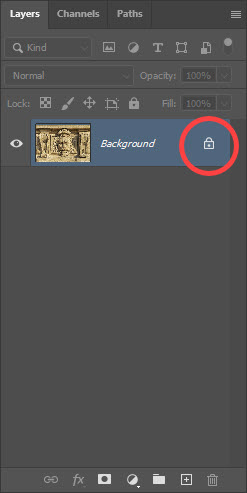
- Double-clicking on the word “Background” and choosing a name for the layer in the New Layer dialogue box that opens;
- Clicking once on the small padlock icon, or;
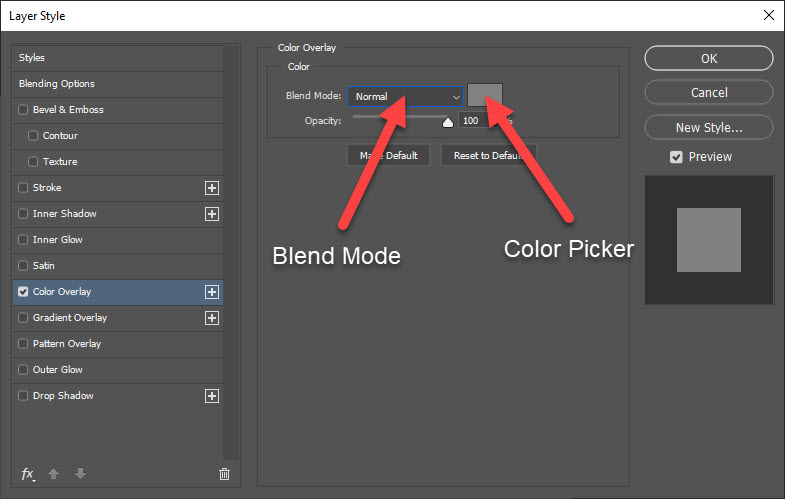
- Now from the bottom of the Layers Panel, click on the FX icon and choose Color Overlay from the list;

- By default, this will colour the entire image a shade of grey;
- Next click on the colour swatch and type the following values for the H, S and B settings – H = 30, S = 20 and B = 50. This will result in a pale brown colour, which is ideal for sepia toning. Click Ok;
- Lastly, change the blend mode from Normal to Color and click OK.

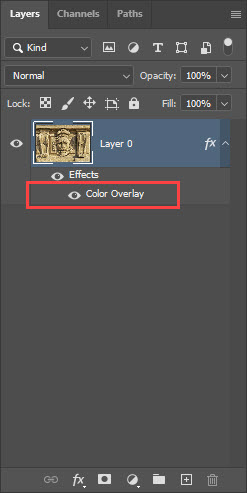
This technique will produce a sepia-toned image and you have the option to change the tone at any time by: –
- Double-clicking on the Color Overlay effect listed below the Layer name;
- Click the colour swatch, and dial in different values. For example, changing the H value to 210 will produce cyanotype colouring.
For a quick and simple way to colour tone an image, this is a perfectly acceptable technique. It also has the advantage of being non-destructive. But here is what I consider to be a more professional method of creating a sepia-toned image.
Adding the Sepia Tone Effect in Photoshop (Professional Method)
This professional method for creating a sepia tone will retain the image contrast. It is a slightly more involved technique, but the highlights and shadows are protected from the colour toning, and as you will see, it produces a more professional and nuanced sepia toning effect. The first step is to create a black and white conversion of the colour image. This technique will not work on a colour image in the same way as the simple sepia toning method does.
Creating the Black and White Image
There are many ways to create a black and white image using Photoshop. My preferred method is to use a Black & White Adjustment Layer. Adjustment Layers provide a lot of control and are non-destructive. To create a black and white image using a Black & White Adjustment Layer: –
- Open your colour image into Photoshop;
- Add the Black & White Adjustment Layer by either: –
- Selecting Layer > New Adjustment Layer > Black & White, or;
- In the Layers panel, click on the Create new fill or adjustment layer icon and select Black & White from the list;
- A new Black & White Adjustment Layer will be created above the colour image layer. Using the Properties dialogue for this new Black & White Adjustment Layer, you can adjust the look of the black and white image, but for now, let’s move on.
Creating a Solid Color Layer
After creating the Black & White Adjustment Layer, I am going to add a Solid Color Layer. This Solid Color Layer will be the toning for our sepia effect, but this time we will use blending options to protect the sepia tone from our highlights and shadows.
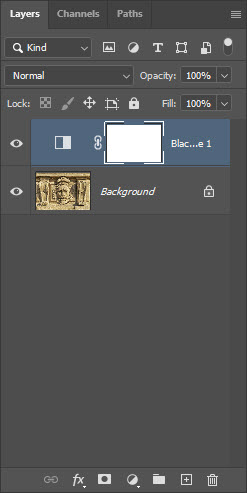
- Add the Solid Color Adjustment Layer by either: –
- Selecting Layer > New Fill Layer > Solid Color, or;
- In the Layers panel, click on the Create new fill or adjustment layer icon and select Color Fill from the list;
- Your image will now be completely coloured, and the Color Picker dialogue box will be visible. In the Color Picker dialogue, type in the following values for the H, S and B settings – H = 30, S = 60 and B = 80 and click OK

- To blend this new orange colour with the underlying black and white image, I am going to use blending options in the Layer Styles dialogue box. To access the Layer Styles dialogue box, double-click on an empty area of the Layer; do not double click on the Layer icon or the Layer name.
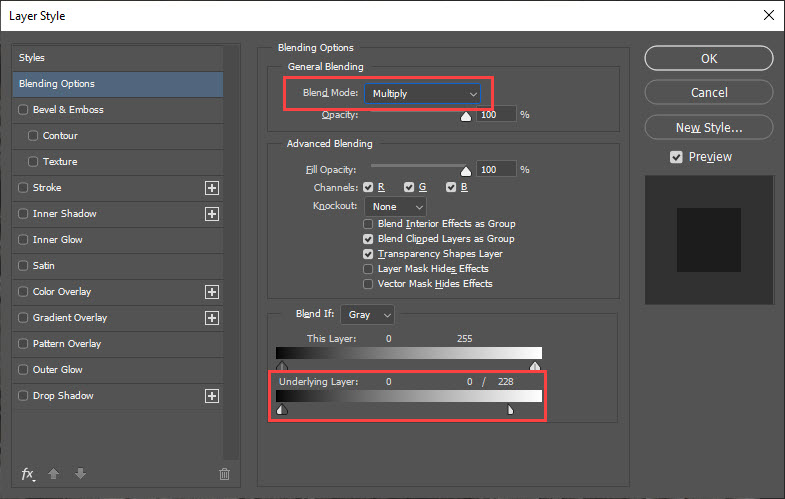
- In the Layer Styles dialogue box: –
- In the Blend If area at the bottom of the Layer Styles dialogue box, drag the white slider triangle to the left until you begin to see a few white areas appearing in the main image. These white areas will be protected from the sepia toning effect. It is best to only have a few of the brightest highlights showing through;
- Next, hold down the Alt key (Windows), or the Option key (Mac OS) and drag the left-hand half of that same white triangle slider all the way to the left. Using the Alt or Option key to split the triangle will create a smooth transition to the effect;
- Lastly, at the top of the Layer Styles dialogue box, change the Blend Mode to Multiply.
- Setting the Blend Mode to Multiply, will darken the image slightly.
- To lighten the image, I have used a Brightness Contrast Adjustment Layer and increased the Brightness slider to a value of 20. I could have also used a Levels or Curves Adjustment Layer to lighten the image.
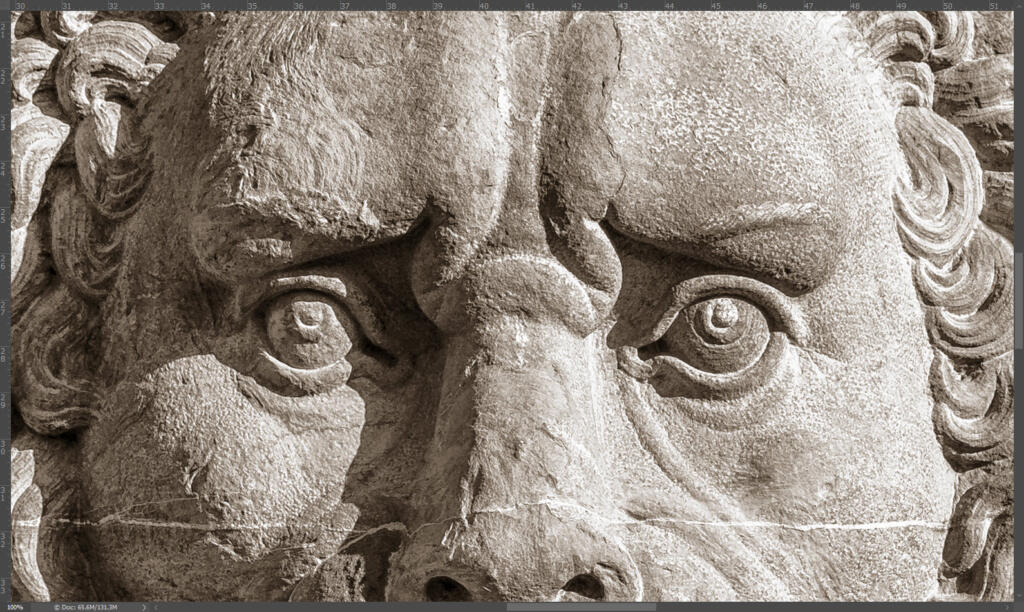
This professional technique is slightly more involved, but I am sure you will agree that the effect is more dramatic and natural. Give this a try with your own images and let me know in the comments below what you think.


Brilliant!!!
Wow!!!
Just what I was looking for a sepia ton for a new musical set in the mid 19th century telling the story of the amazing Titus Salt who was an industrial pioneer in Yorkshire,Great Britain.
I’ll post some of the results when I have a moment!
Thank you so much.
I’ve saved it as an action and it works perfectly!!
Thank you!