
Photoshop provides the ability to automatically adjust the contrast and colour of an image in a non-destructive way. It is not immediately apparent, but you can auto colour correct an image using either a Curves adjustment layer or a Levels adjustment layer. Should you wish, you can use this auto colour correct process directly on the image layer, but I always recommend using an adjustment layer. By making use of adjustment layers, you can edit your image in a non-destructive manner. Editing non-destructively, allows you to apply as many changes as you wish without damaging the original image.
In this article, you will learn how to access the auto colour correct options, and I will describe what each of the auto colour correct options do. The process and the auto colour correct options are the same whether you are using a Curves adjustment layer or a Levels adjustment layer. I will describe the process using a Curves adjustment layer.
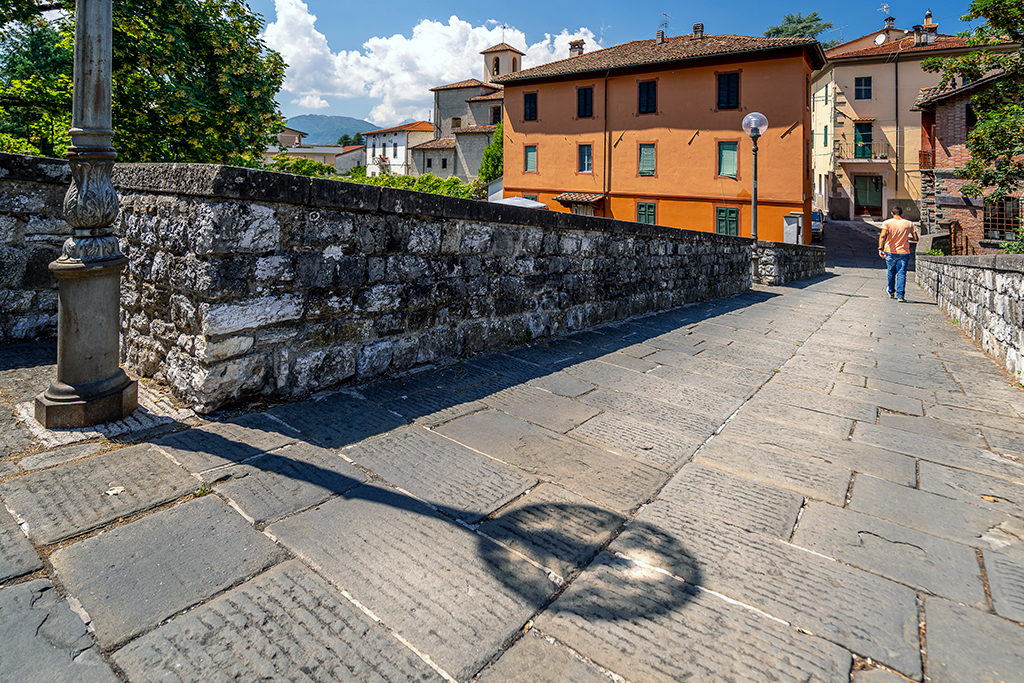
Sample Image

Sample Image
The image I have chosen to demonstrate how to make use of Photoshop’s auto colour correct options has a strong colour cast. Using the auto colour correct options built into Photoshop, will remove the colour cast and create a more neutral and correctly colour balanced image. The sample image is a JPEG file, so I do not have access to the colour correction options contained in Adobe Camera Raw (ACR). Despite this limitation, the auto colour correct options will produce a perfectly colour balanced image.
Create a Curves Adjustment Layer
After opening the image you want to colour correct: –
- Create a Curves adjustment layer by either:
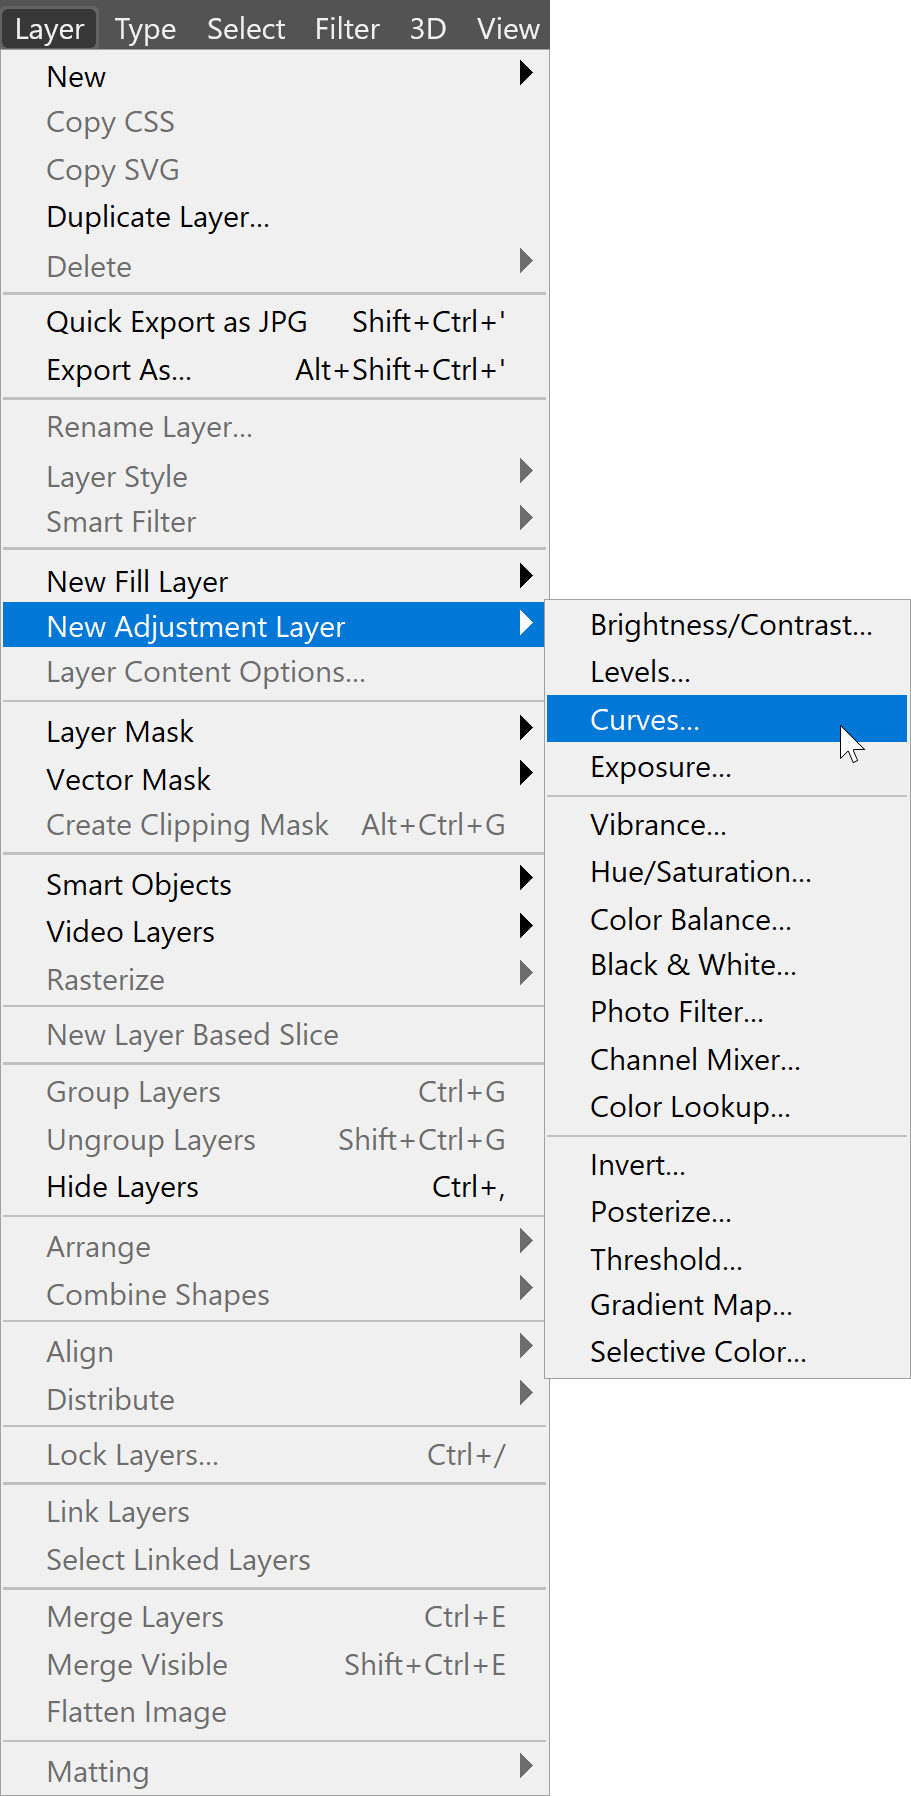
- Selecting Layer > New Adjustment Layer > Curves, or;
- Clicking on the Create new fill or adjustment layer icon at the bottom of the Layers panel, and choosing Curves, or;
- In the Adjustments panel, click on the Create a new Curves adjustment layer icon. If you do not see the Adjustments panel, you can open it by choosing Window > Adjustments. This is my preferred method for adding adjustment layers.
- The new Curves adjustment layer will appear above the image layer in the Layers panel. Plus, the Properties panel will open automatically for the new Curves adjustment layer.


Using the Auto Colour Correct Options
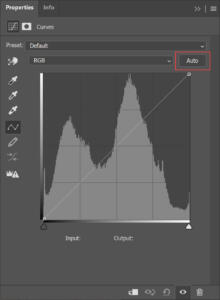
In the Properties panel for the newly added Curves adjustment layer, you will see the Auto button. Clicking on the Auto button will apply an auto contrast adjustment. This auto contrast adjustment does not adjust the individual colour layers. Therefore, it will not alter the colour balance of an image. A contrast adjustment may be all that you need if you are happy with the colour balance of the image.
In this example, I do want to correct the colours, so I need to access the additional controls that come with this Auto button. To access the additional controls: –
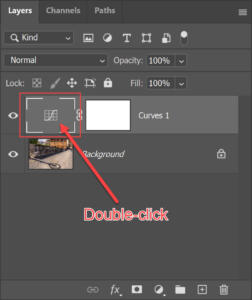
- If not already open, double-click on the Curves adjustment layer icon to open the Properties panel;
- With the Properties panel open, Alt-click (Windows) or Option-click (Mac OS) on the Auto button;
Alt or Option Click
- The Auto Color Corrections Options dialogue box will now open. Let’s look at this dialogue box and its options in detail.


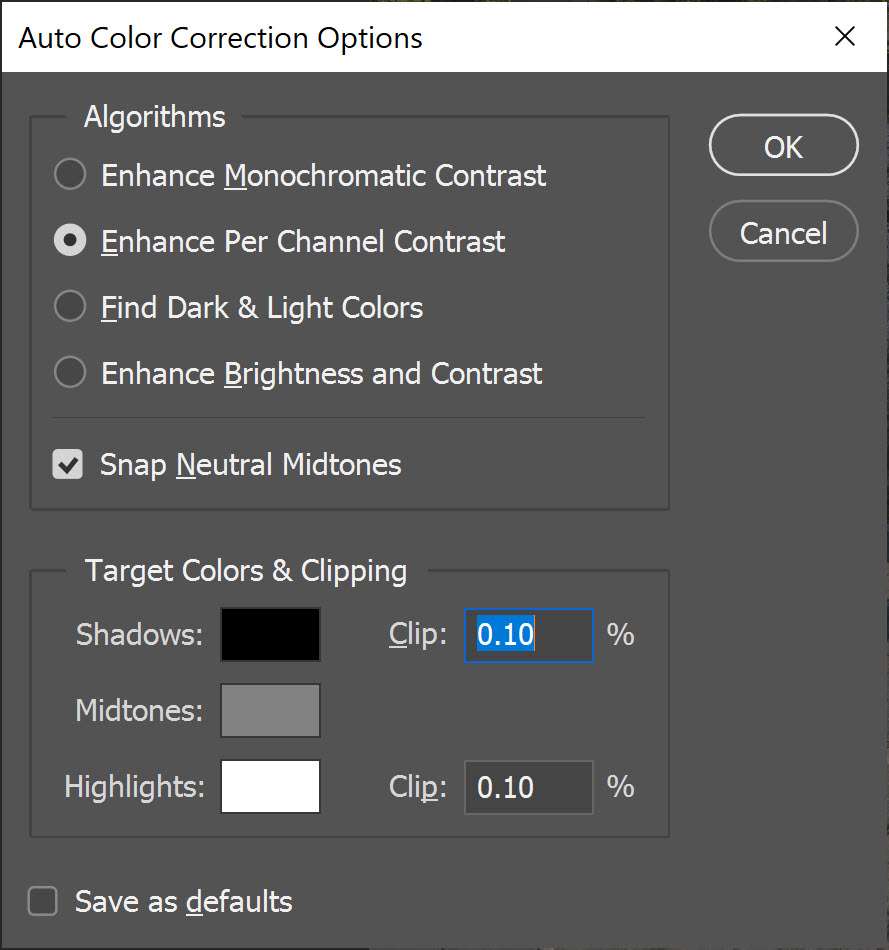
The Auto Color Corrections Options dialogue box allows you to automatically adjust both the contrast and the colour in an image. It also allows you to save the settings as default values for the Auto button. In this way, once you have decided which settings you prefer, you can save them and use the Auto button to apply the saved settings with one click.
The Algorithms
Photoshop offers four algorithms for auto colour correction. Please don’t get bogged down by these algorithms, because there is no correct algorithm that will work for all images. Neither is there a good or a wrong algorithm. So, try them all and assess the result visually on the image you are adjusting, before committing to your choice.
Enhance Monochromatic Contrast
This option preserves the overall colour and only adjusts the contrast. The highlights will appear lighter, and the shadows will appear darker.
Enhance Per Channel Contrast
This option adjusts the red, green, and blue colours individually. This individual adjustment ensures each colour channel has the best balance of light and dark tones. The colour balance of the image will change when this algorithm is used.
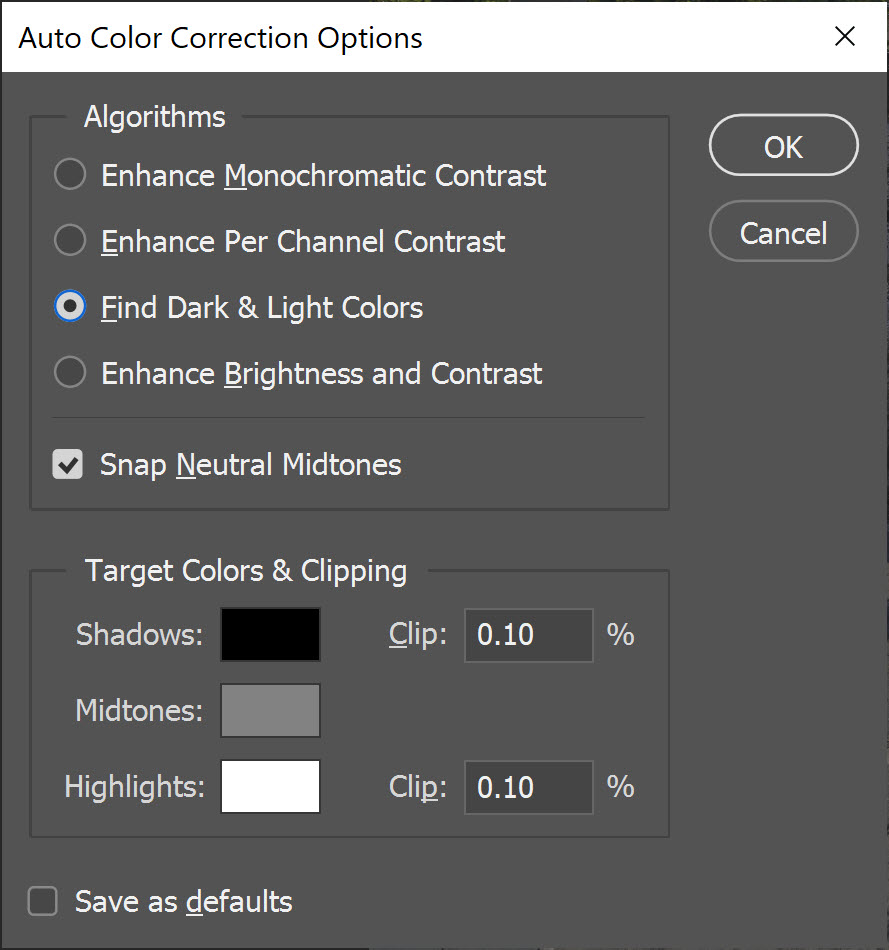
Find Dark & Light Colors
This option Looks for the darkest and lightest pixels in the image. It then uses these as a reference to adjust the contrast for the whole image. Photoshop will maximise the contrast while attempting to prevent highlight and shadow clipping. The colour balance of the image will also change when this algorithm is used.
Enhance Brightness and Contrast
This option is the newest of the algorithms. It analyses the pixels in your image and performs a content-aware adjustment. This option will usually perform a reasonable contrast adjustment of the image without creating significant gaps in the histogram. This algorithm will not alter the colour balance. If you want to adjust only the contrast of the image, this will usually be the best option to use.
Snap Neutral Midtones
This option performs the magic when it comes to correcting colour balance in an image. In this example, I want to fix a strong colour cast on the image. Therefore I am going to check this option.

With the Snap Neutral Midtones options checked, Photoshop will find a medium neutral tone within the image and base all the algorithm adjustments around that mid-tone. The corrections will now adjust contrast and correct any distinct colour cast.
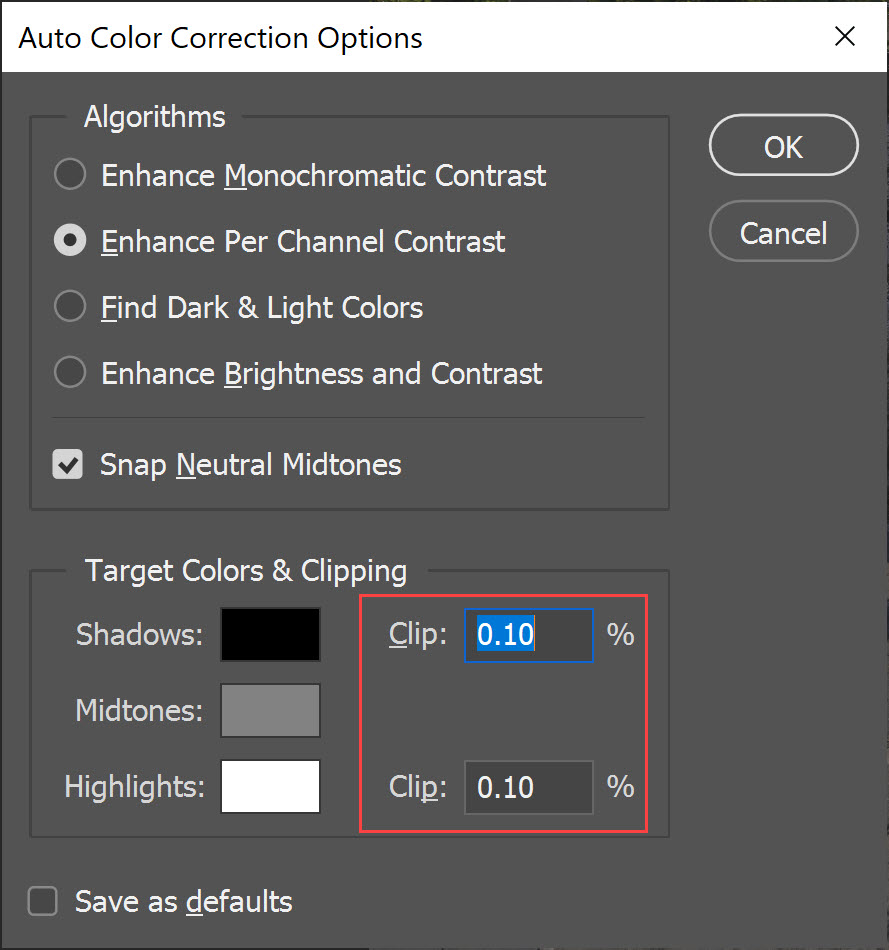
Target Colors & Clipping
When Photoshop is identifying the lightest and darkest pixels in an image, this adjustment tells Photoshop which range of pixels it should ignore. Adobe recommends a setting of between 0% and 1%. The default value of 0.1% is generally good enough. But feel free to experiment with the setting while watching the highlight areas of the image. The higher the number, the more likely you are to clip the highlights and shadows of your image.
My recommendation is to leave it set to the default value of 0.1%.
Colour Swatches
These three swatches will tell Photoshop what to consider as the darkest, mid-tone and lightest areas of the image. To change any of the swatches: –
- Click once of the swatch you want to change;
- In the Color Picker dialogue that opens, select the colour you want to use. You will immediately see the effect this change has on the image;
- Click OK when you are happy with the result.

Save as defaults
The last option on the Auto Color Corrections Options dialogue box allows you the option of saving your settings as the new default. If you check this box and click OK to exit and apply your settings to the image, you will have saved the settings as the new default.
Now, whenever you want to apply those default settings to an image, you need only click the Auto button in the Curves or Levels Properties dialogue. You will not need to Alt-click (Windows) or Option-click (Mac OS) on the Auto button. You will need to Alt-click (Windows) or Option-click (Mac OS) on the Auto button if you wish to change the settings.

Auto Colour Correct this Sample Image
Using the sample image, here are the settings I applied to auto colour correct.
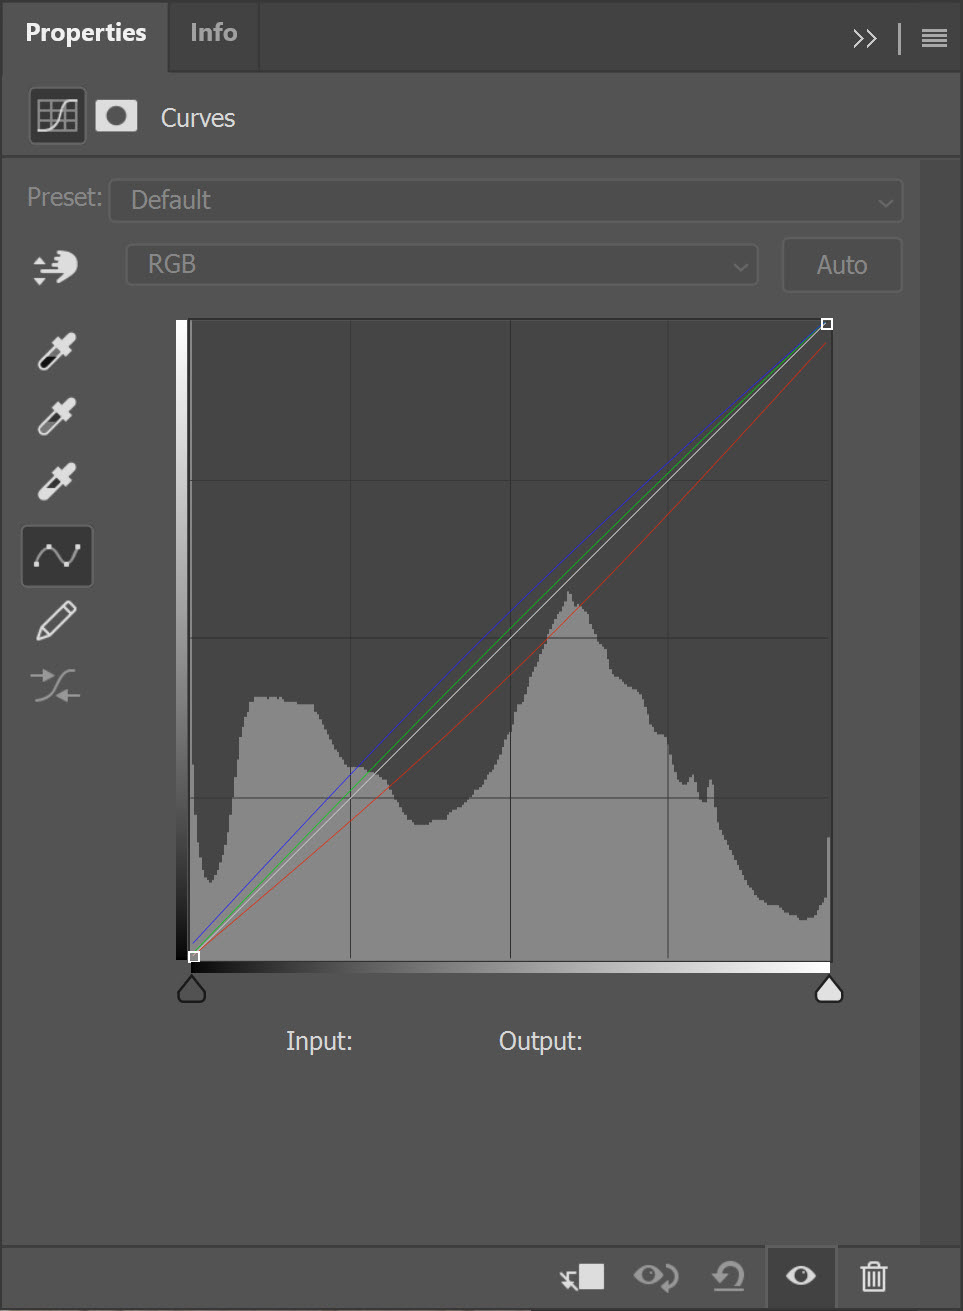
You can see the three colour channels have been adjusted independently to achieve the best contrast and to correct the red colour cast.
Before and After
Before
After
Conclusion
Colour correcting images can often be a daunting task. Ensuring you have an accurate colour balance and pleasing contrast can be a back and forth guessing game. Using the auto colour correct options on an adjustment layer is a fast and reasonably accurate way to correct colour casts and contrast in your images. The colour correction may not always be 100% accurate, but it is a solid starting point. In this sample image, the auto colour correction was a vast improvement, and the slight tweak in contrast also helped the overall appearance of the image. Using the auto colour correct options was enough to fix this image.


Leave A Comment