
Creating HDR images in Lightroom Classic
Once you have captured the bracketed images for your HDR merge, you can now import them into Lightroom Classic and create the HDR image.
- Import the images into Lightroom Classic;
- Select the images you want to create an HDR blend from by Ctrl/Cmd clicking on each of them. The selected images will be highlighted;
-
Do one of the following:
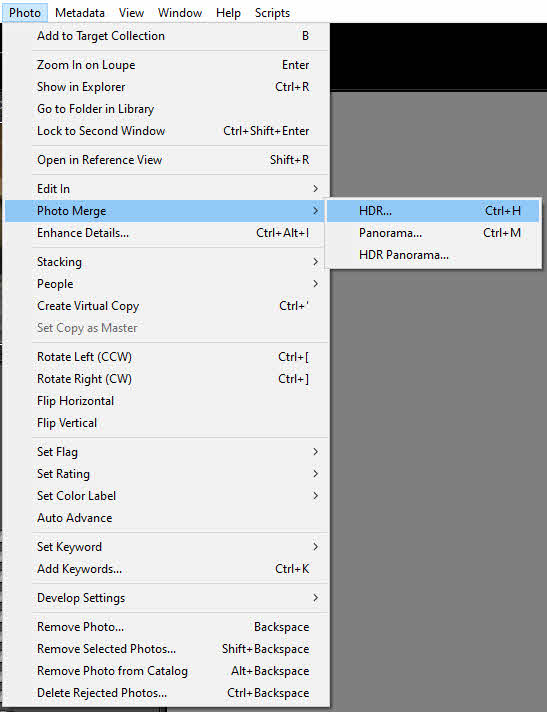
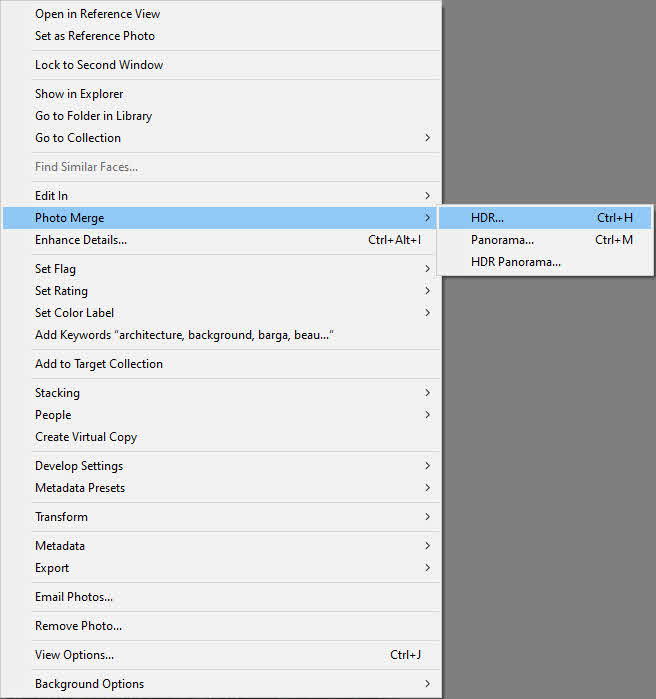
- Select Photo > Photo Merge > HDR from the menu, or;
- Right-click any of the highlighted photos and select Photo Merge > HDR, or;
- Press Ctrl/Cmd H.
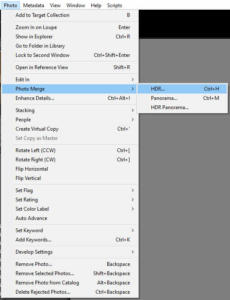
Photo Merge Menu Item
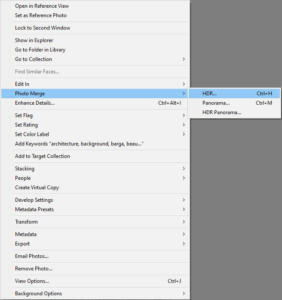
Photo Merge right-click Menu Item
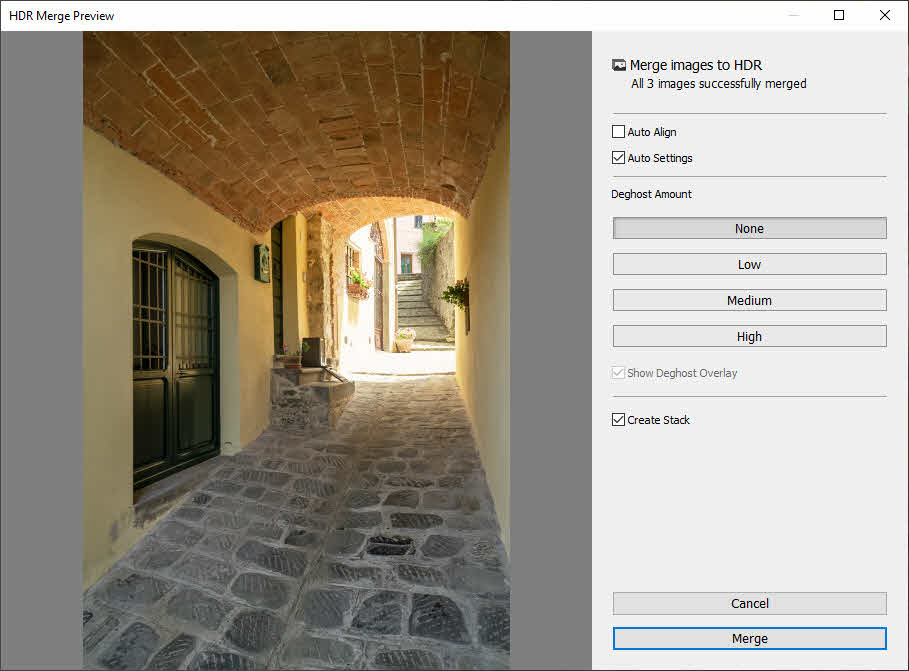
- This will open the HDR Merge Preview dialogue. The word to remember here is “Preview”. You see a small resolution preview of the final HDR merge. Therefore, you will not be able to zoom in on any details, nor will the image in this dialogue box be an accurate representation of the final HDR – it will be close, but not 100% accurate;
-
The HDR Merge Preview dialogue presets you with some options:
- Auto-Align – If you shot the bracketed images handheld, or you suspect there may have been slight movement between the shots, this Auto-Align function will align all the images. Using Auto-Align will slow down the HDR merge process;
- Auto Settings – Ticking the Auto Settings box will apply the same auto-exposure settings that you find in the Basic Panel of the Develop module. So, it makes no difference whether you click Auto Settings here or use the Auto exposure function after the HDR merge is completed. It is useful as an indication of how the final HDR merge will look;
- Deghost Amount – You may notice some areas of the HDR preview are semi-transparent. This transparency is caused by objects moving in the scene between the exposures, for example, leaves blowing on trees, people walking or birds flying past. The deghosting option will correct and remove these semi-transparent areas. The options of None, Low, Medium and High refer to the amount of movement and ghosting present in the preview. The higher the value you select, the longer Lightroom will take to merge the images, and you will reduce the amount of dynamic range in the final HDR image. My advice is to start with None and increase if necessary.
- Show Deghost Overlay – Selecting this will overlay the preview with a mask of where the ghosting has been detected and rectified. You can use this checkbox to assess the amount of ghosting in your image;
- Create Stack – This option will group your bracketed images and the resulting HDR image into one stack. This option can help organise your photos inside Lightroom. The Create Stack option was introduced in April 2018 to Lightroom.

- Once you have made your selections in the HDR Merge Preview dialogue, click on Merge to create the HDR image (and stack if you selected the Create Stack option);
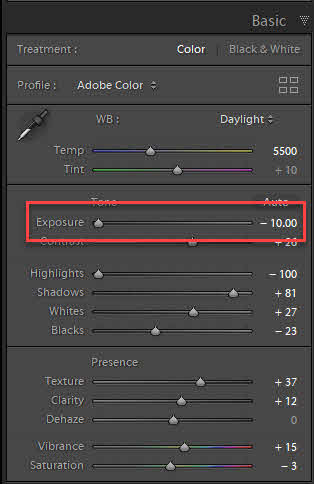
You will now have a DNG file that contains all the information you would find in a Raw file (if you used jpeg files for the merge, you will still have a new DNG file, but it will not contain Raw information). The new HDR image will have the same filename as the first image used in the blend with –HDR.dng appended to the filename.
To prove you have increased dynamic range in this new HDR merged file, try dragging the Exposure slider. You will notice that you have a considerable amount of range compared to a single file. In most cases, you will have -10 to + 10 stops of dynamic range.
Now develop your image as you normally would.


Leave A Comment