
All camera lenses are different and all camera lenses have their own optical characteristics and idiosyncrasies. The lens profile correction adjustment built into most Raw software packages will compensate and remove these idiosyncracies from camera lenses. This article will show you how to use the lens profile correction within Adobe Lightroom, Adobe Camera Raw and ON1 Photo Raw.
These lens characteristics will often show up as a darkening of the corners, known as vignetting, or as some kind of distortion. The distortion can be divided into two kinds, known as barrel distortion and pincushion distortion. Both of these distortion types make the image look as though it has been wrapped around a sphere.
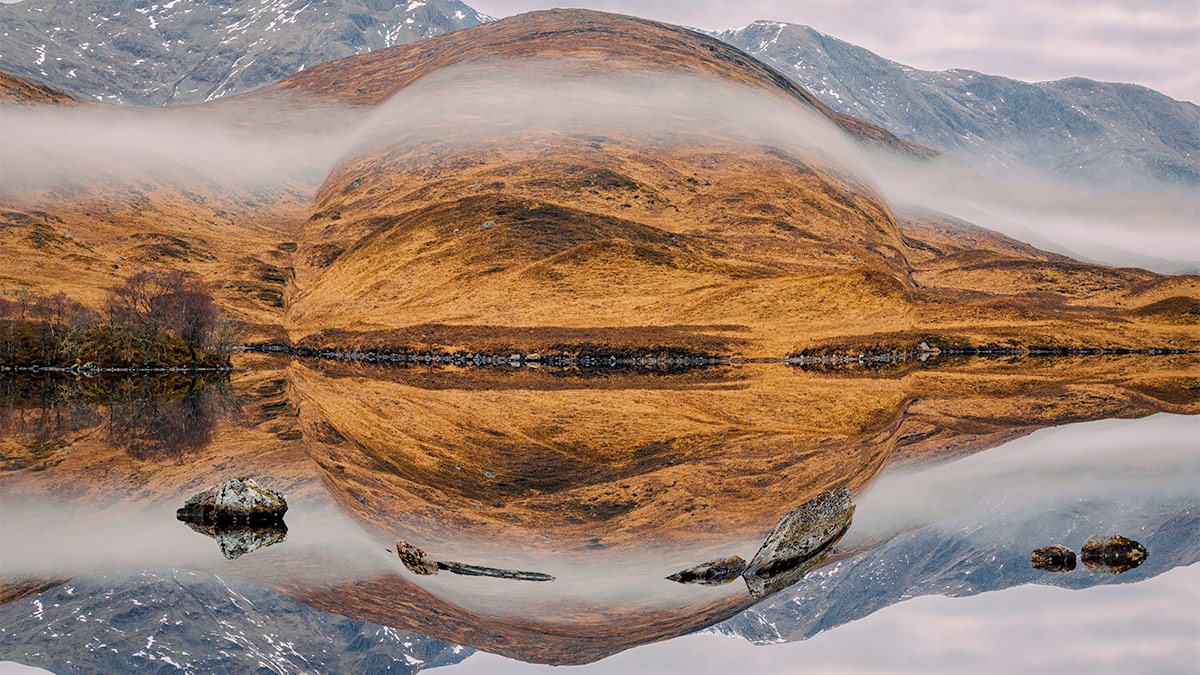
The image below shows a photograph before lens correction has been applied and the same image after lens correction has been applied. Move the slider left and right to see the difference.


Apply Lens Profile Correction
Thankfully, it’s an easy fix with the latest versions of Lightroom, Adobe Camera Raw and many other raw editing software packages. It all cases it is simply a matter of ticking a box somewhere in the develop setting area of the Raw conversion software.
Each Raw conversion software has a huge list of lens profiles built-in. As you tick the box to apply a lens correction profile, the software will read the EXIF information embedded in the image, and automatically apply adjustments to compensate for distortion and vignetting. It’s that easy.
Before we apply the lens correction profile, it is worth noting that this adjustment is best applied to Raw files. The Raw conversion software contains separate profiles for Raw files and non-Raw files. However, if you apply this adjustment to a JPEG image, you may get an undesirable result. A JPEG image may already have settings and adjustments applied, and adding a further lens correction profile on top, may not work as expected. If you do apply a profile to a JPEG and you don’t like the result, you may want to consider leaving the adjustment off.
Let’s take a look at how to apply a lens correction profile to an image using Adobe Lightroom, Adobe Camera Raw and ON1 Photo Raw.
Applying lens profile correction in Lightroom
- Select the image you want to apply the lens correction profile to;
- Open the Develop module by clicking on Develop along the top of the screen or press the D key;
- On the right-hand side of the Develop module, scroll down to the Lens Corrections tab;
- Ensure the Profile tab is selected;
- Click on the checkbox next to Enable Profile Corrections.
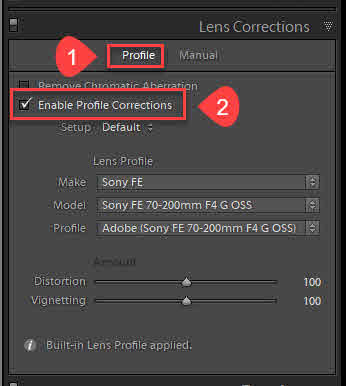
Lightroom Lens Profile Correction
Applying lens profile correction in Adobe Camera Raw (ACR)
Adobe Camera Raw is a plug-in that comes with Photoshop. Whenever you open a Raw file directly into Photoshop, the Adobe Camera Raw plugin will launch. To apply a lens correction profile to an image using ACR, follow these steps:
- Open a Raw file from the File > Open menu;
- In the ACR window, click on the Lens Correction tab;
- Ensure the Profile tab is selected;
- Click on the checkbox next to Enable Profile Corrections.
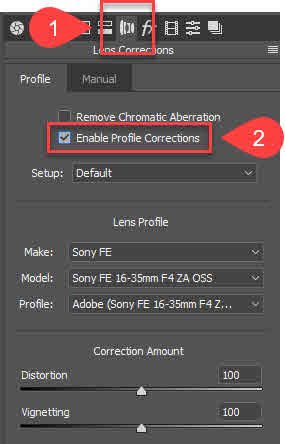
Photoshop Lens Profile Correction
Applying lens profile correction in ON1 Photo Raw 2018
- Select the image you want to apply the lens correction profile to;
- Click the ON1 Develop icon on the right-hand side of the screen;
- Scroll down to the Lens Corrections tab;
- Click on the orange circle next to Lens Correction.

ON1 Photo RAW Lens Profile Correction
Automatic Lens Correction
If you shoot with a micro 4/3 camera such as a Panasonic or Olympus, you should note that lens corrections are applied automatically without your intervention. The same is true of some other cameras, including Leica Q, Fuji X, Sony and a collection of point-and-shoot cameras from Canon.
The lens correction profile is written into the Raw file by the camera. This information is then picked up by Lightroom and applied to the image automatically. You can find out if a lens correction profile has been applied automatically by clicking on the information icon within the lens correction tab.
Info Icon
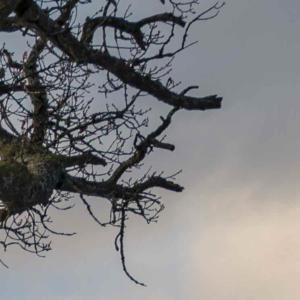
You can see that Lightroom has applied a built-in profile this image. However, when I check the box next to Enable Profile Corrections, there is a marked difference to both vignetting and distortion. But, when I check the box next to Remove Chromatic Aberration there is no difference to the image. Even when I zoom in on one corner where there is a lot of fine contrast detail, there is zero chromatic aberration regardless of whether or not the box is checked. So, let’s click on the Info icon to see what information it gives me for this Sony FE 16-35mm lens.

Information Window
This is consistent with what I see on the screen. Checking and unchecking the Remove Chromatic Aberration box makes no difference. Lightroom is picking up the information the camera embedded in the Raw file and appliying the profile. There is no built-in profile for distortion and this is why checking and unchecking the Enable Profile Correction box does make a difference. In the split-image below, you can see without Lightroom’s profile correction applied and with the profile correction applied. They are identical. This means, I have one less thing to do when editing images.
What is and what is not applied in the camera is dependent on the manufacturer. Try this with some of your own images and see what built-in profiles are applied automatically.
Conclusion
I would say that the vast majority of your images will benefit from applying a lens correction profile. There may be the occasional image that you want to leave the distortion and vignetting in place, but that will be rare.
It is easy to miss and forget the lens profile correction adjustment. ON1 Photo RAW applies the correction automatically to your Raw images whereas Adobe Lightroom and Adobe Camera Raw do not. Thankfully, Lightroom offers the ability to automatically apply lens profiles to your images as you import them into Lightroom. Read this article to learn how.
What do you think? Please comment.


Does Adobe Camera Raw automatically pick up and apply the Olympus lens correction info like Lightroom does?
Ralph,
Thank you for your question. Yes, Adobe Camera Raw (ACR) should pick up on the Olympus lens correction information. Lightroom uses the same ACR that Photoshop uses. Thus, the EXIF information embedded in the Raw file by the Olympus camera will be read and used in the same way by both Lightroom and ACR inside Photoshop.
Martin.