
Adding a selective colour effect in Lightroom is a lot easier than most photographers think. Some photographers may not even be aware that a selective colour effect can be applied in Lightroom. In this short tutorial, I’m going to show you how easy it is to add a selective colour effect in Lightroom only.
What is a Selective Colour Effect?
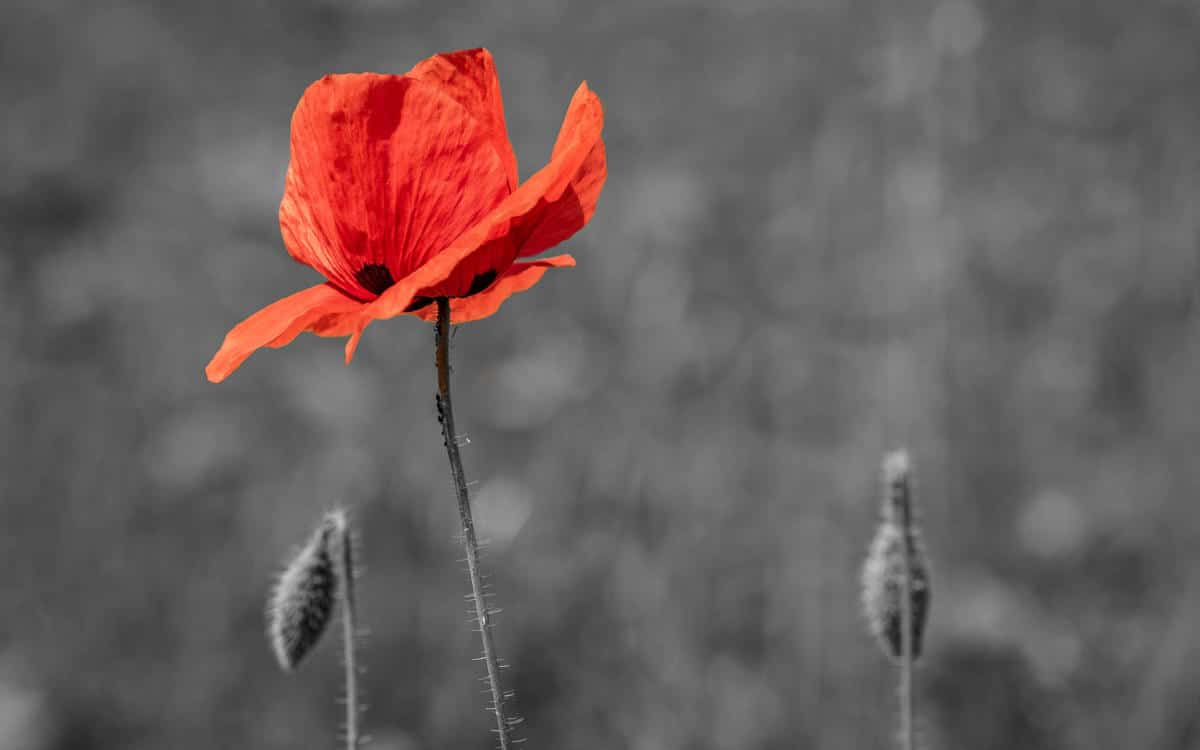
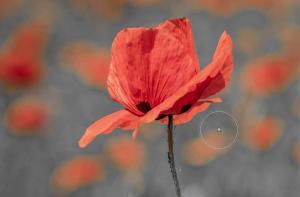
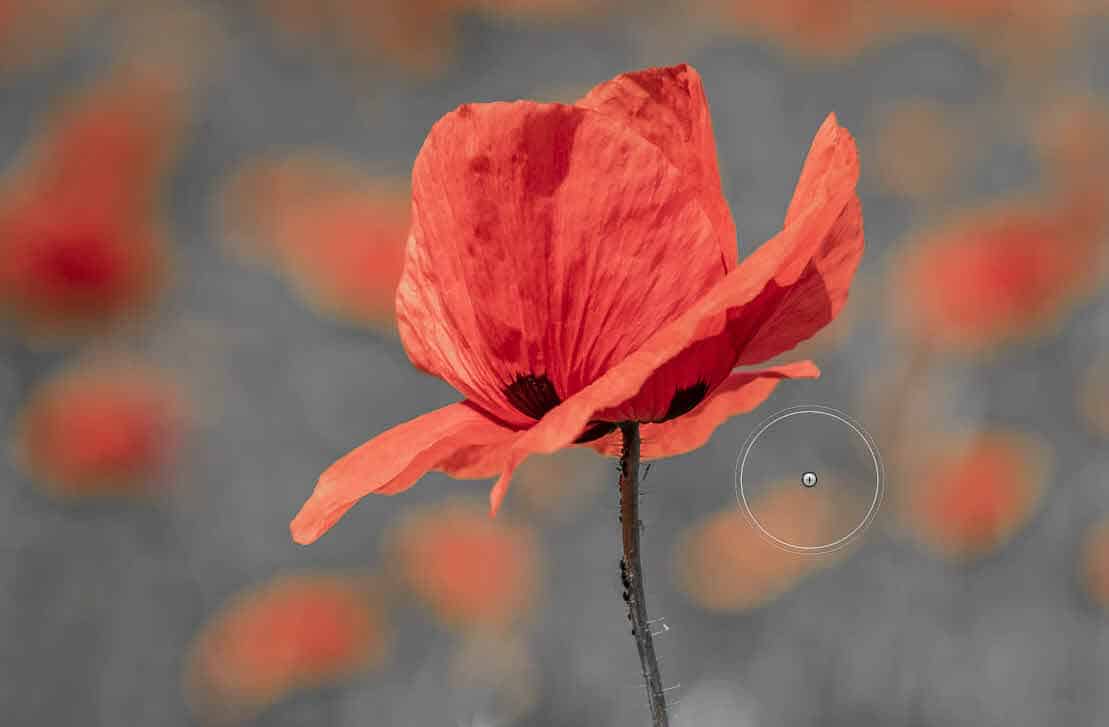
Selective colour is an effect where a photograph is converted to black and white, but one colour is left untouched by the black and white conversion. The image above is an example of the selective colour effect.
The effect was successfully used in Steven Spielberg’s film, Shindler’s List. In Shindler’s List, Spielberg shot the entire movie in black and white except for the little girl in the red coat. This selective colouring ensured the little girl stood out from the rest of the characters in the film. Towards the end of the film, Speilberg again used the red coat to identify the body of the little girl.
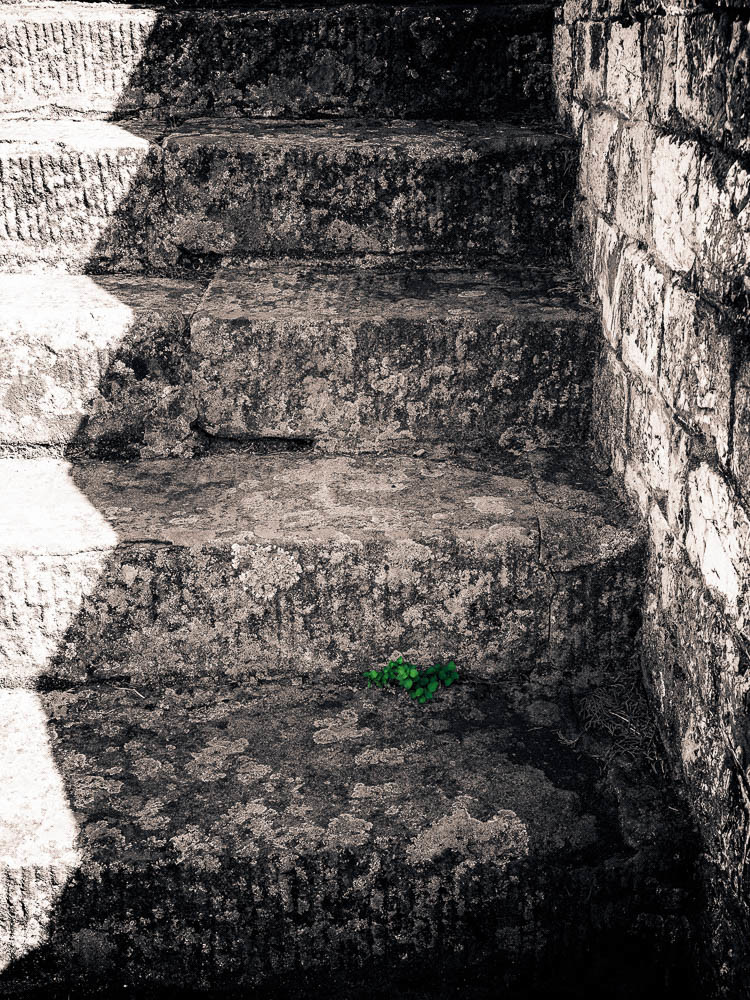
Using selective colour in a photograph is something that I have often seen being overdone. If the selective colour effect is used wisely and sparingly, it can enhance a photograph while drawing the viewer’s attention to a detail that may otherwise have been missed.
How to Create a Selective Colour Effect in Lightroom
I have seen a lot of photographers using Photoshop and individual plugins to achieve the selective colour effect. I believe Photoshop will produce a more accurate result than Lightroom, but the effect can be created successfully using Lightroom alone. Let me show you how:
- Open your image in the Develop module;
- Edit the full-colour image as you normally would;
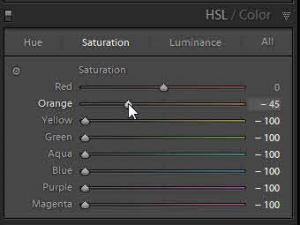
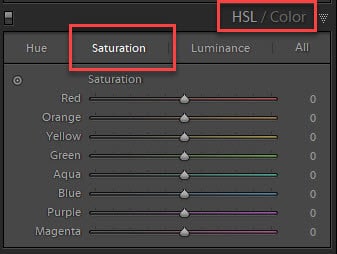
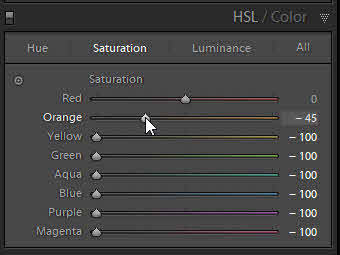
- Now, open the HSL panel and click on the Saturation tab;
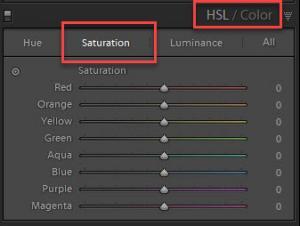
- Drag all the sliders to the left, except for the colour you want to retain. In the poppy image above, I left the Red slider at 0 and partially reduced the Orange slider;
- These settings will leave your selected colour visible throughout the image. If this is the effect you are wanting, then you’re done. But, if you want the colour to be visible only on a particular portion of the image, then select the Brush tool from the toolbar or press the K key;
- You are going to use the Brush tool to remove the colour from the areas you don’t want it. In the settings panel for the Brush tool, drag the Saturation slider all the way to -100 and leave all other settings untouched;
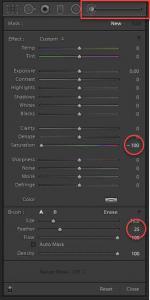
- Using a hard-edged brush, paint over the colour areas to remove the saturation. When you come to the area of the image with the colour you want to keep, paint carefully around the edge. This is where the hard-edged brush will help. You can change the size of your brush using the square bracket keys; use [ to reduce the brush size and ] to increase the brush size.
TIP – if you accidentally paint into areas of the colour you didn’t want to, holding the ALT key will temporarily change the brush to an eraser. Or, you can select Erase at the bottom of the Brush tool settings panel. The eraser will allow you to paint back an area you overpainted.

Conclusion
If this is an effect that you wish to try out on some of your images then maybe using this technique inside Adobe Lightroom will save you some time. Being able to create the selective colour effect in Lightroom will save you the time and effort of taking the image into Photoshop, or some other plugins.
It is an effect that can very easily be overdone, but it can also add a lot of interest to a photograph. Whatever your opinion on the effect, give this technique a try and, as always, let me know your thoughts below.


Great post thanks