
I would say every single digital camera is capable of black and white photography in camera. Well, maybe with one exception.
The question I get asked a lot regarding black and white photography is, should I shoot in black and white in the camera or should I shoot in colour and convert to black and white in post-production? My answer is always the same – shoot in colour and convert to black and white in post-production. Here’s why.
In-Camera Technology
I’m not going to bore you too much with the technical side of how a digital camera works, but it is worthwhile me pointing out that whenever you take a photograph with a digital camera, it always records a colour image. This is true regardless of the settings you are shooting with. Even if you have the camera set to black and white, it will always take a colour image first before converting it to black and white using the settings you have dialled in. This is true for all cameras unless you are using the Leica M-Monochrome. That’s the one exception I alluded to earlier. So, even if you have your camera set to shoot in black and white, pressing the shutter button still produces a colour image, even if it is only for a fraction of a second.
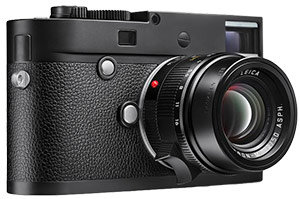
LEICA-M-MONOCHROM
It is what happens after this fraction of a second that persuades me to always answer the question in the same way when asked about shooting black and white photography. You see, once the camera has recorded the colour image and converted it to black and white using all of your chosen settings, it throws away all the extra information. Once the information is gone, it’s gone forever!
Now I don’t know about you, but after spending a lot of money on a camera, I just don’t see the point in not getting the best from it. I don’t like the idea of the camera simply throwing away information. Therefore, I always shoot in colour and convert to black and white in post. In fact, I always shoot in raw and convert it later, but that is another discussion completely.
A Good Trick for Black and White Shooting
Did you know that when you shoot in raw and view the image on the camera’s screen, you are only seeing a small JPEG preview image? The JPEG preview is compiled using the JPEG settings you have dialled in, regardless of whether or not you are shooting in JPEG mode. So, you can dial in the JPEG setting you would use if you were intending to shoot in black and white and shoot in raw instead. Now your camera will show you a preview of the black and white image while actually recording a raw image for you to edit in post-production. This way, you get the best of both worlds. You can train yourself to “see in black and white”, get an instant preview of how it will look but still retain all the information that your expensive camera can record.
The exact way this is achieved will vary between camera makes and models. However, if you look into your camera’s menu, you should be able to set the mode to raw and set the picture effects (sometimes referred to as “picture profiles”) to black and white. This will record a raw image while displaying a black and white preview on your camera’s screen. If you have a mirrorless camera, you have the added benefit of being able to see a black and white image in the viewfinder as you are framing the shot.
How cool is this trick?
Convenience
Of course, there is the downside that this approach does mean that you are going to spend more time in post production and less time taking pictures. So is it worth it? Yes! At least I think so.
Most post production software packages can convert your raw image to black and white in a single click. Most will even allow you to select multiple images and convert them all at once with the same single click. Plus, and this is a big plus, you can also create multiple recipes of black and white photographs from the one original raw image.
For example, you can create soft contrast, high contrast, sepia tone, selenium tone, add clarity, add sharpness or remove clarity and sharpness. You can create as many different varieties of the same image as you wish and you can create different conversions for individual photographs from a single shoot. All this choice is severely limited if you shoot the image as black and white in the camera.


Conclusion
When deciding on how to shoot black and white photography, my advice is always to shoot in raw and convert to black and white afterwards. In this way, you have more choice and you will always produce an image with the maximum amount of quality that your camera can produce.
The argument about the extra time spent having to post process the images is not really valid with today’s software. Once click is all it takes to convert to black and white. Adobe Lightroom even allows the option of using presets to get a prescribed look and feel to your black and white photographs with a single click. You can even buy our hand-crafted presets here. Hint hint!
So, shoot in raw and convert to black and white.


This was my impression. I think that shooting in camera drops some elements which Lightroom makes use of. Is this true when shooting in RA
Colin,
You are correct. Shooting in Raw ensured you will have all the information that your camera is capable of recording. This extra information allows you more lattitude in post production.