
The crop tool inside Adobe Lightroom is far more useful than many may think. In addition to the obvious function, like cropping an image, the crop tool can also be used to straighten images.
We have all taken images that are slightly crooked when we look at them back on the computer. Now, don’t say you haven’t because you just have. Lightroom’s crop tool is perfect for quickly and accurately straightening those “slightly” crooked images. Let’s open a “slightly” crooked image and look at a couple of ways to straighten it up.
Putting The Crop Tool to Work
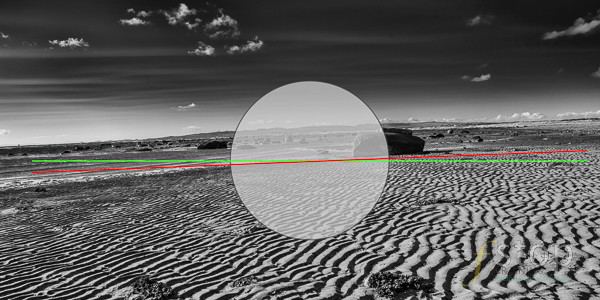
In this image of an electricity pylon and plane, we can see that the pylon leans “slightly” to the right. Sometimes it can be difficult to tell whether or not an image is crooked, especially when you have converging lines. The pylon image below does have verticals that converge but the centre supports of the pylon should be vertical. So let’s fix this with the crop tool.

“Slightly” Crooked Image
- Navigate to the Develop module by clicking on Develop or by pressing the D key;
- Open the crop tool dialogue by clicking on the Crop tool icon or pressing R;
- Select the spirit level and drag along a line in the image that should be either verticle or horizontal, or;
- Click and drag outside one of the corner handles to rotate the image and adjust by eye, or;
- Quick Tip – hold the Ctrl key (Windows) cmd key (MacOS) while you drag. This will change the icon to the spirit level tool and now you can simply drag along a line as per step 3 above. Cool!
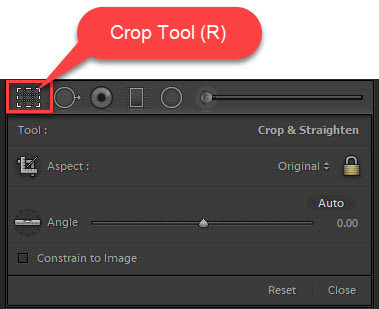
Crop Tool icon
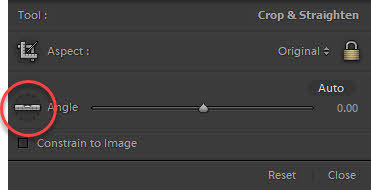
Spirit Level tool

Drag a Vertical Line

Corner Handles

Spirit Level
Conclusion
This is a short and quick tip for the crop tool that will leave you without any excuses for those “slightly” crooked images that you never take in the first place.
As always, let us know what you think.


Leave A Comment