
The targeted adjustment tool inside Adobe Lightroom is often missed, but once you know about, you’ll love it. The tool allows you to make adjustments to your image by clicking and dragging directly on the area you want to adjust. The tool is found in the Tone Curve, the HSL/Color and the B & W panels.
To use the Targeted Adjustment Tool to make adjustments to your image:
- Open the panel you want to use to make the adjustments;
- Click on the Targeted Adjustment Tool icon;
- Move your mouse to the area of the image that you want to adjust, then drag up or down to adjust.
The Targeted Adjustment Tool will select areas of the image with the same colour and tone. When you drag up and down, your adjustments are applied to all areas within the image that fall within the selected colour range. In the image of Venice below, I want to lighten the blue tarpaulins on the gondolas.
Using the Targeted Adjustment Tool with the HSL panel
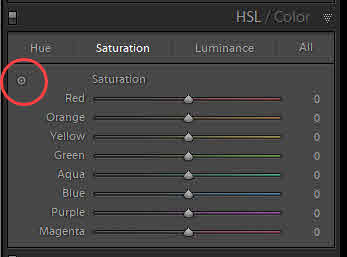
Targeted Adjustment Tool – HSL Panel
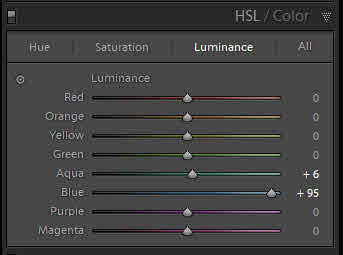
- Open the HSL panel and select Luminance;
- Click on the Targeted Adjustment Tool;
- With the Targeted Adjustment Tool active, click on an area of the tarpaulins and drag upwards to lighten those colours in the image. If I were to drag downwards, the colours would darken throughout the image;
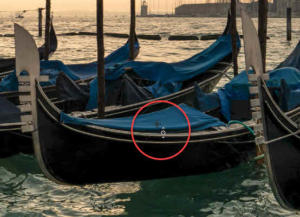
- As I drag, the Blue and Aqua sliders move to the right, and the tarpaulins lighten. It should be noted that all similar colours throughout the image will also be brightened. These adjustments are global.
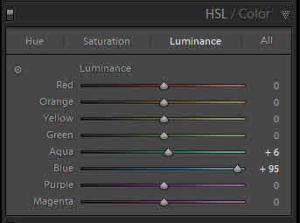

I could have achieved the same effect by dragging the Blue and Aqua sliders myself, but it is simpler and more accurate to use the Targeted Adjustment Tool. I would not be able to judge the ratio of Blue to Aqua as accurately as the Targeted Adjustment Tool can. Now let’s see how to use the Targeted Adjustment Tool with the Tone Curve panel.
Using the Targeted Adjustment Tool with the Tone Curve Panel
Targeted Adjustment Tool – Tone Curve
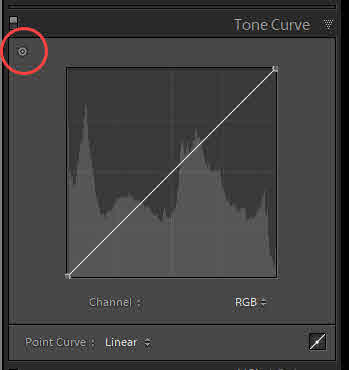
The method is similar to that used in the HSL/Color Panel. Open the Tone Curve Panel and click on the Targeted Adjustment Tool icon:
- With the Targeted Adjustment Tool active, click on an area of the image and drag up to lighten and drag down to darken. This time, areas of the image with a similar tone will be adjusted, and a control point is added to the tone curve;
- Again, this is a global adjustment, but you do have limited control over which colours are affected;
- Click on the RGB drop-down menu underneath the tone curve and choose which of the three primary colours you would like to adjust;
- Dragging up and down on the image with the Targeted Adjustment Tool will affect only the tonal region of the primary colour you have chosen. For example, if you target a bright area of the image and you have chosen Red from the drop-down list, bright areas of the images will have more or less red tone added as you drag up or down.
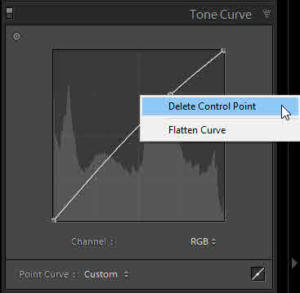
To remove a control point from the Tone Curve:
- Right-click to Control Point;
- Select Delete Control Point.

Using the Targeted Adjustment Tool with the B&W Panel
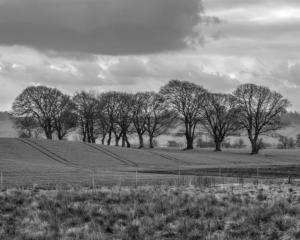
The Targeted Adjustment Tool becomes invaluable in processing black and white images. When you convert your image to black and white in Lightroom, the colour information still exists, even if it’s not visible. Lightroom uses this underlying colour information to allow you to make tonal adjustments to you black and white composition. Being able to adjust the underlying colours means you can darken a sky in an image. In the image below, I want to darken the blue clouds, lighten the green grass and darken the orange tones of the foreground.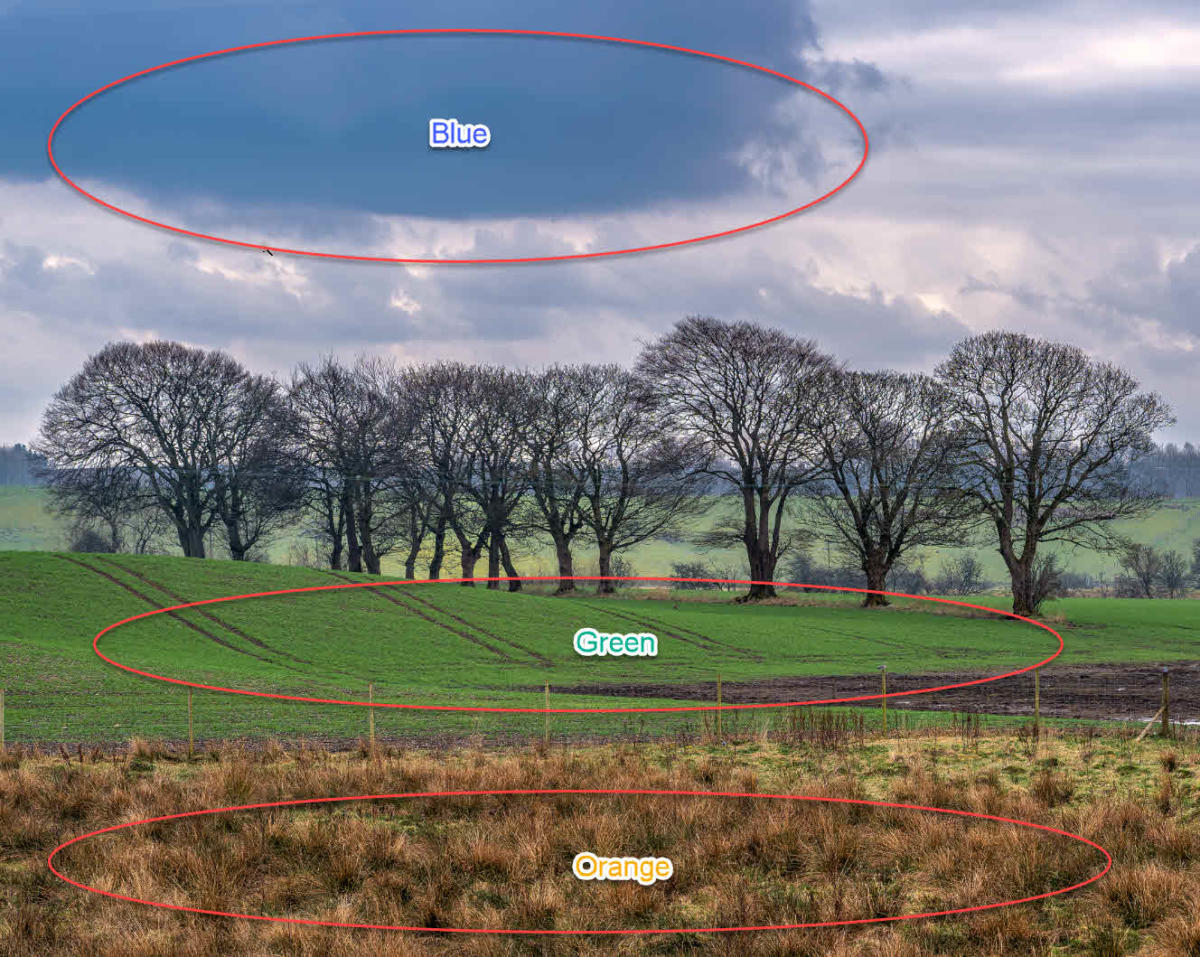
- Convert the image to black and white by clicking on Black & White in the Basic Panel (or press the V key). With older versions of Lightroom, the B&W setting is located in the HSL/Color panel;
- Open the B&W Panel;
- Click on the Targeted Adjustment Tool icon;
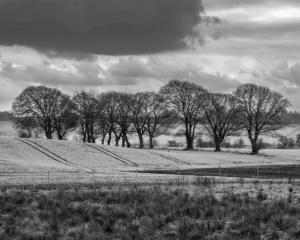
- Click on the cloud at the top of the image and drag down to darken the blue tones in the image;
- Click on the grass in the middle of the image and drag up to lighten the green tones;
- Click on the grass in the foreground and drag down to darken the orange tones in the image.
With a few strokes, I have created a more dynamic black and white image.
Conclusion
The Targeted Adjustment Tool is one of those hidden gems in Lightroom. Give it a try on your images, and I am sure you’ll be amazed how easily and accurately you can make tonal and colour adjustments to your images.
Please comment below and ask questions.


Leave A Comment