

Here is another quick tool tip that will show you how to straighten the horizon in Photoshop CC. Let’s be honest, we have all taken a photograph were the horizon has been slightly tilted. If the image in question feature a lot of rolling or mountainous terrain, you may get away with a slight slope to the horizon but it becomes very noticeable when the horizon is a water line. So I’ve picked the image below to demonstrate how easy it is to straighten the horizon in Photoshop.
This shot was taken from the banks of Lake Garda in northern Italy and you can clearly see that the left hand edge of the water is higher than the right hand edge. It needs to be straightened.
Step 1:
Select the crop tool and a new tool bar will appear at the top of the work area.

Step 1
Step 2:
Click on the spirit level icon and your cursor will change to a small cross hair.
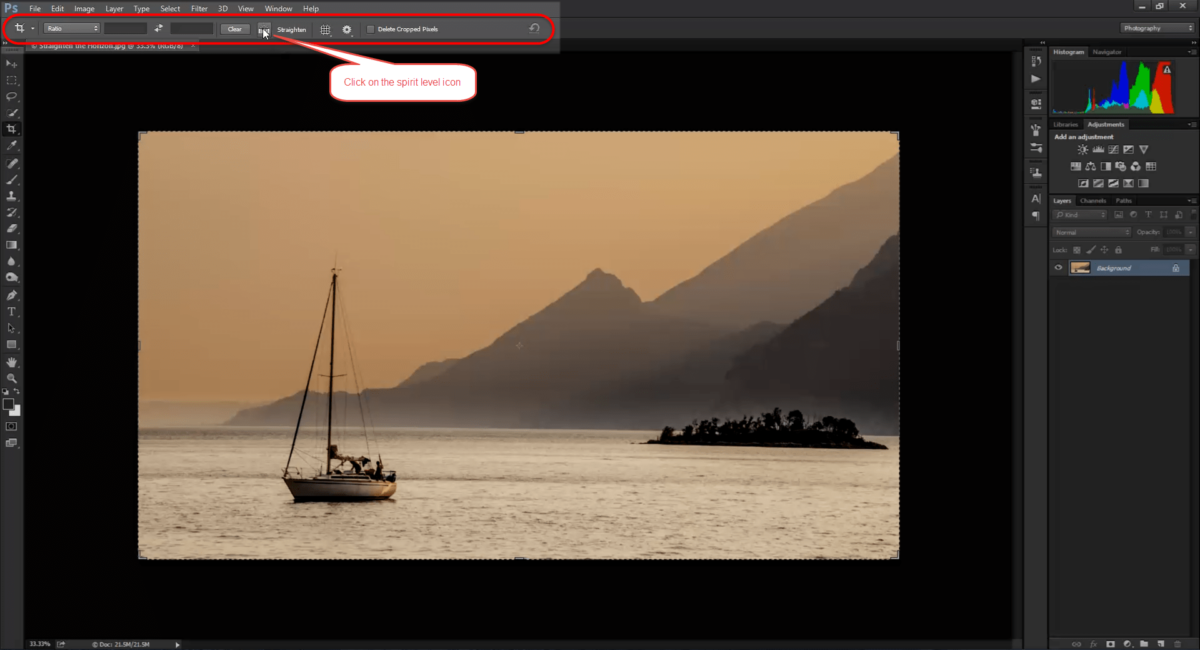
Step 2
Step 3:
Click on one edge of the line you believe should be level with the left mouse button. While still holding the left mouse button, drag to the far end of the line that you want to straighten. Once you have lined up correctly with this far end of the horizon, release the left mouse button.
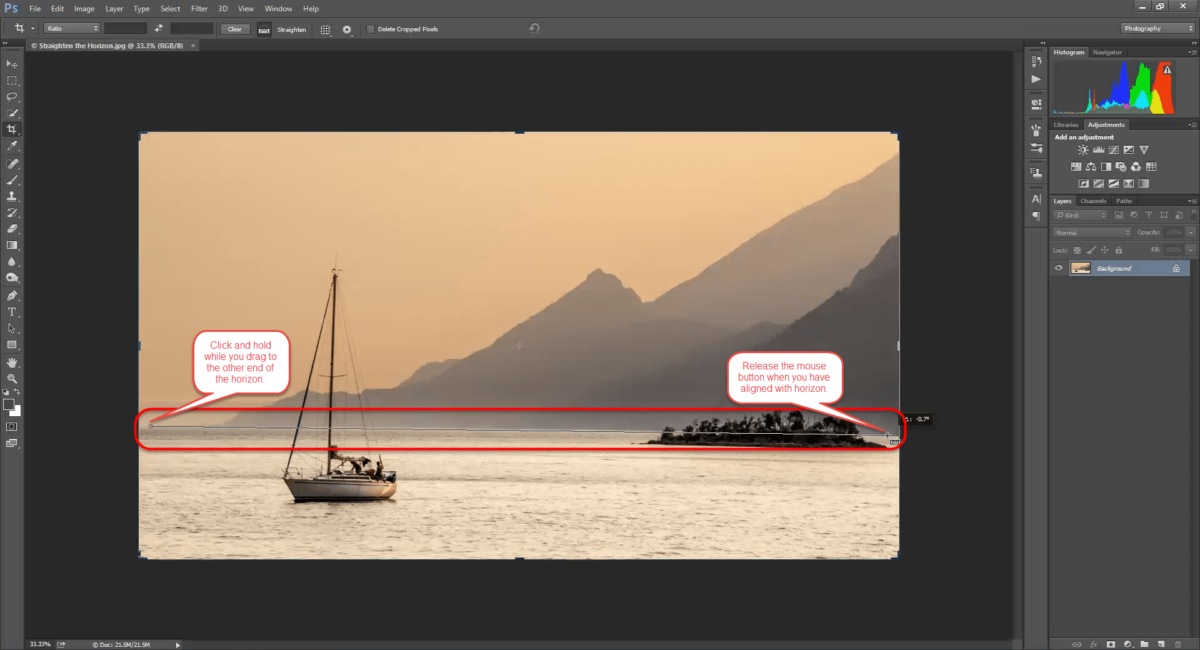
Step 3
Step 4:
Photoshop will calculate the required angle of rotation and automatically rotate the image and suggest a crop for you. To avoid automatic cropping and rotation, hold down Alt (Windows) or Option (Mac OS) as you drag.
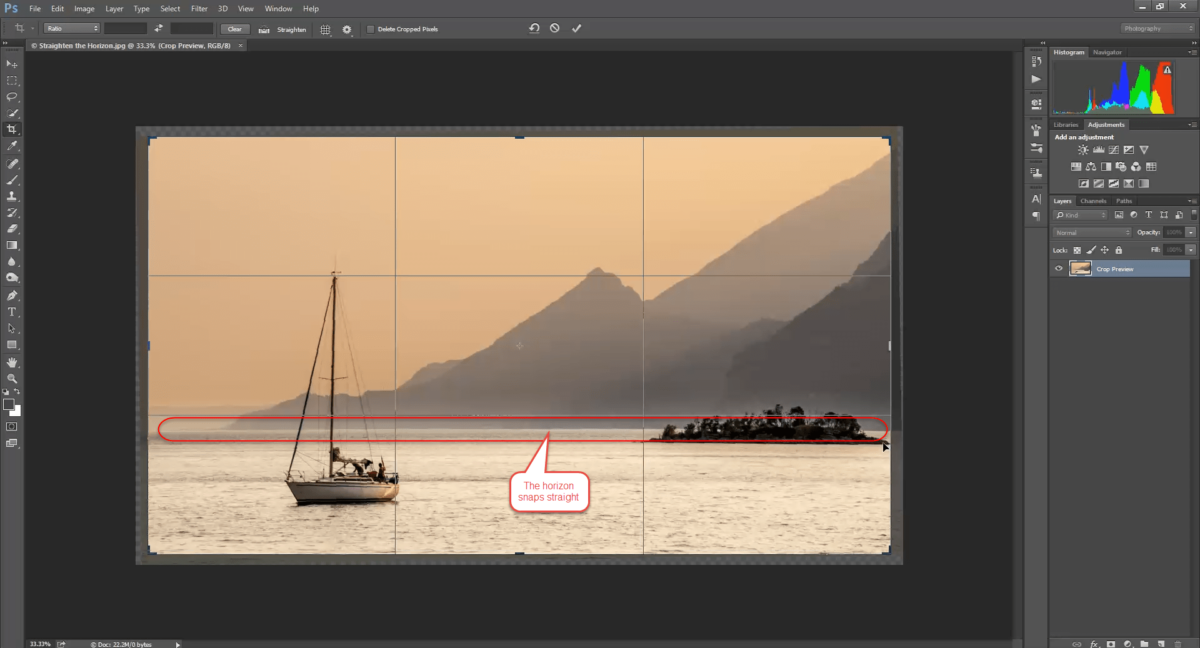
Step 4
Step 5:
You can manually teak the automatic adjustments by clicking inside the crop area and dragging into position. If you require a more delicate movement of the cropped area, you can nudge it with the arrow keys on your keyboard. Each tap of the arrow keys will nudge the image a small amount but if you hold down the Shift key while using the arrow keys it will nudge by a greater amount. The exact amounts are determined in the Preferences menu.
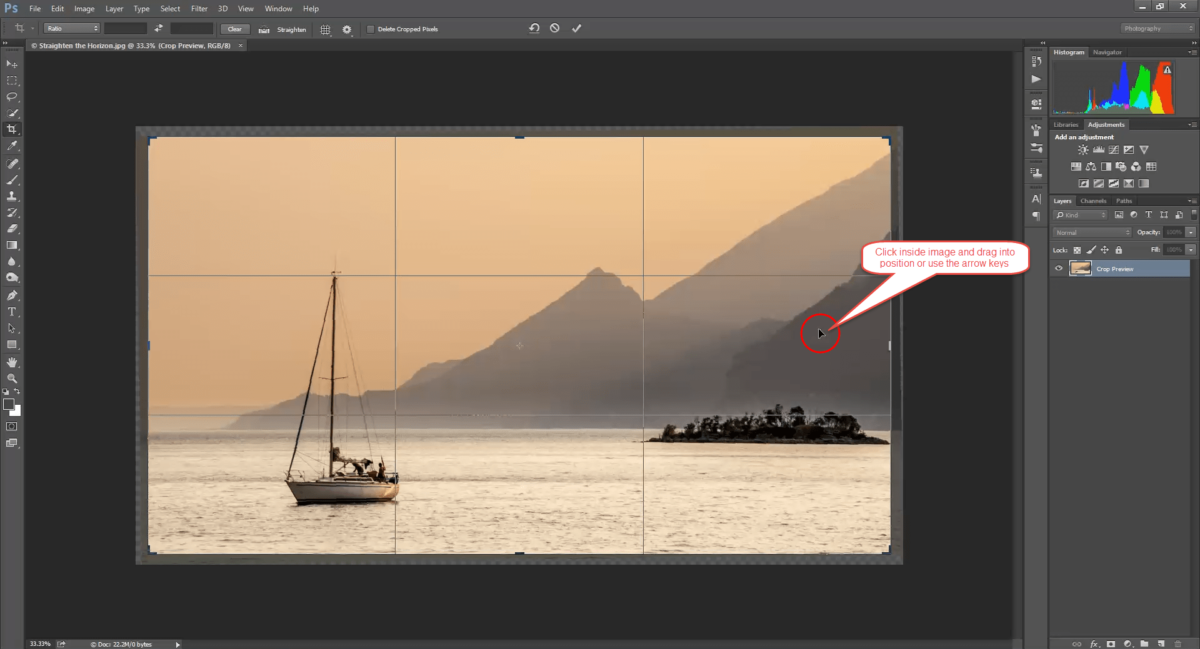
Step 5
Step 6:
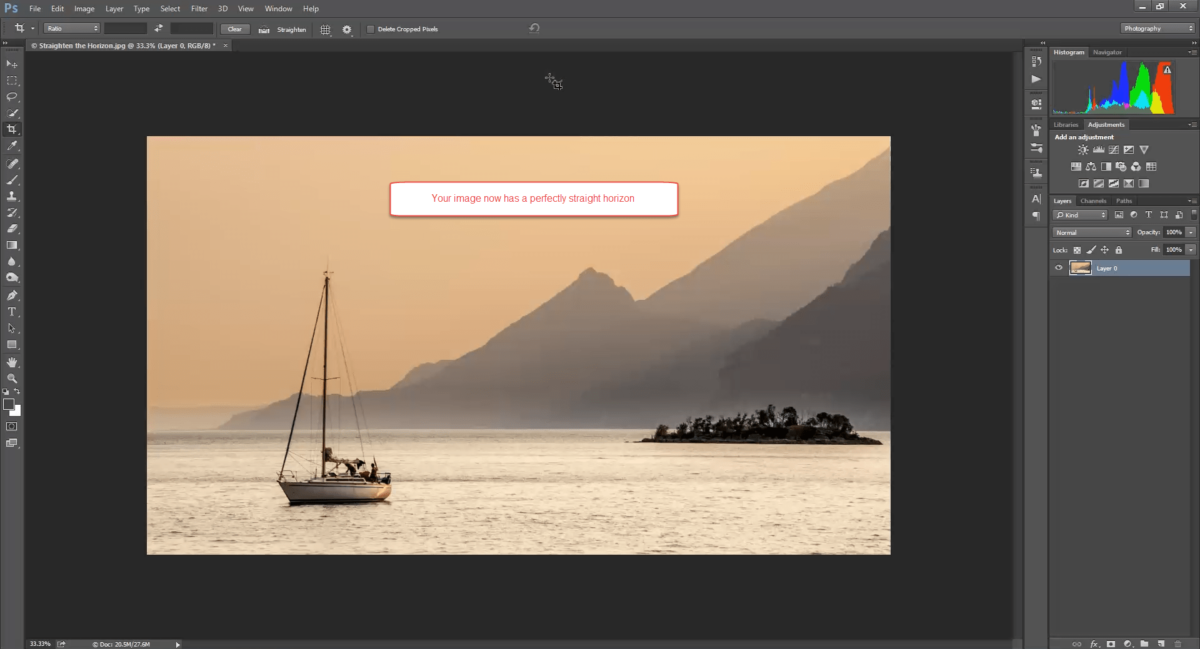
Once you have the image as you want it, click on the tick to accept the changes. You now have an image with a perfectly aligned horizon.
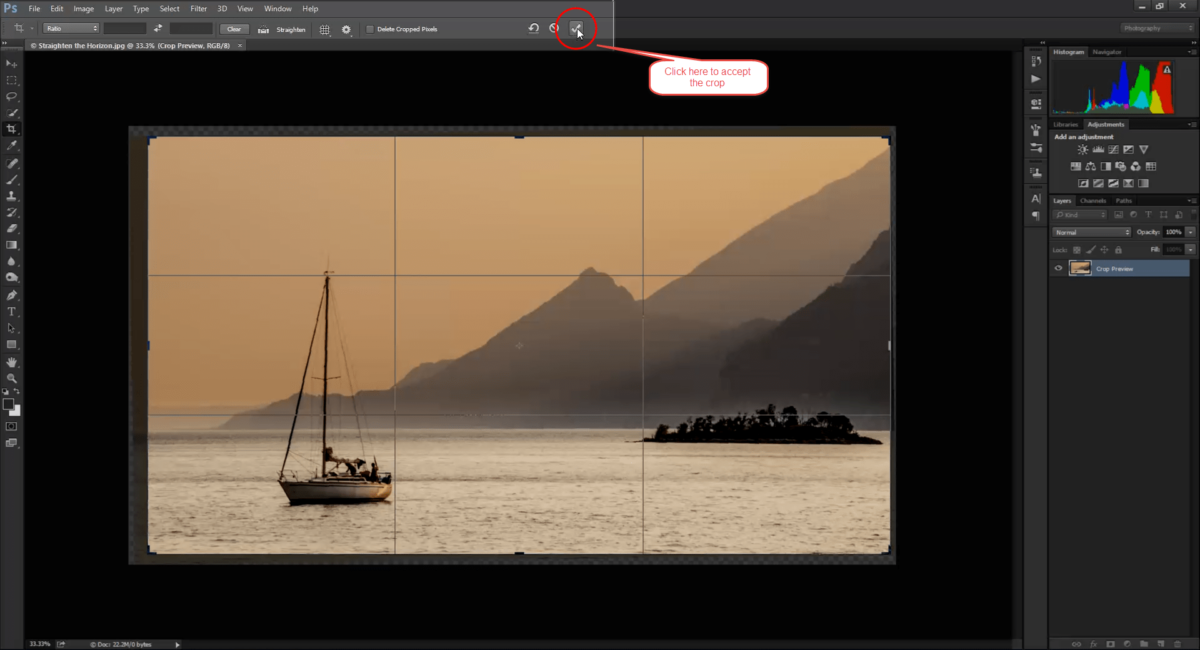
Step 6
Step 6
This exact same technique can be used to straighten a vertical line that is a bit off in your image. This is a quick and simple way to straighten the horizon in Photoshop and I’m sure I’m not the only person who has crooked images. Give it a try and let me know your thoughts.


Leave A Comment