
There are many guides and discussions about night time photography. Most of them are concerned with photographing the night sky, which is never an easy task. For one thing, it is essential that you take yourself out to the countryside away from all sources of light pollution. Depending on where you live this can be extremely difficult, if not impossible. It also relies upon having a cloud free sky which is a rarity over Britain. But there is another type of night time photography that you can try; photographing the bright lights of our towns and cities. Rather than trying to avoid them, embrace them.
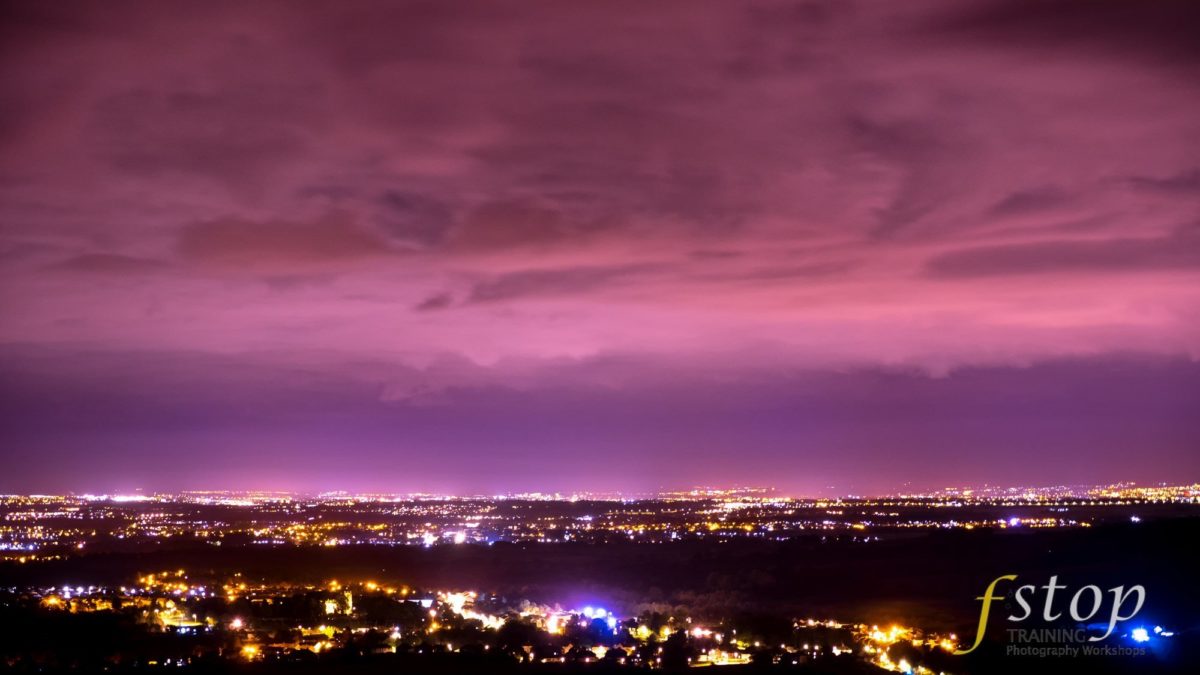
In the image above, I drove to an elevated position just north of Glasgow and deliberately pointed my camera back towards the lights of the city. I found a (semi) safe spot on the side of the road and set up my tripod. A sturdy tripod is always going to be an essential piece of kit for successful night time photography. Another essential piece of kit is a torch or a mobile phone with a good torch facility. I can assure you that trying to see in the dark to walk, place your tripod, orientate your camera to fit it onto the tripod and seeing the buttons on the camera is not a simple job at 12:30am with a cold wind blowing and I have no doubt that without my iPhone torch I would have tripped, dropped my camera and sworn once or twice. So take a torch!
Once you have your spot, and have remembered your tripod and torch, how do you actually set up for night time photography? There are lots of things to consider and pay special attention to:
- Shutter speed;
- Motion blur;
- Image stabilisation;
- Aperture;
- White balance;
- Focusing and
- Noise.
This list is not exhaustive and it can appear a bit daunting but there is nothing actually different or new about how you set up your camera for night time photography. Provided you have a good understanding of exposure settings, you can comfortably head out and try night time photography. You do need to bear in mind, that there will be trade-offs with the exposure settings that will have a bearing on image quality. When photographing at night, your margin for error is much smaller than it would be during daylight conditions. Let’s discuss some of these trade-offs.
The Camera Sensor
When shooting in low light conditions it may be necessary to increase the ISO setting on your camera. As you do this, the amount of noise created in the final image will increase. Your camera’s sensor is a digital semi-conductor that uses an electrical current to record the information. As you increase the ISO, the camera will amplify the information coming from the sensor before it is recorded onto the memory card. It is this signal amplification that results in noise on the final image. Ah but, I hear you say, if the camera is securely mounted onto a tripod, there is no need to raise the ISO to achieve a fast shutter speed. After all, there won’t be camera shake if the camera is on a tripod. True, but a low ISO will require a slow shutter speed and having the shutter open for a long time results in the sensor heating up. As the sensor heats, it produces noise. This is what I meant by trade-off.
Shutter Speed
With all night time photography you are going to need to set a longer shutter speed. This will ensure that enough light comes into the camera and is recorded by the sensor. There are a couple of considerations with long shutter speeds; motion blur and blur from camera shake. Motion blur results when objects pass through your frame, such as cars, aeroplanes, people or clouds and camera shake is a result of the camera moving during the exposure. Motion blur is not always a bad thing and can more often than not contribute to a pleasing image. However, camera shake is rarely going to be good and will always result in an image that is blurred. Camera shake can happen during hand held shots, even with image stabilisation, and it can also occur as a result of the shutter and mirror moving inside your camera as the photograph is taken, even when mounted on a sturdy tripod. The way to avoid camera shake is to always use a tripod, use a cable release (or self-timer) to activate the shutter and use mirror lock if your camera has this feature. Needless to say, this “mirror slap” problem is not a consideration if you own one of the modern mirrorless cameras.
Aperture
The rules for aperture and depth of field remain the same during night time photography. Lenses will often be described in terms of their speed and this is a direct indication of their maximum aperture size. A fast lens will have a maximum aperture of anywhere between ƒ/2.8 and ƒ/1.2 and will allow more light to pass through. Obviously these fast lenses are more beneficial to night time photography than slower lenses. Unfortunately, fast lenses require a lot of high quality glass and precise manufacturing, which result in them being significantly more expensive. Another trade-off!
White Balance
The Blue Hour
Colour can be tricky and deceiving during night time photography. As the light level falls, our eyes start to lose the ability to perceive colour but your camera doesn’t. Additionally, the lights that illuminate our towns and cities at night have a variety of different colour casts but our eyes and brain will always attempt to make them look white or as near to white as possible. You camera doesn’t attempt to bend the colour to suit, it will simply record the light in its native colour. These two factors are the reason why photographs taken at night are often more saturated than we remember the scene and they are often thought of as having a strange colour cast. Certainly, the colour cast can be adjusted if you shoot in RAW but if you shoot in JPEG and leave your camera to select the white balance, it is inevitable that the final image will have a colour cast of some kind. In low light, our eyes will tend to favour the red side of the visible spectrum and we will see everything with an orange hue. A photograph of the same scene will reveal the blue that our eyes ignored and result in a slightly more magenta hue to the image. This is where shooting in RAW allows you to adjust the white balance to any setting you wish and fully pamper your creativity and ensure that you have more than just orange coloured night time photographs.
Conclusion

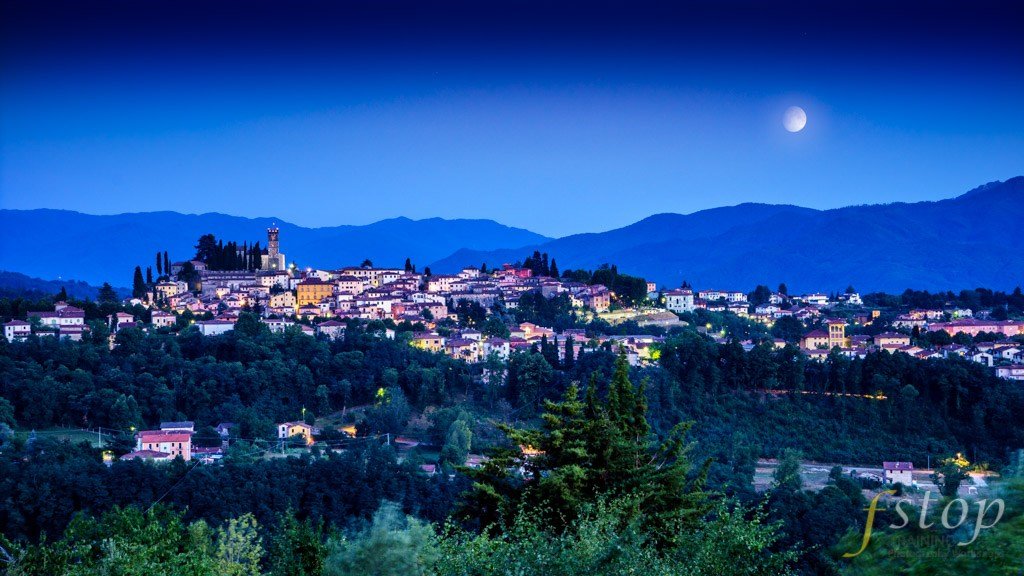
Tuscan Street in Low Light
Night time photography is not hugely different from daylight photography; it just forces you to take your time and think more about your camera settings. That’s never going to be a bad thing. Don’t just think of night time photography as photographing the stars and Milky Way, it is also photographing our towns and cities and the lights that define them. Trial and error is the way forward and with the winter nights approaching, you will have bags of time to try, fail and try again.
Do you have some examples of night time photography that you would like us to publish on this site? We offer the facility to produce a gallery of your images and post them on this site with your name watermarked on each image. Contact us if you’d like your own gallery to showcase your photographs, free of charge.


Leave A Comment