

Using the Gradient Tool in Lightroom
There has been a gradient tool in Lightroom for several years now and it may possibly be one of the most useful, but one of the most under used tools within Lightroom. In this tutorial, I am going to show you how to make more use of the gradient tool in Lightroom while demonstrating its versatility.
Lightroom’s gradient tool allows us to make a large selection across the full width or height of the image but with an imperceptible transition. Thus, we can make alterations to one area of an image and have the strength of that alteration diminish throughout the selected area. This way, it’s impossible to see a join. It works in the same way as a graduated filter you would place on the front of your lens while you are taking the photograph. But if you don’t own any graduated filters, Lightroom can help. Let me show you rather than describe it with words.
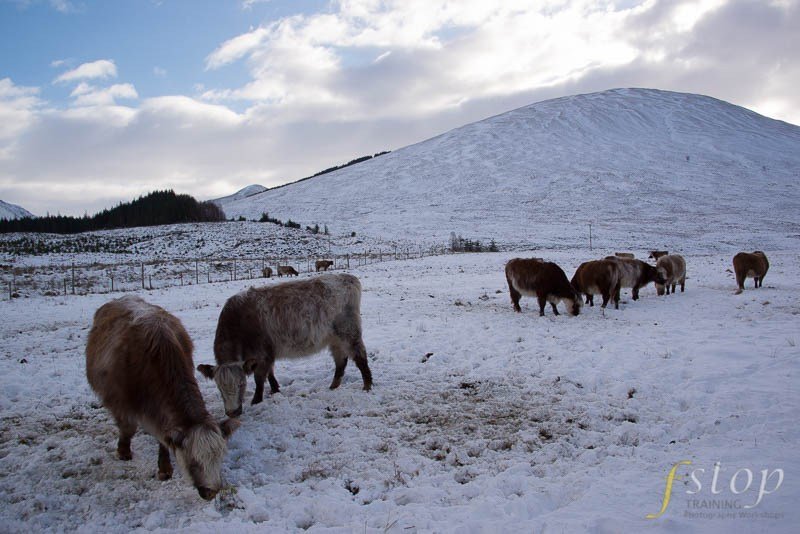
I have selected an image of highland cattle grazing in the snow. Any image with snow in it can present problems for exposure but for the purpose of this demonstration, I made the exposure even more challenging by shooting into the sun. So let’s walk through this and we will see how the gradient tool in Lightroom can be put to full use and produce an image with a balanced exposure.
Step 1:
After selecting the image you want, make sure you are inside the Develop module. You can get to the Develop module easily by tapping the “D” key on your keyboard or clicking on Develop towards the top of the screen.
Step 2:
We are going to darken the sky and have an invisible transition into the foreground of the image. Select the Gradient tool by clicking on the icon or tap the “M” key.

Step 2
Now position your curser over the area near to the horizon, which in this image is near to the top of the hill. Click with the left mouse button and drag down to a place on the image where you no longer want the effect to apply. In this image, where we don’t want the darkening effect to apply. Release the mouse button.

Step 2
The top line represents the start of the transition and the bottom line represents the end of the transition. Everything above the start line will have the effect applied at 100% and everything below the bottom line will have 0% of the effect applied. The area between the lines represents the area of transition. Therefore, the wider the gap the less obvious the transition will be.
Step 3:
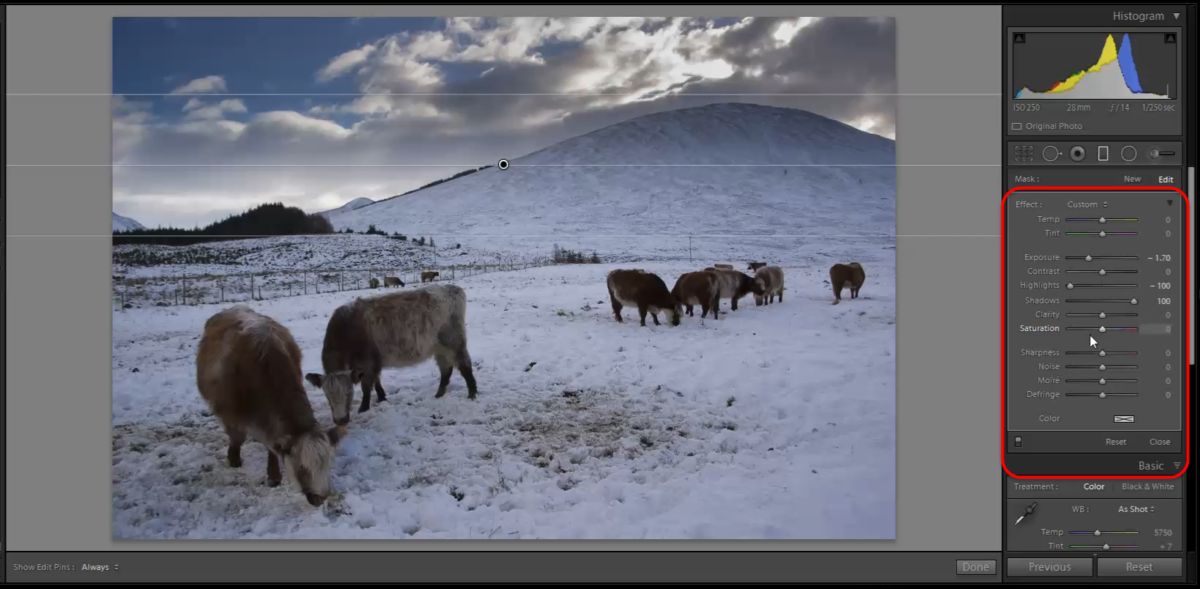
With the limits of the gradient set, we can now make our adjustments. You will have noticed on the right hand panel, we have a new group of control sliders. These are the sliders for the Gradient tool. We will adjust them to darken the sky.
Step 3
The exact settings to use will depend upon your image and there is no set of adjustments that will always be correct for every image. The screenshot shows my settings for this image but adjust yours to suit your image. As you move the sliders you will immediately see the effect being applied.
Step 4:
Another very useful feature of the gradient tool in Lightroom, is the ability to rotate the effect. In my image, the top of the hill has darkened on the right more than I would like and the sky to the left has not darkened enough. So let’s change that.

Step 4
As you move your mouse over the middle line, it will change to a double arrow symbol. Left click and hold while you move the line up or down and the gradient effect will rotate. Release the mouse button when you have it rotated to the correct angle.

Step 4
Once you have the adjustment as you want it, click on Done at the bottom right of the screen. This step is essential to ensure you exit from the Gradient tool.
Step 5:
In the last step we used the gradient tool in the traditional way, and in the way it was no doubt designed to be used. I am certain that Adobe included it in Lightroom as a way to emulate a neutral density gradient filter, or a ND Grad as they are more commonly known. Now, let’s have a look at the flip side of the coin.

Step 5
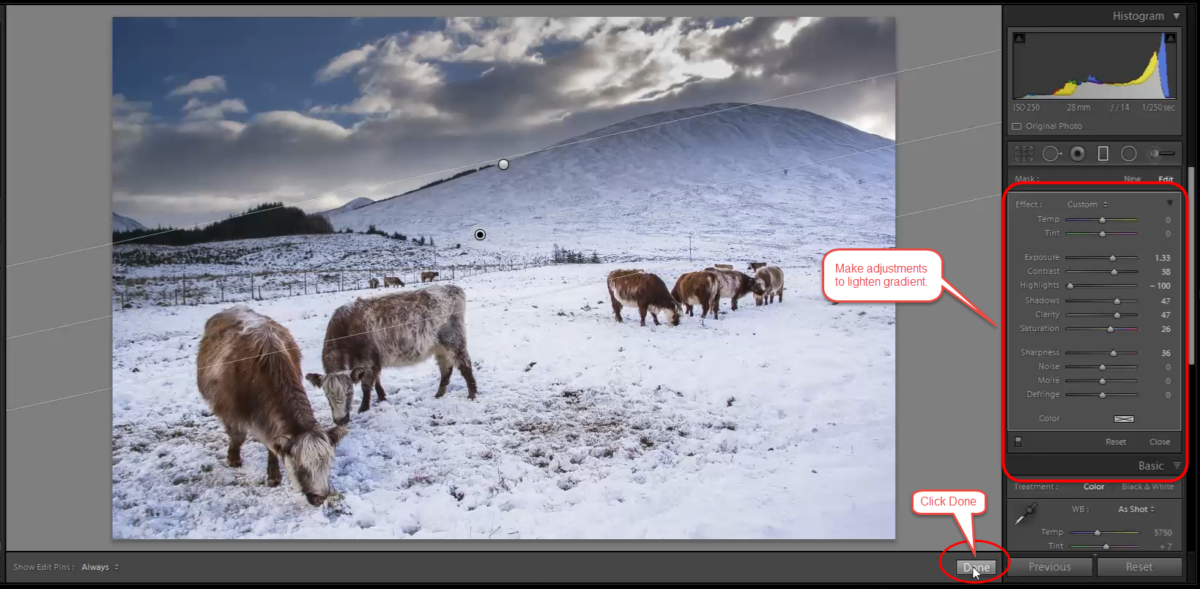
This is where the real versatility, and overlooked use, of the gradient tool comes in. We can also use it to lighten areas of an image. In this image let’s use it to lighten the foreground and produce a more balanced overall exposure.
Again select the gradient tool by clicking on the icon or by tapping the “M” key but this time we will drag up from our chosen start point. In this way the gradient tool works in the opposite way; the bottom line marks the boundary of 100% effect and the top line represents the area where 0% effect is reached. Now we can use the gradient tool sliders to lighten the foreground.
Step 5
You will have noticed by now that there are more than just exposure sliders for the gradient tool. There are sliders for temperature, tint, sharpness, clarity as well as a few others. I have used a few of these additional sliders to give a bit of pop to the foreground and I would encourage you to experiment with all of them in your image. The effect is applied in real time so you can see exactly what you’re getting.
TIP
Step 6:
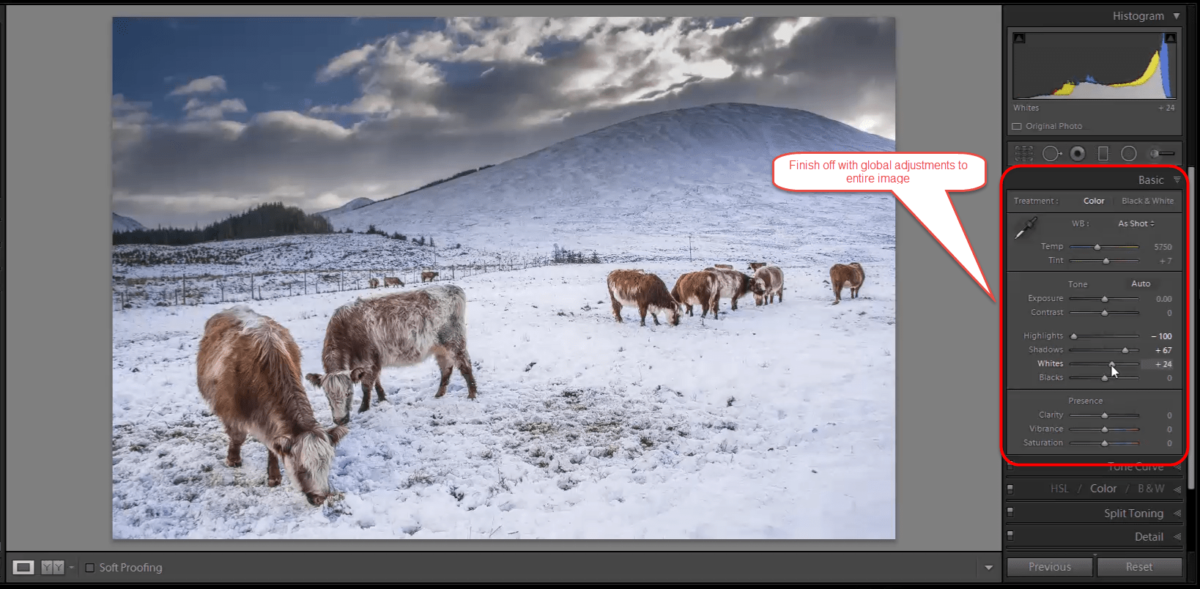
We now have two gradients on the image and have quickly and easily changed its overall exposure. Now we are free to make further global adjustments to the image if we wish.
Step 6
Conclusion
This technique is definitely not the only method for balancing the exposure across an image. It may not even be the best technique but it does illustrate the versatility of the gradient tool in Lightroom. It is probably under used and should be considered more often as a quick and easy method for making changes to a large number of images or as a credible replacement to a glass ND grad filter.
I encourage you to consider it more often and experiment with the other adjustment possibilities it offers, such as temperature, tint, sharpness, saturation, clarity etc.
Your thoughts
Do you use the gradient tool in Lightroom? Is it a tool you will use more of now? If you have any thoughts, hints & tips or ideas for the gradient tool in Lightroom, please comment below or contact us.


Leave A Comment