
This clip shows my Glen Etive time-lapse. This was the time-lapse that was shot using my GoPro camera when I was out for a day’s photography on Sunday 1 February 2015.
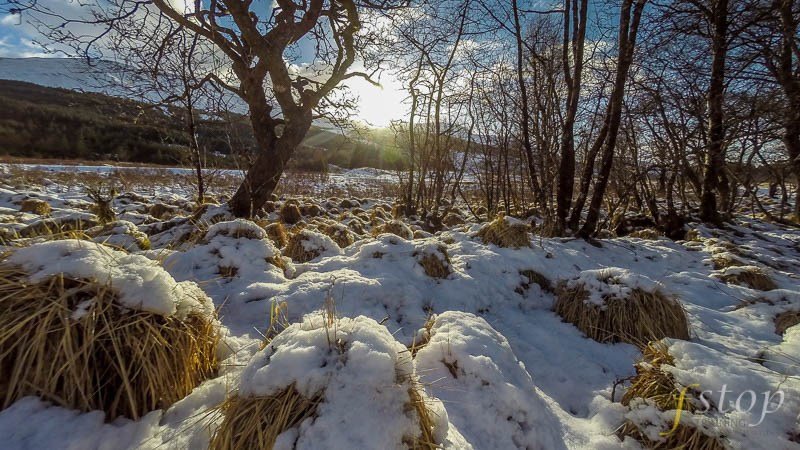
I was looking for a spot where I could set up the GoPro and know that it wouldn’t be seen, and more importantly stolen, because it was my intention to leave it in place for several hours. I also wanted to place it in a position where it was pointing south towards to sun and having it record the sun and clouds moving through the frame. To emphasise the movement of the sun, I also wanted to have thin trees in the foreground. This way, the shadows from the trees would also show as a right to left movement through the frame. After some treacherous driving on the ice road through Glen Etive, we found the perfect spot.
I put the GoPro on the Gorillapod tripod (or the Joby as I like to call it) and placed it behind the trees and pointing south into the sun. I set it up, using the iPhone app, to take a photograph every 30 seconds. The photographs were sized at 12 megapixels and I just left it to keep taking pictures until it either ran out of memory of battery. It was -3C so I knew it would be the battery than would give up before the 64GB card. My reasoning for the 30 second gap between exposures was there was only a slight breeze and the clouds didn’t appear to be moving quickly, if at all. I didn’t spend a lot of time thinking about the exact setting and time gaps for this time-lapse because we were keen to drive onto Rannoch Moor before we lost the good light that was now developing.
Once home I uploaded the 937 images into Adobe Lightroom to slightly adjust the light and crop them to a 16:9 ratio. This is the ratio most used by monitors, televisions and smartphones. In Lightroom I lowered the highlights and added a subtle neutral density grad (ND Grad) to the top of each image. However, there was 937 images to apply the same effect to! This is easy in Lightroom if you make use of the Auto Sync feature. I’ll post more information about this feature shortly.
Once all the images were adjusted and cropped, I exported them as full sized JPEGs into their own subfolder. Again a task made easy by Lightroom. From here, they were taken into Adobe After Effects to render them out as a video. There are several software packages that can render a sequence of images to a time-lapse but I prefer After Effects because of it’s superior frame blending capabilities. Again, I will produce an article about time-lapse in After Effects shortly. I chose the best 10 second clip and uploaded to our server for inclusion on this site.
The video below is the result of the time-lapse and I think the clouds are moving too fast, although this is a matter of personal taste. In my opinion, the video would have been nicer if the clouds were moving more slowly. I do still have the option to slow the video down but I wanted you to see it as shot. If I’d set the time interval between shots to be 10 seconds I think it would have been a better effect. I could also have achieved a nicer effect if I had used a DSLR to take the images because I could have used a neutral density filter to force a slower shutter speed. This would have caused a nice blurring of the clouds on each frame which when blended into a time-lapse looks more fluid. Problem was, I need my DSLR for the rest of the day.
What do you think? Would you like to know more about this process? Comment below.


I agree it would look better slowed down or 10 sec intervals, nice wee video though
Thanks Mick. And thanks for the support.