
Using the Adobe DNG Converter
This is a very useful tool if you do not own Lightroom. The Adobe DNG Converter is free and is very easy to use. It provides you with all the same options as described above. Heres how to use the Adobe DNG Converter:
- Download the Adobe DNG Converter by clicking on this link – <<Adobe DNG Converter Download>>
- Once downloaded and installed, run the programme;
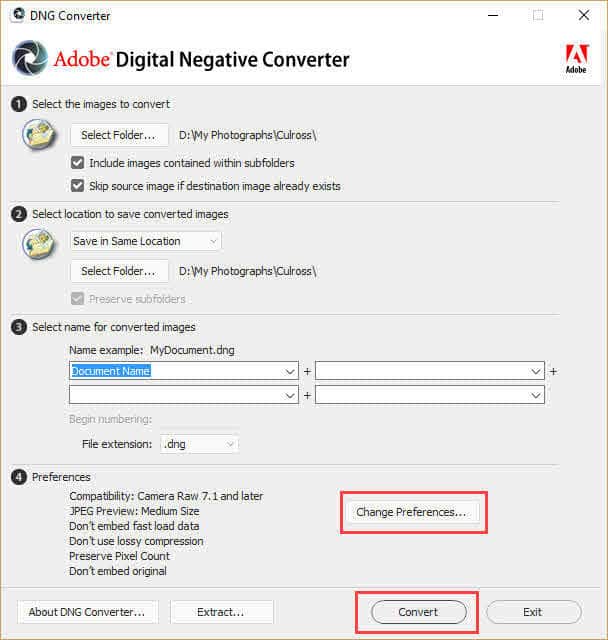
- You are now presented with the main interface. Work down from the top;
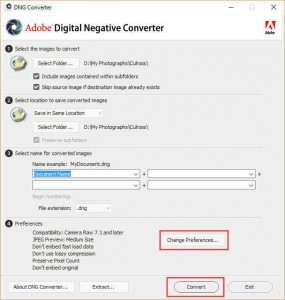
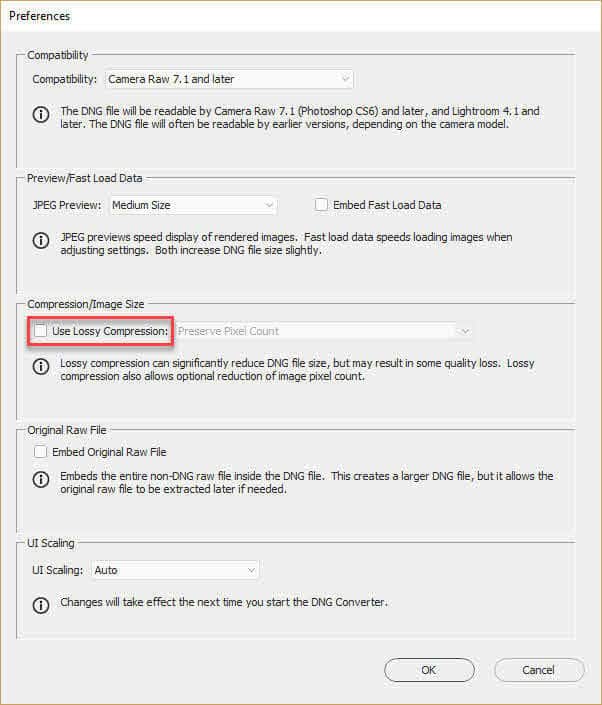
- Decide if you want to change the preferences. These are the same preferences that you find inside Lightroom’s Preferences panel. Normally, the defaults are fine but you may want to add compression if you are archiving your images.

- Click on Convert and make the coffee.
Conclusion
There is a lot of debate about whether or not you should convert Raw files to DNG. I have read a lot of the discussions online and spoken to other photographers and I decided to convert to DNG and take advantage of the benefits the format offers.
If you decide that you want to convert your Raw files to DNG or you want to give it a try with old Raw files first, then I would recommend using Lightroom if you own it. It makes it very easy to find the exact files that you want to convert. If not, the free Adobe DNG converter is also good but it will only convert an entire folder and does not allow you to select individual Raw files.
If you are convinced that DNG is the way forward, try converting to DNG as you import into Lightroom.
Feel free to comment below and let me know your thoughts.


Adobe’s lossy DNG compression reduces the bitdepth to 8 bits. That’s another reason quality suffers when using this option. I never use it.
There is another utility called Slimraw (see here: http://www.slimraw.com/) which is much faster than Adobe’s DNG converter and also has better lossless compression — it consistently produces smaller files. It is a DNG to DNG compressor, so I first convert the raw photos to DNG, then pass them through Slimraw. It also has an interesting 10-bit compression mode where the DNG pixels are transformed logarithmically before the lossless compression. This shaves off more of the size, without any observed quality loss when processing.
Dean,
Thanks for your reply. I will definitely give that a look. Thanks for the info.
Martin
Why do you need DNG files, when would you use them ?
Gordon,
There are a few advantages to DNG files over the manufacturers’ raw files. A DNG file is significantly smaller than the raw file from your camera. Not smaller in terms of dimension but smaller in terms of hard drive space. My Sony a7Rii files are about 80 MB in their native ARW raw format but when converted to DNG, they are about 43 MB. That adds up over several thousand files. Also, DNG files have the adjustments that you make stored inside the file. Raw files rely on a separate XMP file. This XMP file can be easily forgotten if you choose to move your images to another location or another drive. Losing the XMP file will mean that all your edits will be lost too. Plus, I find that the DNG files load quicker and are more responsive inside Lightroom.
Converting to DNG is not necessary nor is it even an advantage to everyone but I also want to reassure people that it is not going to be a disadvantage nor is it as scary as some of the internet stories suggest.
Have a read at this article I wrote a while back regarding the nature of DNG files and let me know what you think.
Ive got Lightroom 6 and I am still unable to Import, as the preview window says “Preview Unavailable for this File?”
Are the Raw files converted to DNG? It is these converted DNGs that you need to import.
I downloaded DNG converter but when I open my Lightroom 5 I cannot view NEF files anyway, like John Forshaw above I cannot preview the files
Did you convert the NEF files to DNG using the converter?
I converted thousands of raw files to dng but made the mistake of not checking the ‘Delete originals after successful conversion’ option. What’s the best way to remedy this and save space?
Rob,
Using Lightroom Classic, open the folders where your original Raw files are still stored. Sort the images in the folder by file type, select all the Raw files and delete them.
Martin.