
Often, we find ourselves wanting to add warmth to the highlights of an image. One preferred way of adding warmth to the highlights is to use the Photo Filter inside Photoshop. This is an acceptable method but it has the disadvantage of adding tint to the entire image. The method I describe below will show you how to be more selective and creative when adding warmth to the highlights of an image. This is a technique that is particularly effective as we move towards winter.
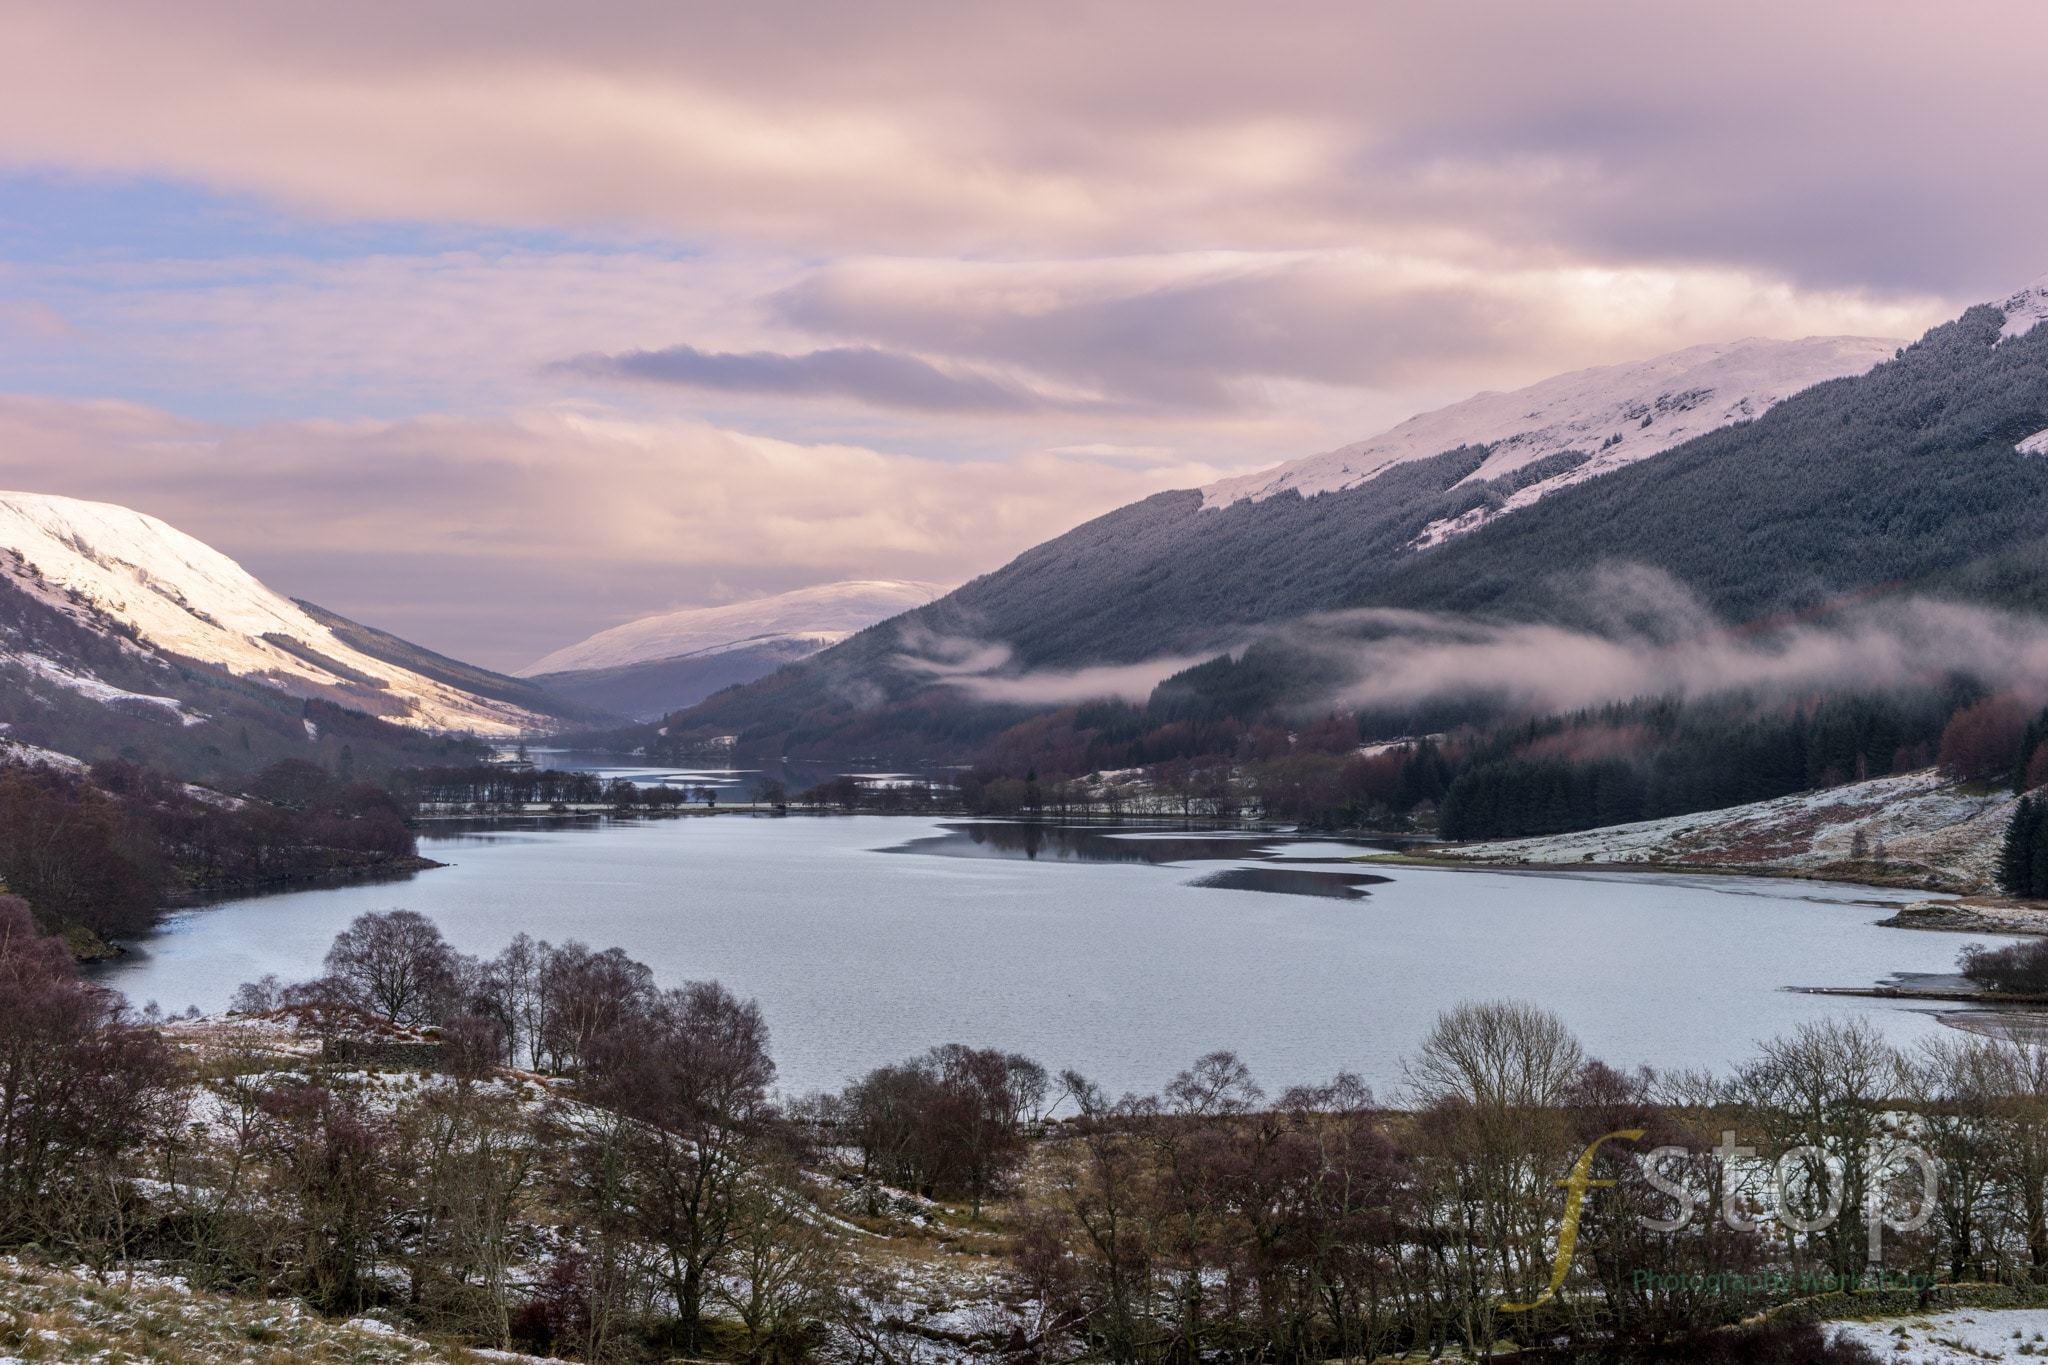
I’m going to use the image featured above to add warmth to the highlights of the clouds and the sunlit snow on the side of the mountains. This is an image overlooking Loch Voil in the Scottish Trossachs.
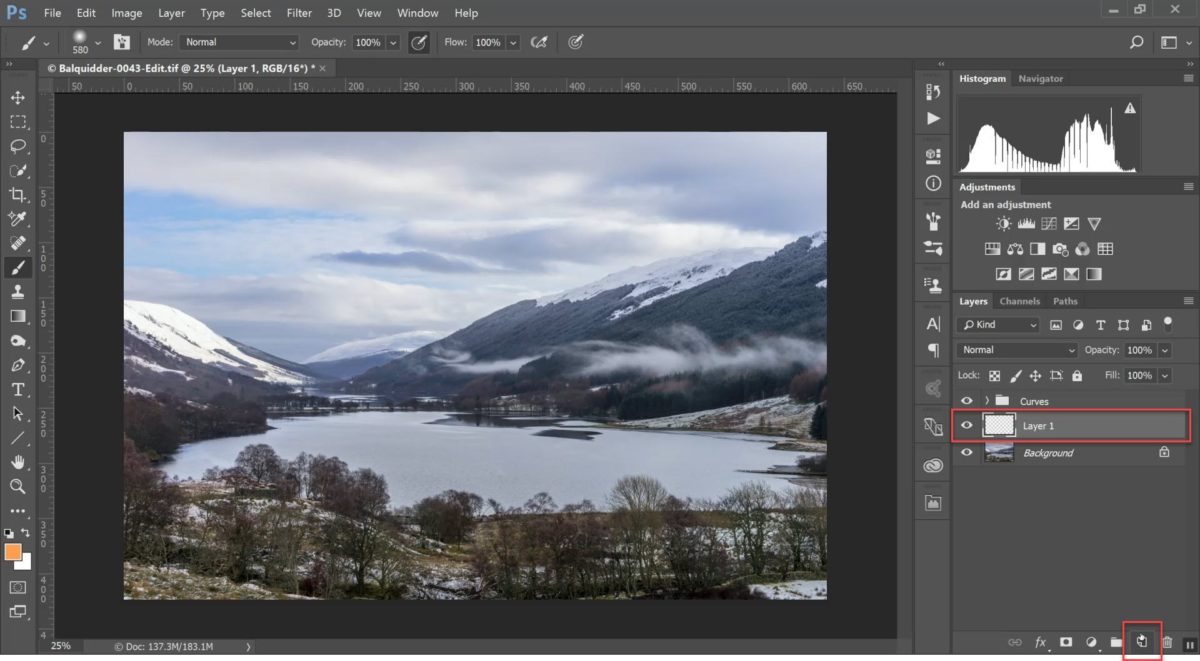
Step 1:
Create a new blank layer on top of the image layer by clicking on the New Layer icon at the bottom of the Layers’ Pallete.
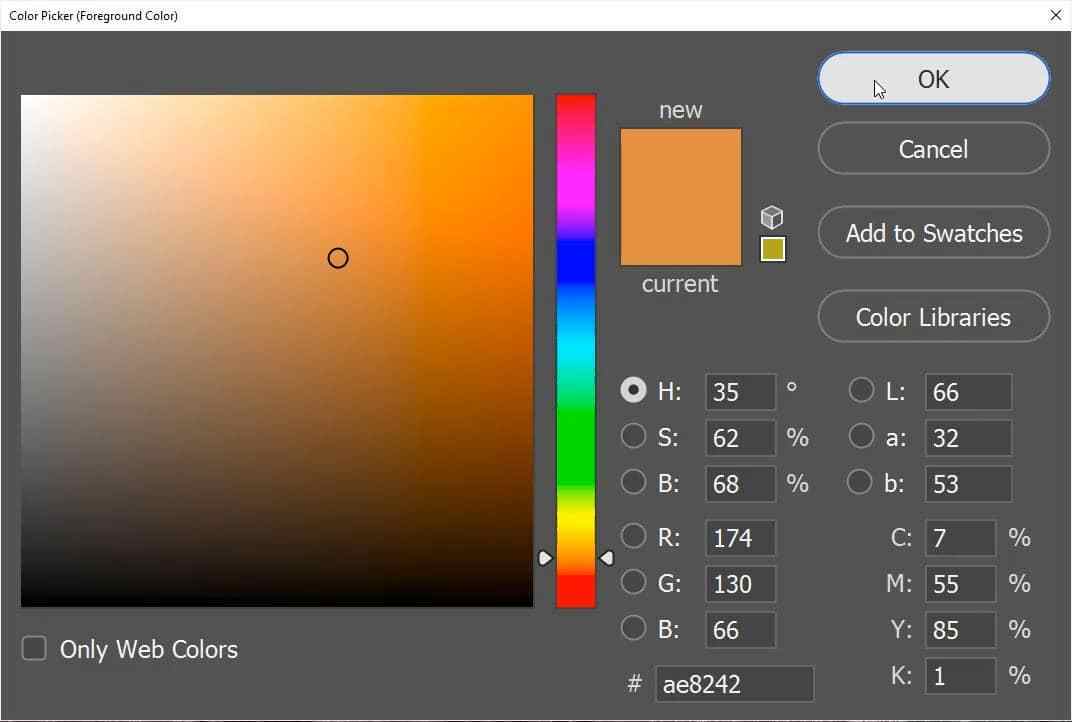
Step 2:
Double click on the foreground colour swatch to bring up the Color Picker. In this example, I have selected an orange colour. Select a colour that you think would most suit your image. Normally, this will be a colour in the red to yellow area. Once you have picked a colour, click on OK.
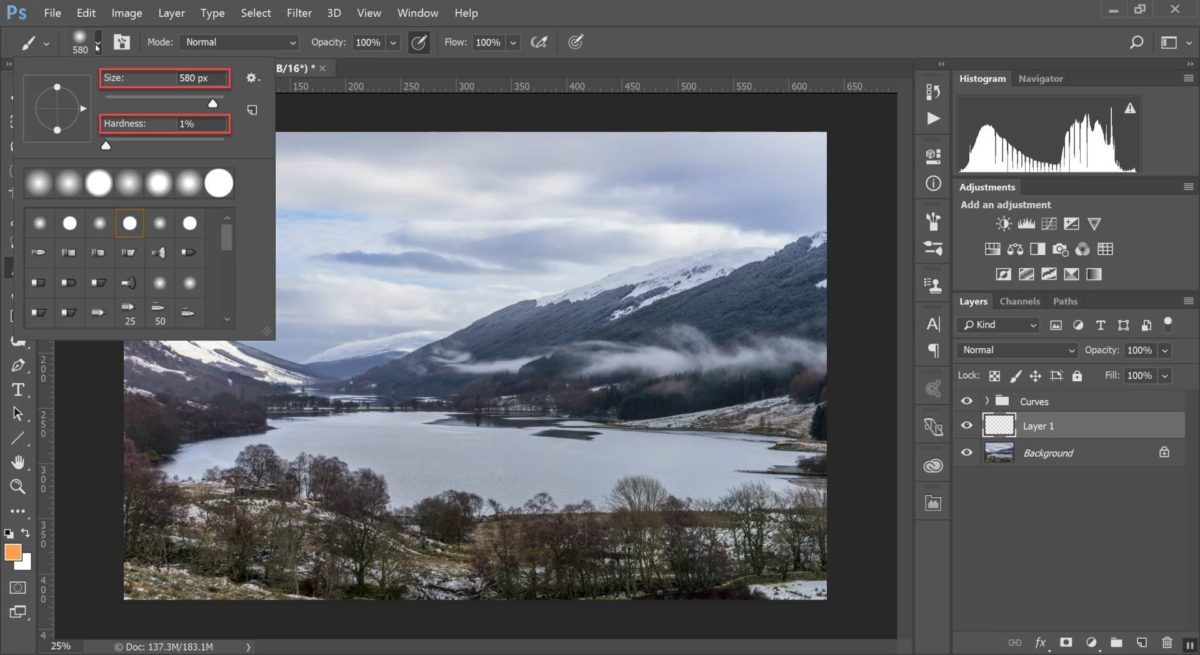
Step 3:
Now, select your brush tool by pressing B on the keyboard and select a large soft edged brush. I am using a brush of 580 pixels with a hardness of 1%. There is no reason why it’s at 1% rather than o% – I simply must have let go of the mouse button too soon.
Paint over the entire area where you want to add warmth to the highlights in the image. Paint at 100% opacity and don’t worry about accuracy because we will make it look natural in the following steps.
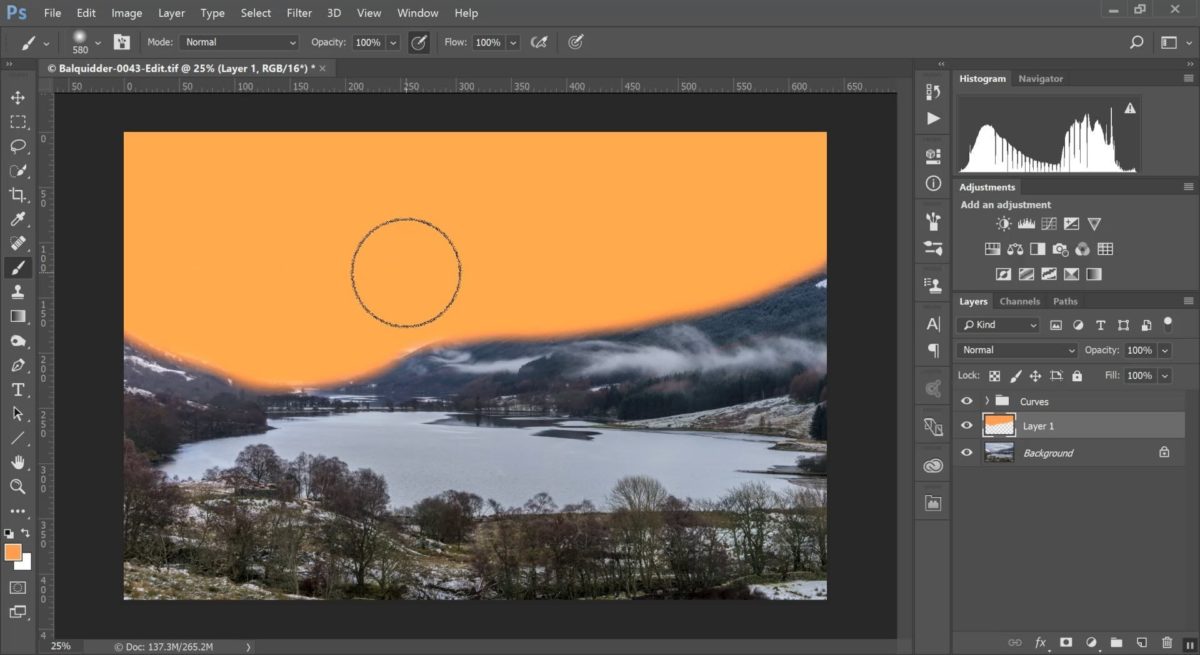
Step 4:
Next, change the layer’s Blending Mode to Soft Light. This will soften the effect and allow the layer below to show through, but it’s still not ideal. You can see that the orange colour we painted is also being applied to the tree line and the shadow areas of the clouds. This doesn’t look very natural nor is the warmth isolated to the highlights. Let’s fix that now!

Step 5:
Add a Layer Mask to the same layer we brushed the warm colour on by clicking on the Add Layer Mask icon at the bottom of the Layers’ Pallete.

Next, from the Image menu, select Apply Image… from the list.

This will open the Apply Image dialogue box. Make sure all the settings in the Apply Image dialogue box are the same as shown below, then click OK.
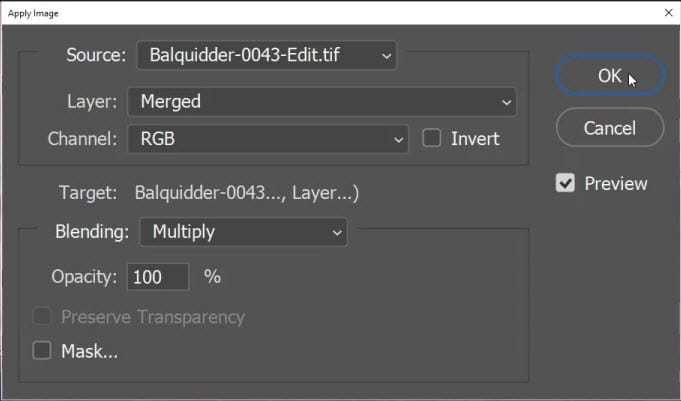
This will apply a mask that will select the brightest areas of the image. This will reduce the effect of the warm brush colour on the shadow areas but I still don’t think it’s enough. The tree line and shadows of the clouds are still a bit too warm for my taste. To fix this, all we need to do is repeat the Apply Image step.
Again, select Apply Image from the Image menu. The settings won’t have changed which means that all we need to do is click OK. Now, with this Apply Image step applied twice, the warming effect is only applied to the bright highlight areas and has a natural fall off into the shadows.
Conclusion.
One of the advantages of using this technique to add warmth to the highlights of an image is the accuracy of the mask. The Apply Image approach will produce a mask that is far more accurate than anything that could be achieved manually. In this image, you can see that the mask has actually allowed some warmth to be added to the highlights of the trees on the slope on the right-hand side of the image.
Additionally, this approach makes it very easy to paint on (or remove paint from) other areas of the image if you choose. Once the Layer blending mode has been set and the mask applied, you are free to simply brush over additional areas. In this image, I brushed over the low clouds hanging over the trees.


Leave A Comment