
This is a little-known method that will allow you to accurately achieve the correct white balance in a photograph using Adobe Photoshop.
There are lots of methods for correcting the white balance in an image but this one achieves one of the most technically correct results for white balance. Rather than using the traditional white and black points inside the curves adjustment setting, this method finds a true gray point which is then used to adjust the photograph to an accurate white balance. If you don’t know what I mean by using the white and black points inside the Curves adjustment, don’t worry. In fact, it’s better that you don’t know what I mean. So enough rambling. Let’s take an image and correct the white balance.
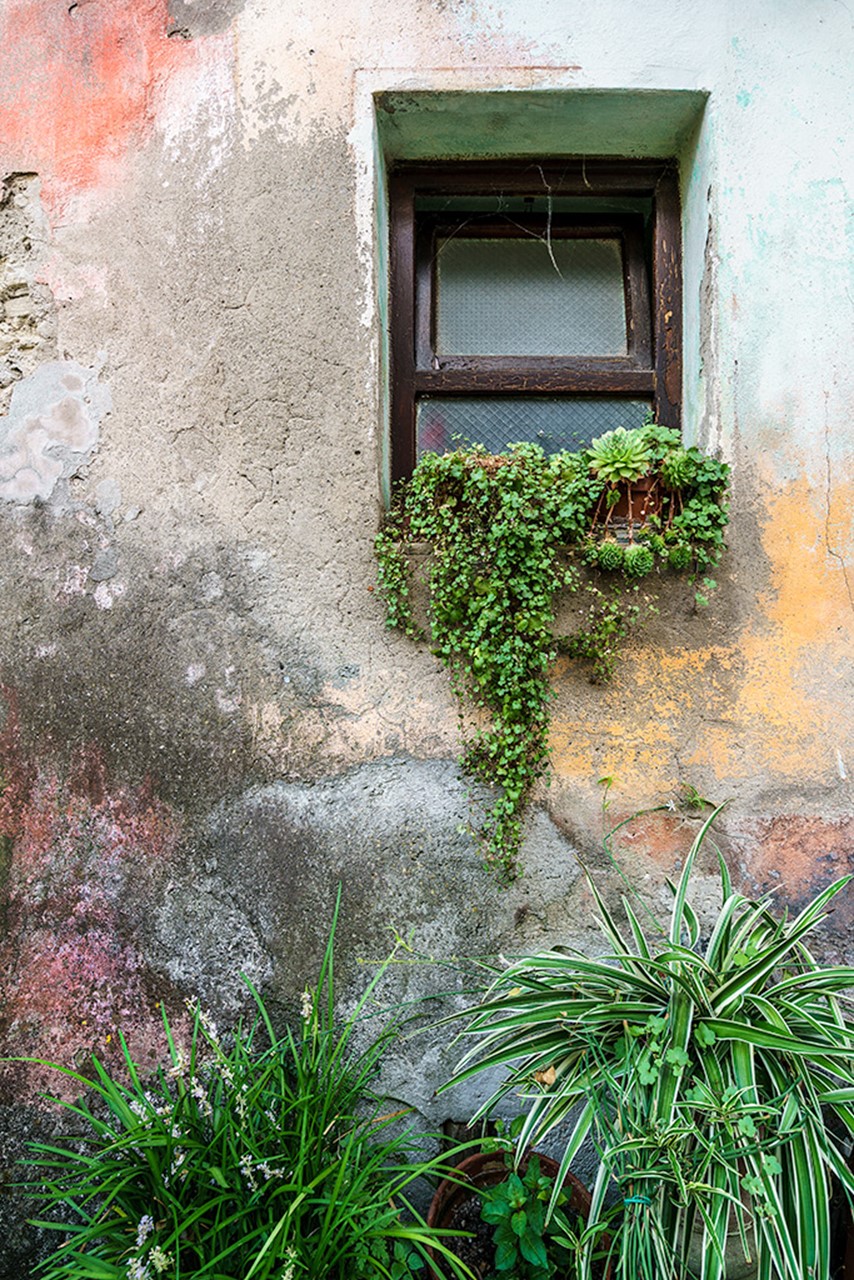
This is the image before a correct white balance adjustment has been applied. The image looks ok and I have done my best to adjust the white balance, but a client is looking for a high-resolution print of the image and before I commit to print, I’d like to correct the white balance perfectly. As it stands, it’s fine for internet sharing but not for printing.
Let’s Get The Correct White Balance – Step by Step
Step 1
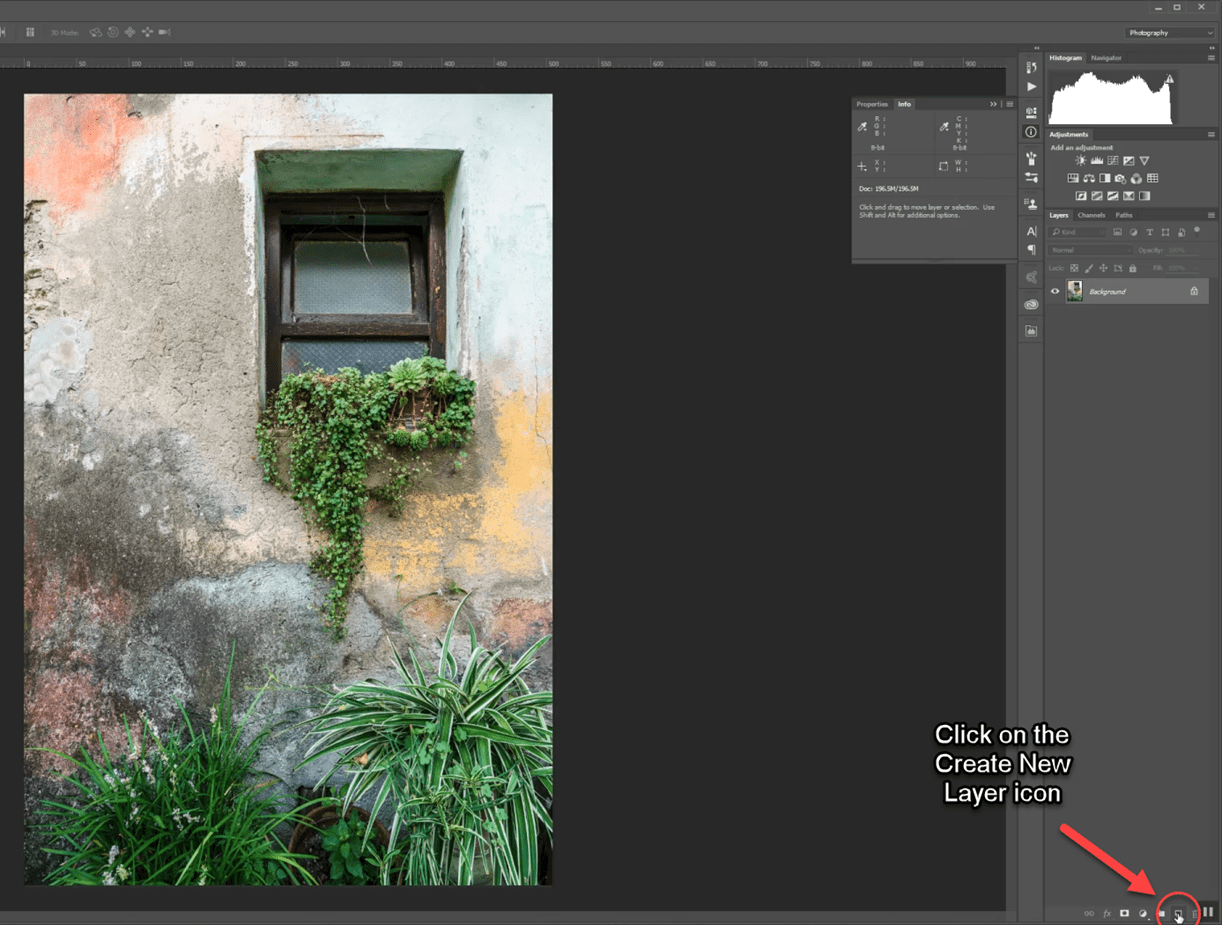
The first step is to open the image into Photoshop. In this case, the image was a TIFF file but this method will work with any file format that can be opened in Photoshop. With the file open, create a new layer by clicking on the Create a New Layer icon at the bottom of the Layers palette (Ctrl+Alt+Shift+n).
Step 2
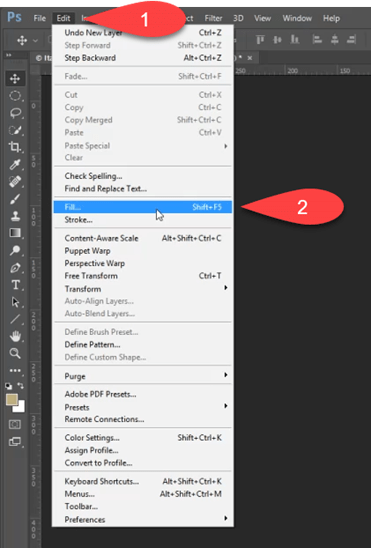
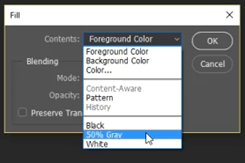
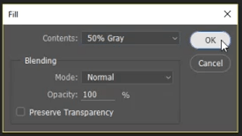
With this new blank layer selected, we are going to fill it with 50% gray by going to the Edit menu and selecting Fill… from the drop down menu. This brings up the Fill dialogue box. Ensure that 50% Gray is selected from the drop-down menu, next to Contents, before you click OK.
 |
|
Step 3
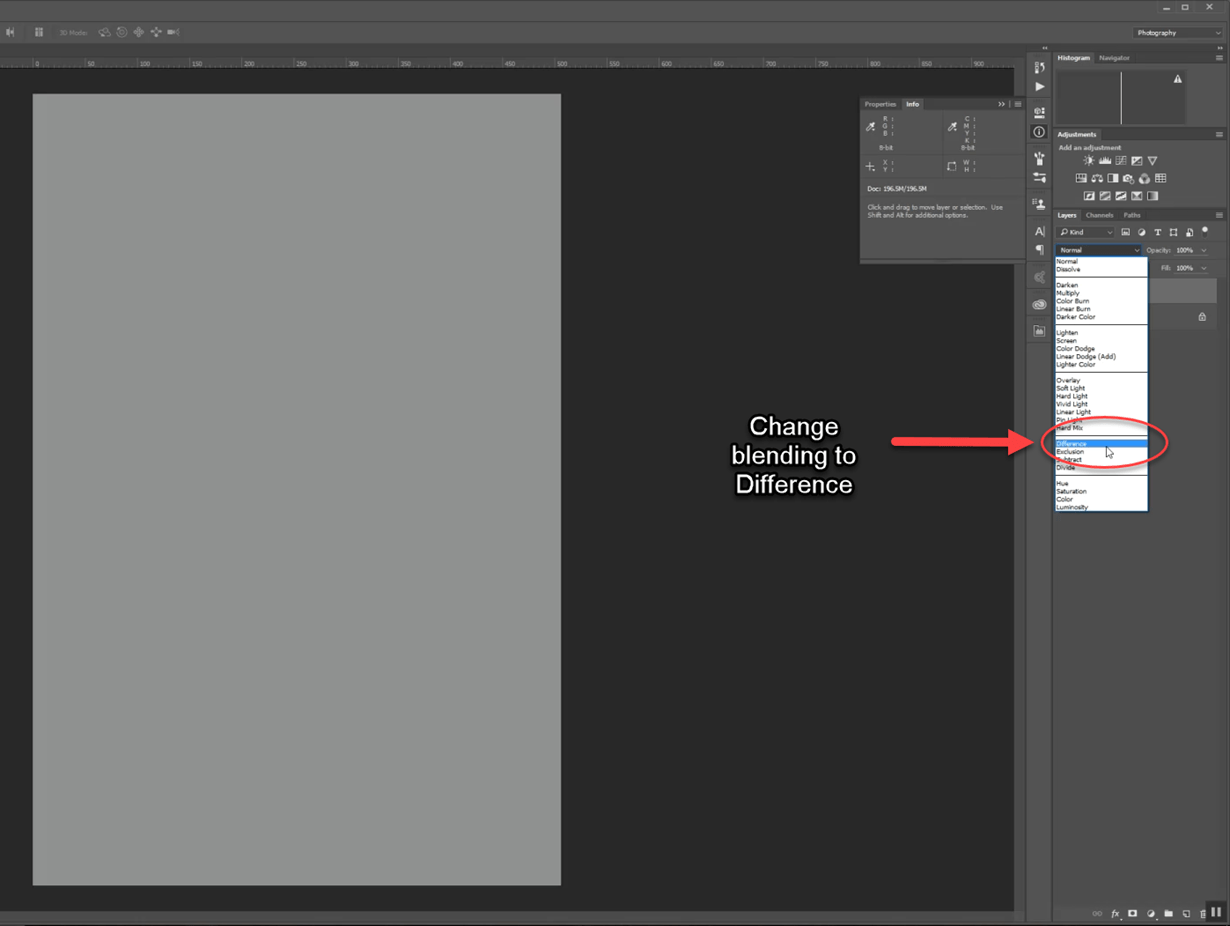
Your image will now change to being completely 50% gray and this is how we ultimately ensure we will have a photograph with the correct white balance. With the new 50% gray layer selected, change the Blending mode to Difference. Your image will now look funky and weird but that’s ok.

Step 4
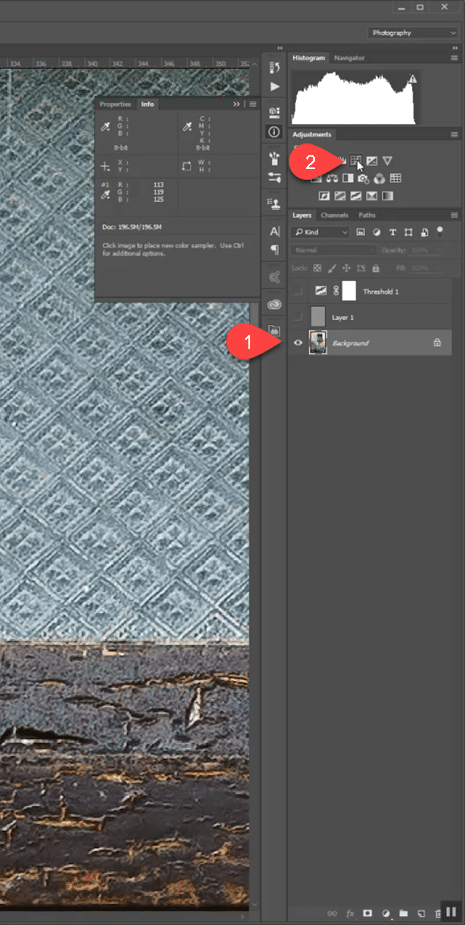
Now we are going to add a Threshold adjustment layer above the 50% gray layer. Don’t worry if you don’t understand what a Threshold adjustment layer is or how it works; you don’t need to understand its workings to be able to correct white balance in a photograph. Just know that it does work.

Step 5
Now your image will turn pure black and white and you will see the Properties for the new Threshold adjustment layer.
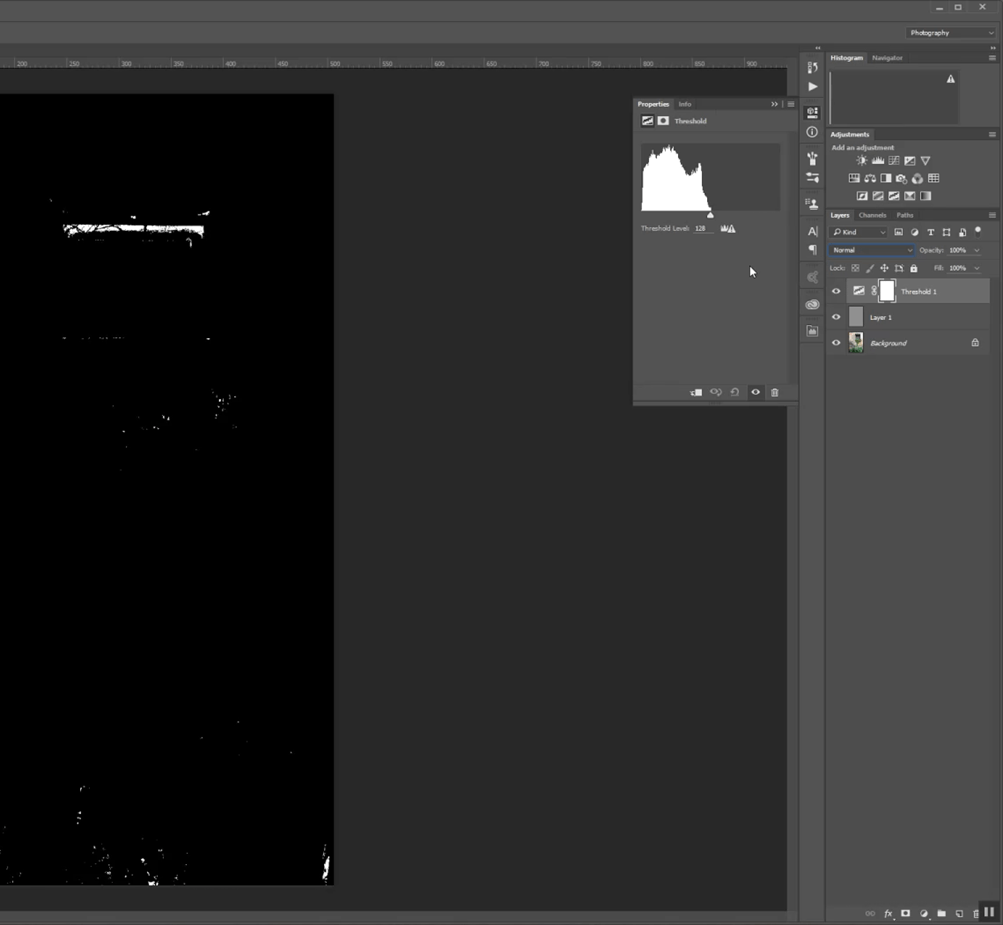
We are going to drag the slider to the left until only a few black pixels remain. These black pixels indicate the areas of exactly 50% gray in your image. It is this knowledge of where the areas of 50% gray are that will allow us to accurately correct the white balance.
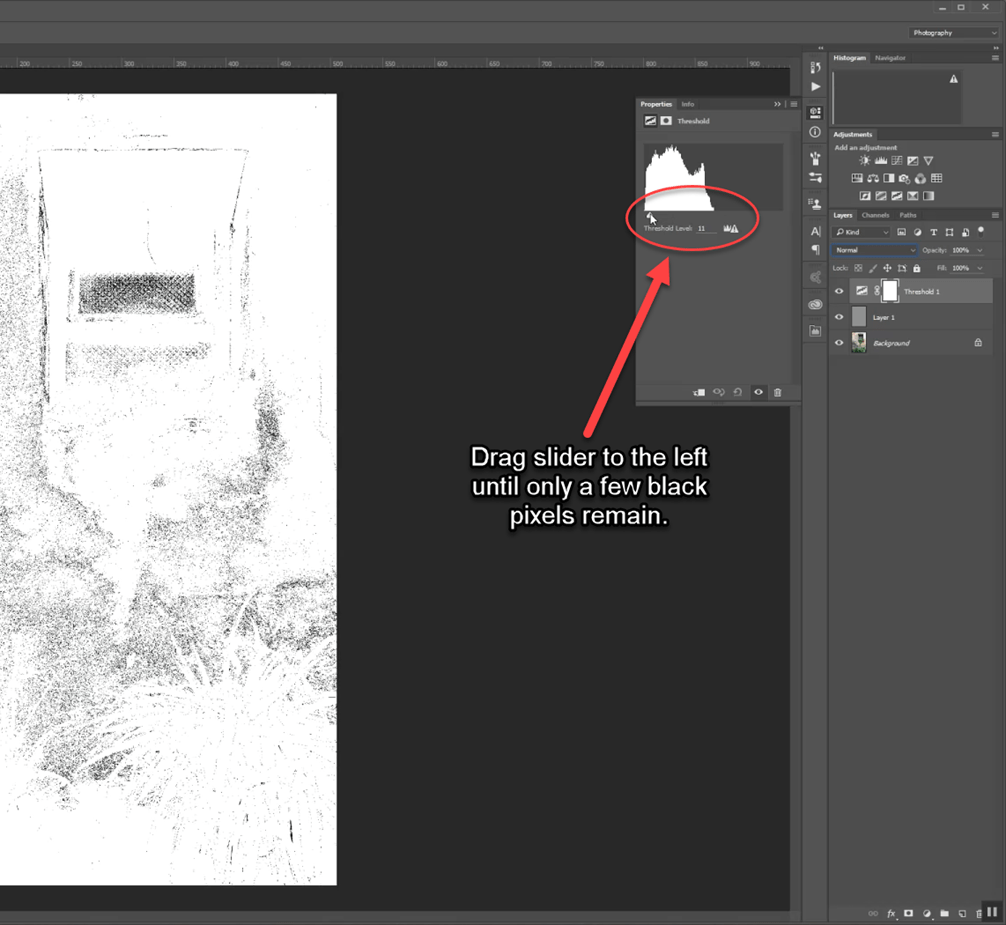
Drag the slider left until you are left with only a few clusters of black pixels.
Step 6
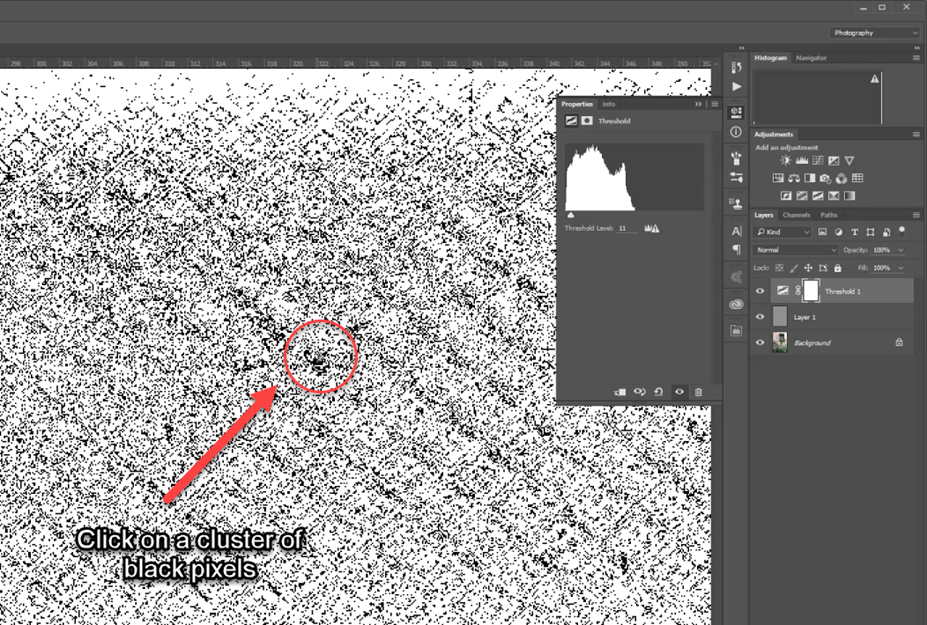
We are going to use the Color Sampler Tool to mark the centre of one of the clusters of black pixels. We know that these black pixels are showing us where the areas of exactly 50% gray are in the image. Press and hold the Eyedropper Tool until you see the fly-out menu and select the Color Sampler Tool.
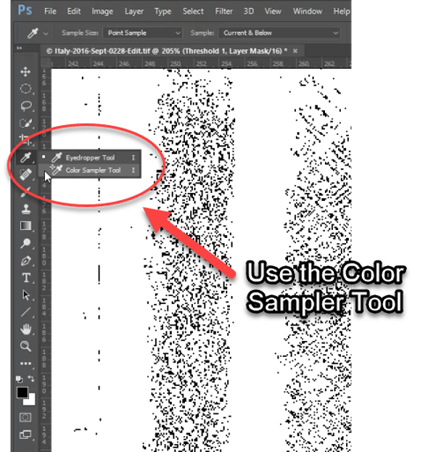
With the Color Sampler Tool active, zoom in and click in the middle of a cluster of black pixels. This will leave a target area marked for us to use in the next step.
Step 7
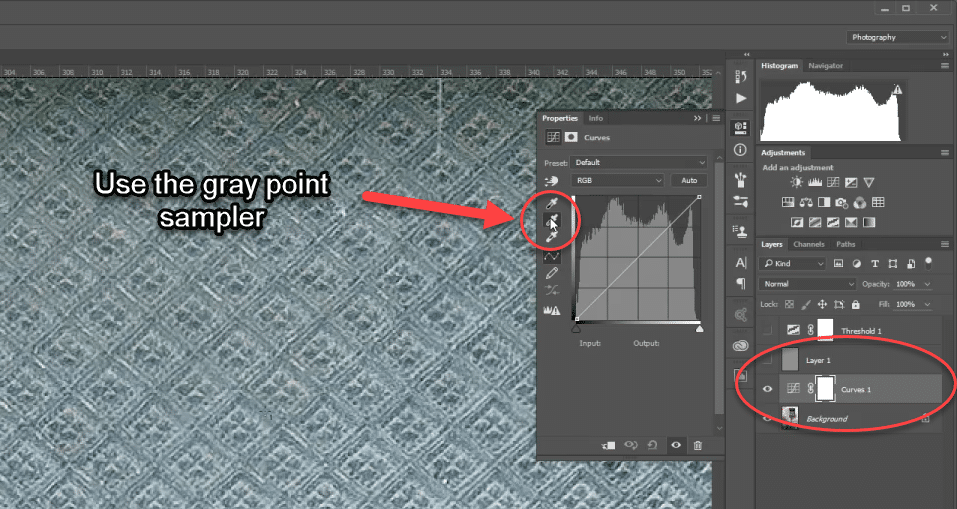
Now that we have an area of exactly 50% gray in the image marked, we can hide both the 50% gray layer and the Threshold adjustment layer. This allows us to see the original image again. In the next step, we can accurately correct the white balance.
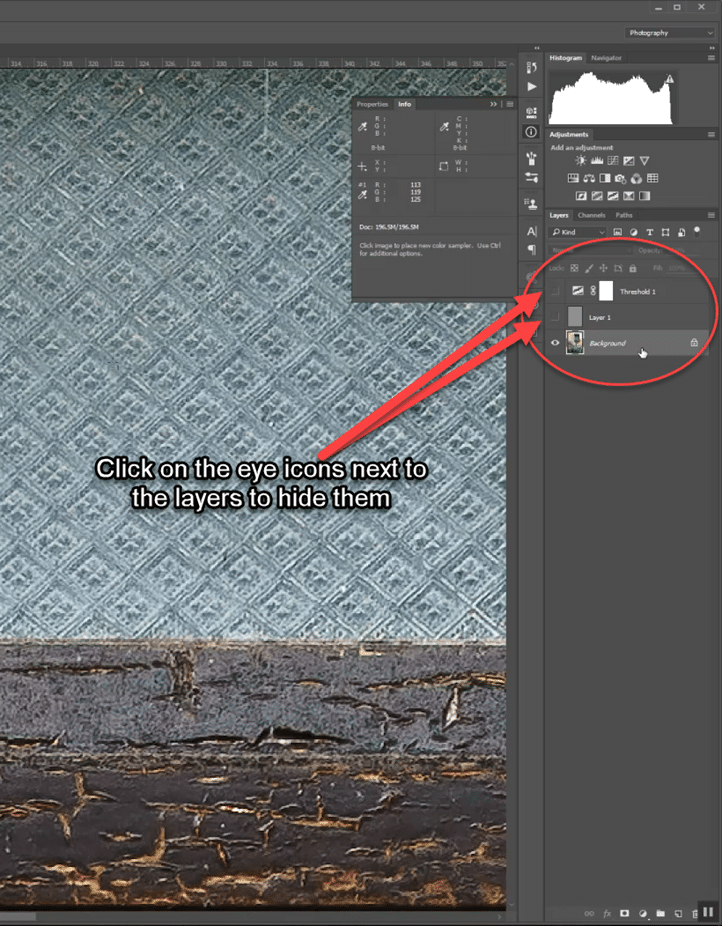
Click on the background layer to highlight it and then add a Curves adjustment layer. It’s this Curves adjustment layer that is going to accurately correct the white balance by making use of the 50% gray spot we had found and marked in the previous steps.
In the Properties dialogue for the Curves adjustment layer, select the gray eyedropper tool.
Now with the gray eyedropper active, move it directly over the sample point we placed earlier and click.
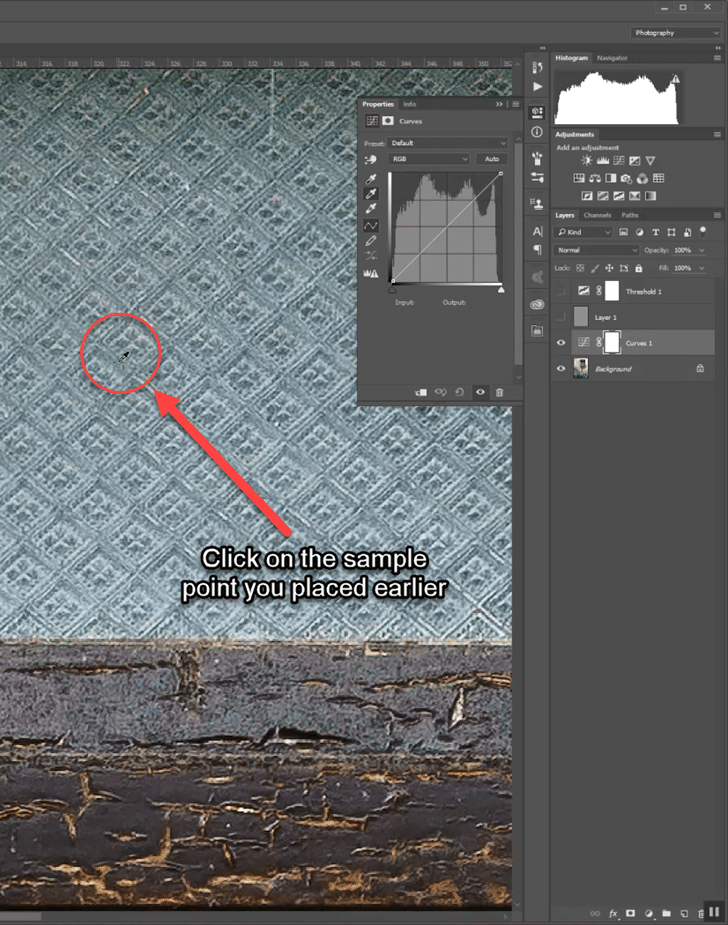
Voila! A perfectly adjusted image with the correct white balance.
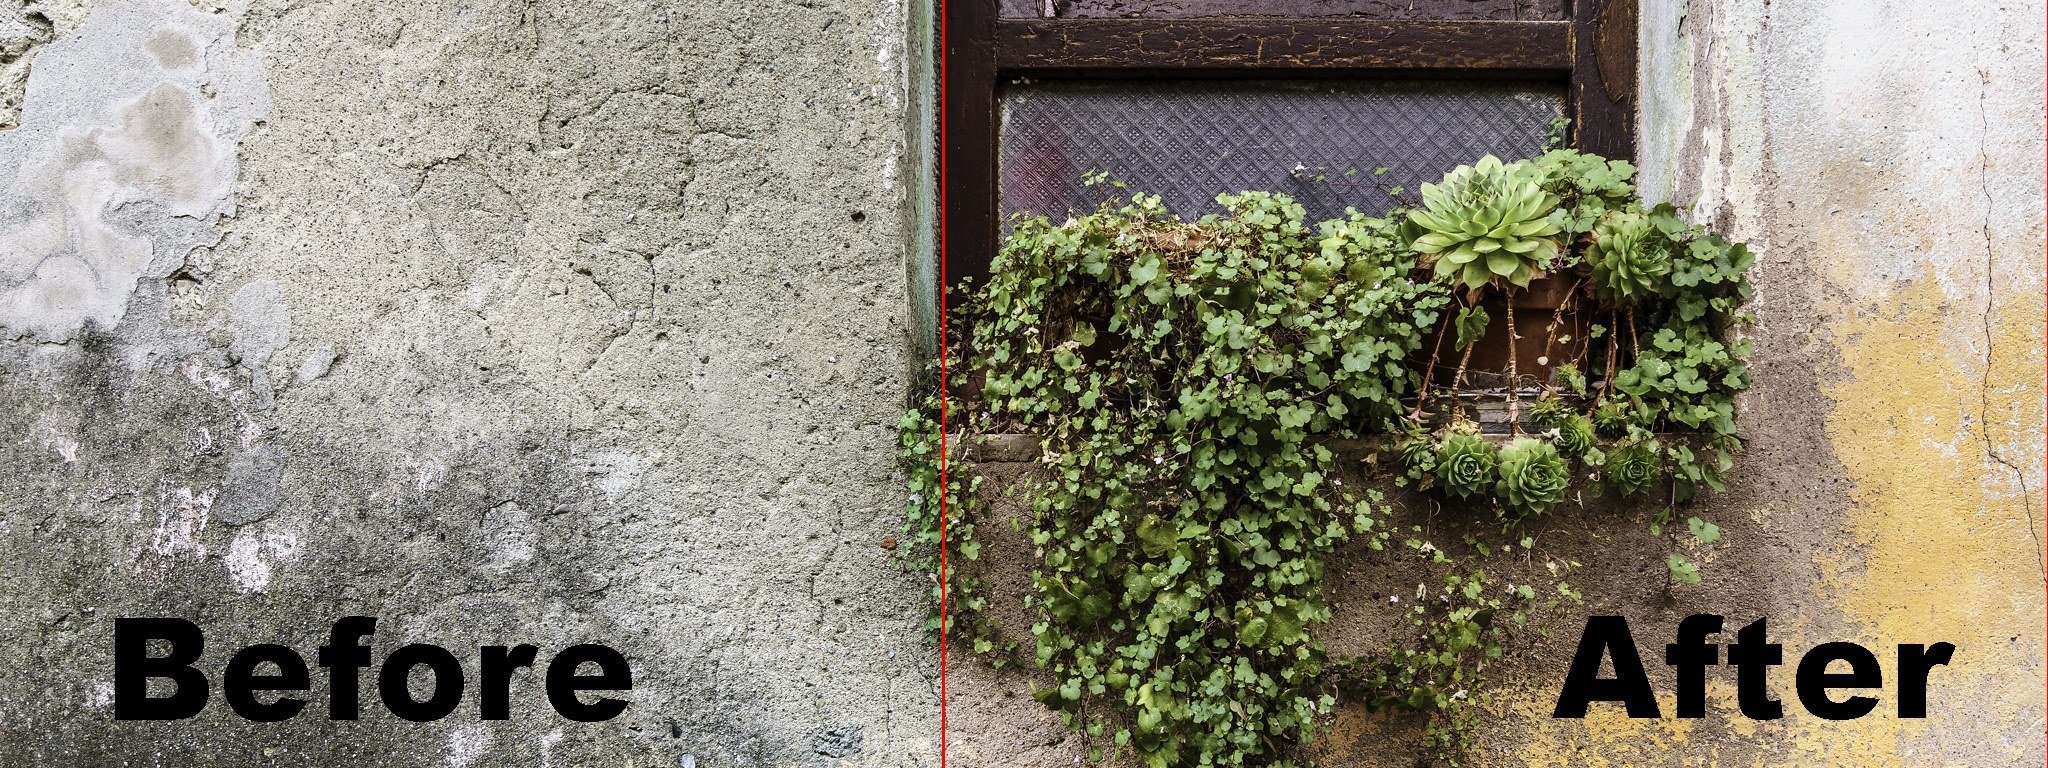
Before and After White Balance
Here are the two images side by side. The change is subtle but effective.
| Before | After |
 |
 |
Conclusion
Sometimes it can be very difficult to correct white balance in an image, especially if the image is a JPEG and you don’t have the benefit of making white balance adjustments in raw processing software. This technique will give you accurate results regardless of the file format even if the white balance is off by quite a long way. I’ve used it on images that were shot using an ND filter that produced a heavy colour cast and it works a treat.
Give it a go on some of your images and let us know how you get on by commenting below. Thank you and enjoy.


I cannot see most of the images for each step. Thanks
Strange – after posting my comment I can now see them. Apologies!
Frank,
Thanks for commenting. Some of the posts that were published, prior to us moving server, don’t show the images on the first page load. I am slowly working my way through them.
Martin
Thanks for a great tutorial and one I’ve really required, highly appreciated.
It worked brilliantly on some recently scanned slides from the 1950s/1960s, and set the colours spot on.
The only minor problem encountered was in removing the target left by the ‘Color Sampler Tool’, but discovered that hovering over it and holding down the Alt key, then clicking on the target, removed it.
Works like a dream on scanned 35mm film. Thanks.
Paul,
Thank you and I am glad you like the technique. I use for my colour negatives too.