
In a previous post, I introduced you to the idea of focus stacking and how it can be used with macro photography. Now I’d like to explain the method for achieving focus stacking in Photoshop. As always, there will be several different ways to carry out focus stacking in Photoshop but the method described here is the one I use. This tutorial will assume that you have already taken your series of images as described in the article Introduction to Focus Stacking.
Focus Stacking Step 1:
I imported all my images into Lightroom. From here it is an easy task to export them all into Photoshop at once.
- Highlight all the images you will be focus stacking in Photoshop;
- Right-click on one of the highlighted images;
- Select Edit In > Open as Layers in Photoshop.
Note: you can get to this same menu by selecting Photo > Edit In > Open as Layers in Photoshop.
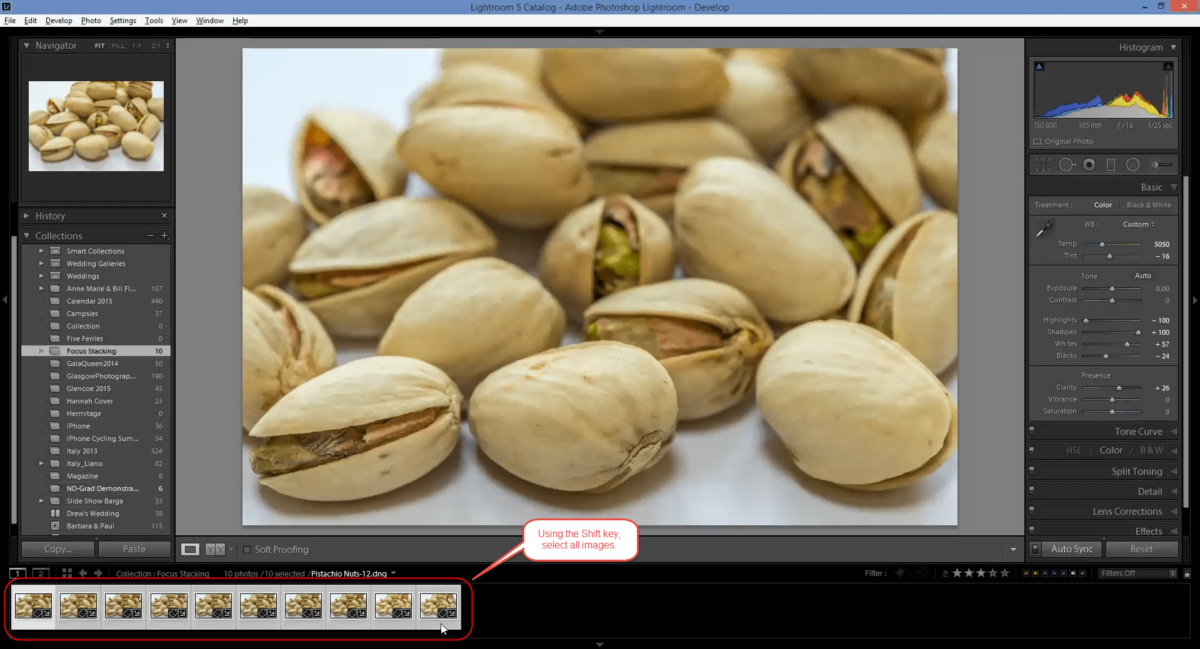
Highlight all the images
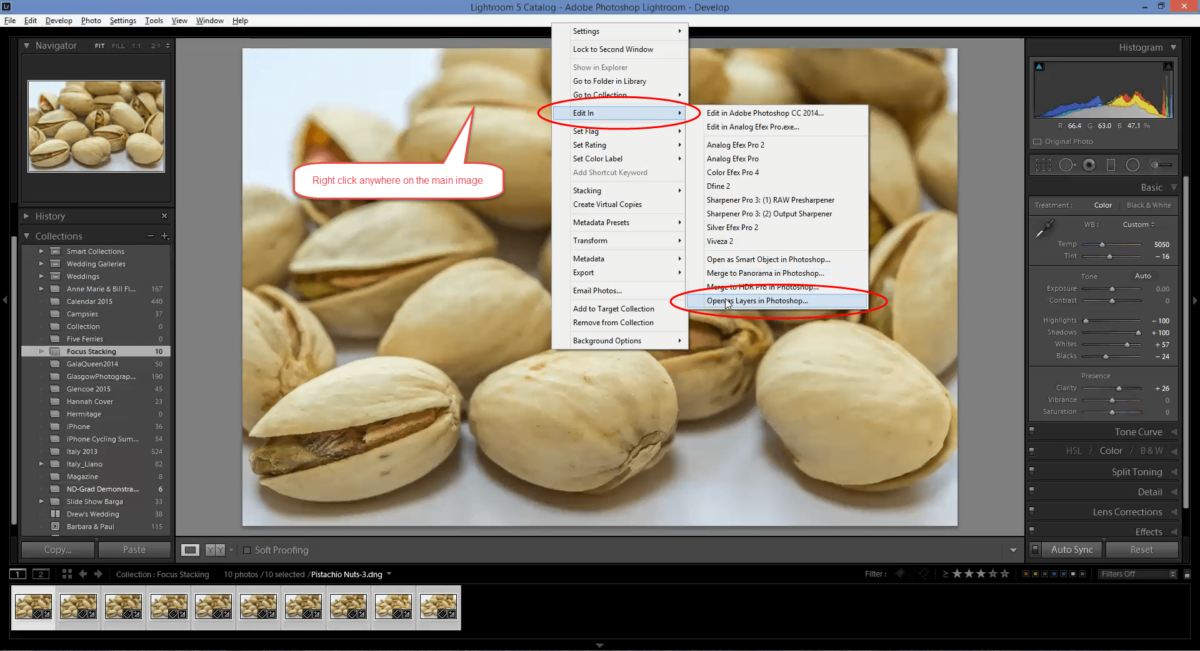
Open as Layers in Photoshop
Focus Stacking Step 2:
Photoshop will launch and all the images will be imported and placed onto their own layer within the composition. Depending on the size of each image, the number of images and the speed of your computer, this process may take a couple of minutes to complete. While they are being imported, you will see the layers begin to stack up on Layers’ pallet. When all the layers have been imported, the bottom layer (Load Layers) will be removed from the composition by Photoshop.

Images loading into Layers

All images imported onto their own layer
Focus Stacking Step 3:
This is the step that will align the layers.
- Select all the layers by clicking on the top layer and, while holding down the shift key, click the bottom layer;
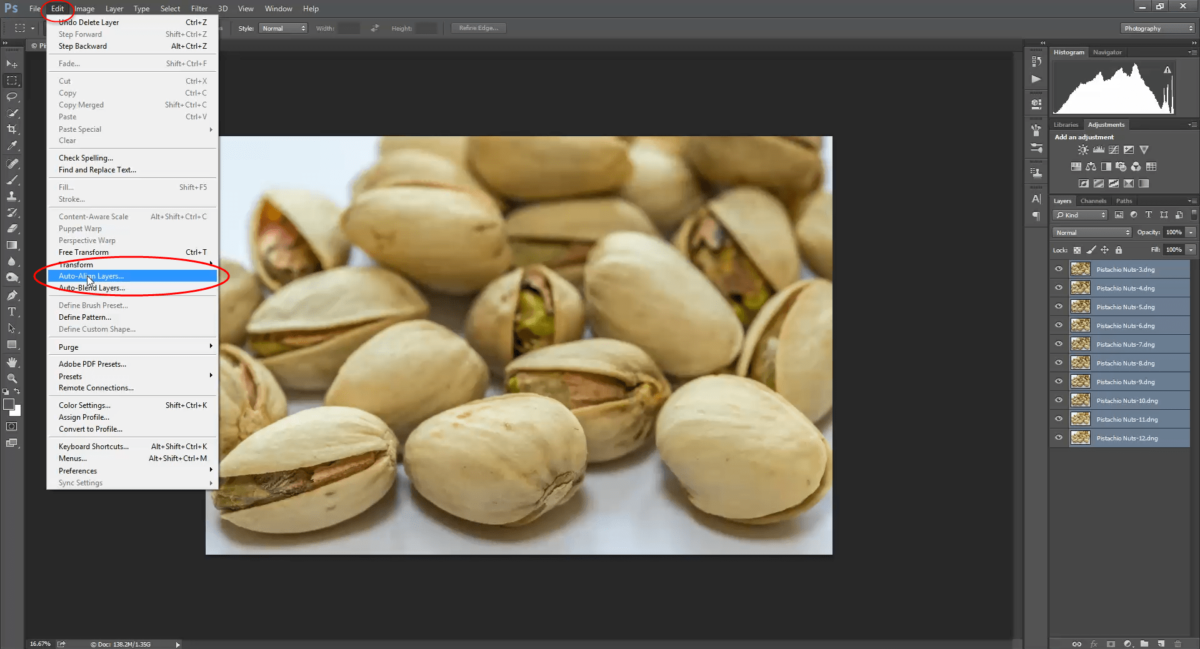
- With all the layers selected, choose Edit > Auto-Align Layers… from the drop-down menu. This step is necessary because each photograph was shot using a different focal length, the scene zooms slightly causing each image to be in a different place in the frame. If you have taken a set of images using the focus stacking technique outlined in the Introduction to Focus Stacking article, you may have noticed this slight shift. Using the Auto-Align Layers function in Photoshop will ensure that this shift is corrected and all the layers align perfectly, one on top of the other;
- Choose Auto from the list of options presented by the dialogue box, then select OK to start the Auto-Align process.
The Auto-Align process may take a couple of minutes. Photoshop has to examine each layer on a pixel-by-pixel basis and compare that layer with the adjacent layers. When you consider the millions of pixels being examined during this task, it’s a miracle Photoshop does it in such a short time.
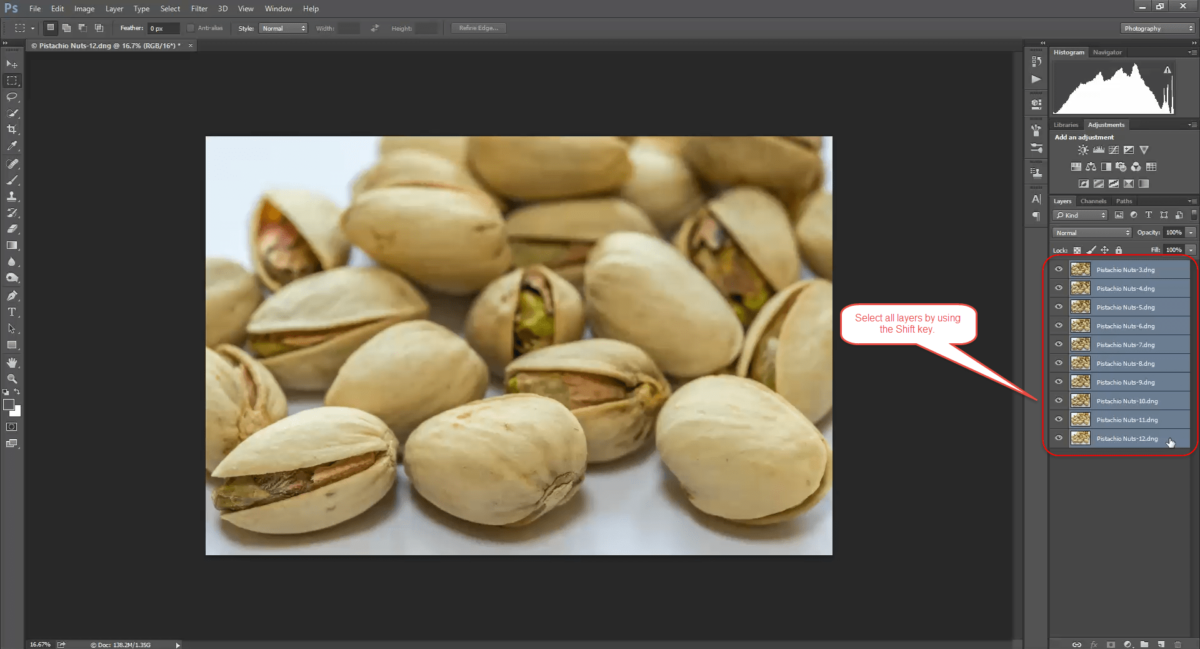
Select all the Layers
Auto-Align the Layers
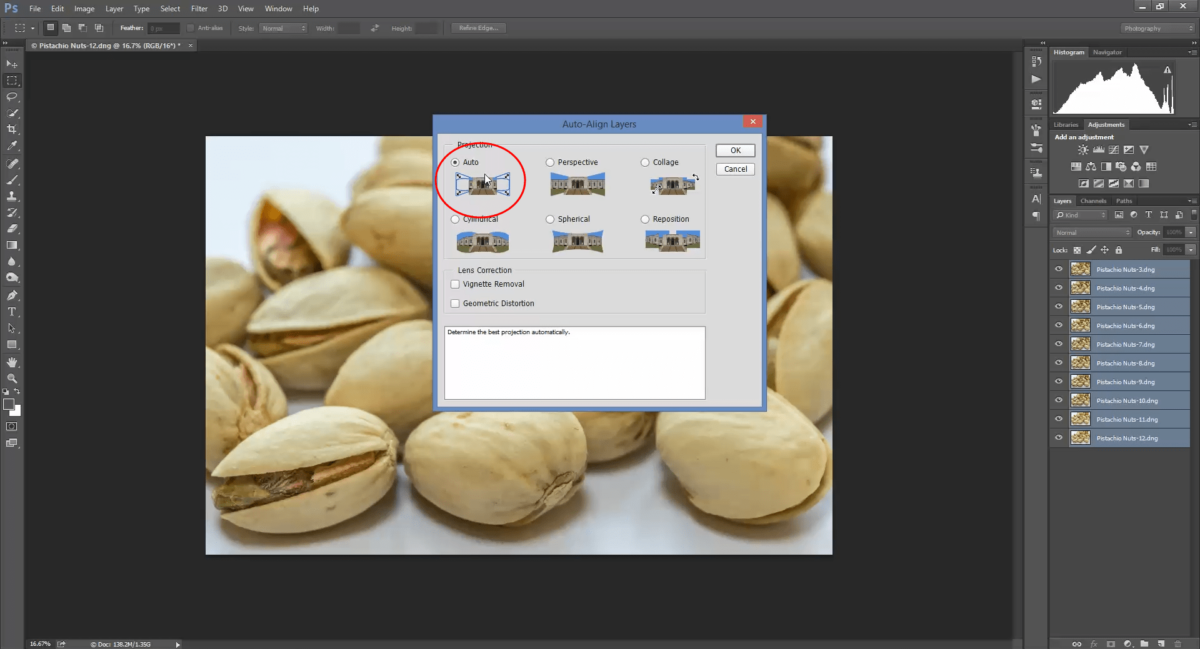
Choose Auto
Focus Stacking Step 4:
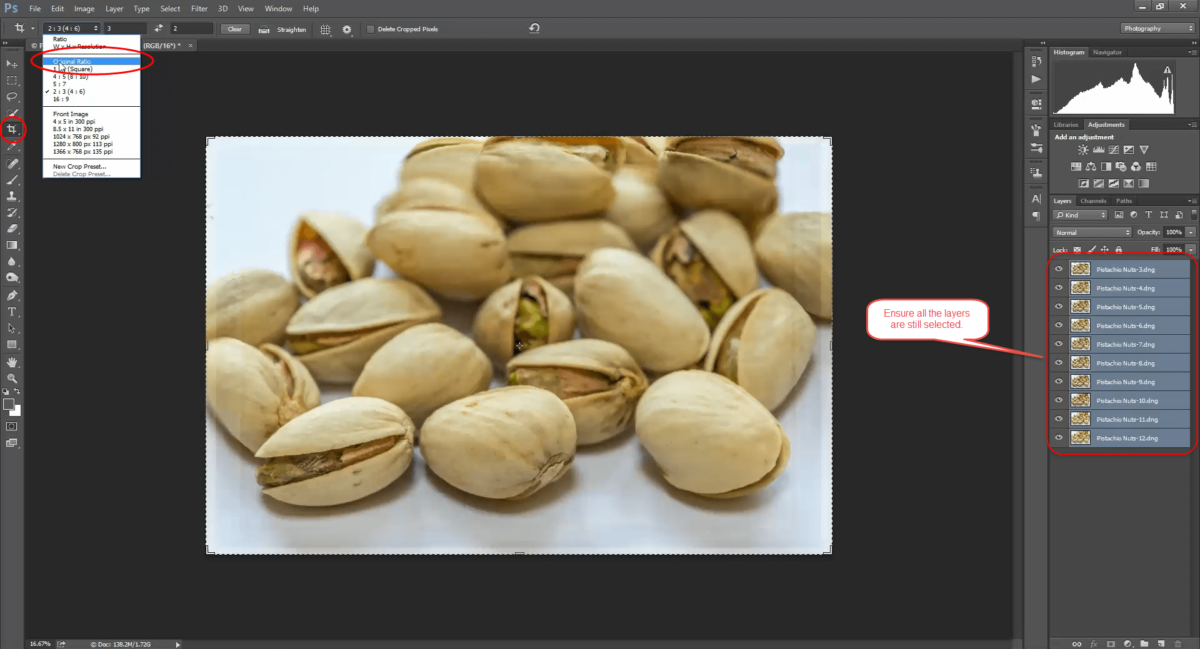
Once Photoshop completes the Auto-Align process, you will need to crop off the edges of the image. The sides will contain pixels that could not be adequately aligned because of the slight zooming effect caused by the focus shifting between shots, and they will need to be removed from the final photograph. One tip to avoid being forced into removing too much information is to compose your original shots wide with empty space around the edges.
- Select the Crop tool and pick whichever aspect ratio you desire for your final photograph. In my case, I left it on the original 3×2 ratio;
- When you are happy with your crop, click on the accept icon on the top toolbar.
Choose a cropping ratio

Accept your crop
Focus Stacking Step 5:
Now we will perform the focus stacking part of the process.
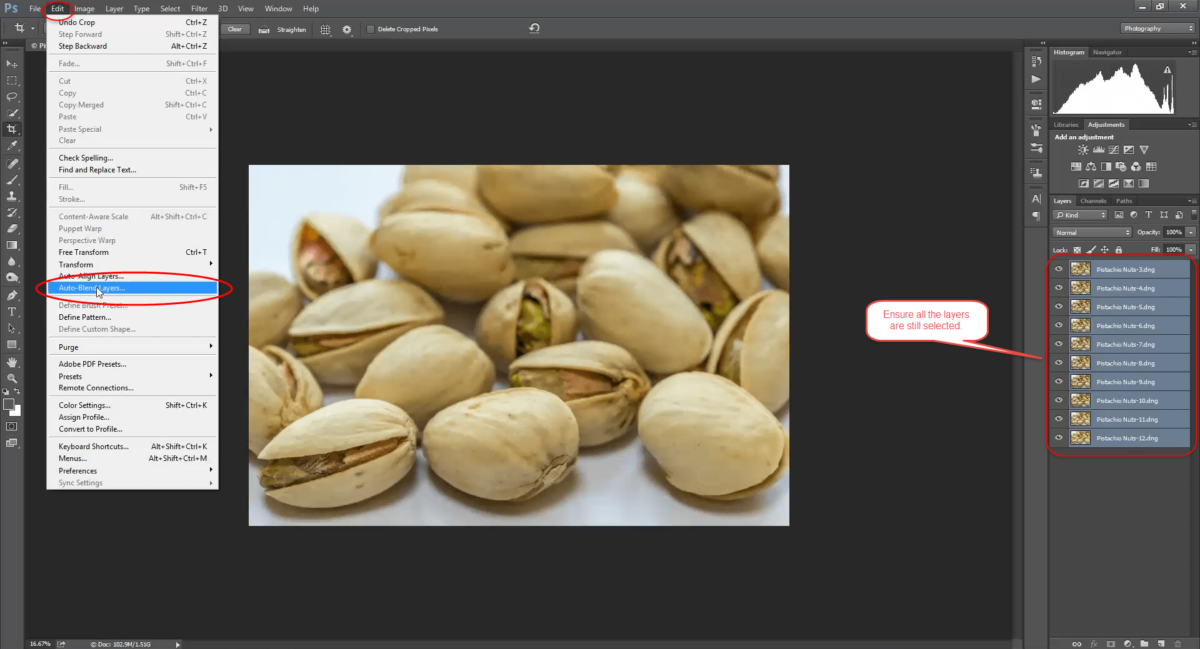
- Ensure you still have all the layers selected (Photoshop will only stack the selected layers);
- Choose Edit > Auto-Blend Layers…
- Then select Stack Images and check the Seamless Tones and Colors check-box before clicking on OK to begin the focus stacking process. Again this may take a couple of minutes to complete.
Choose Edit > Auto-Blend Layers
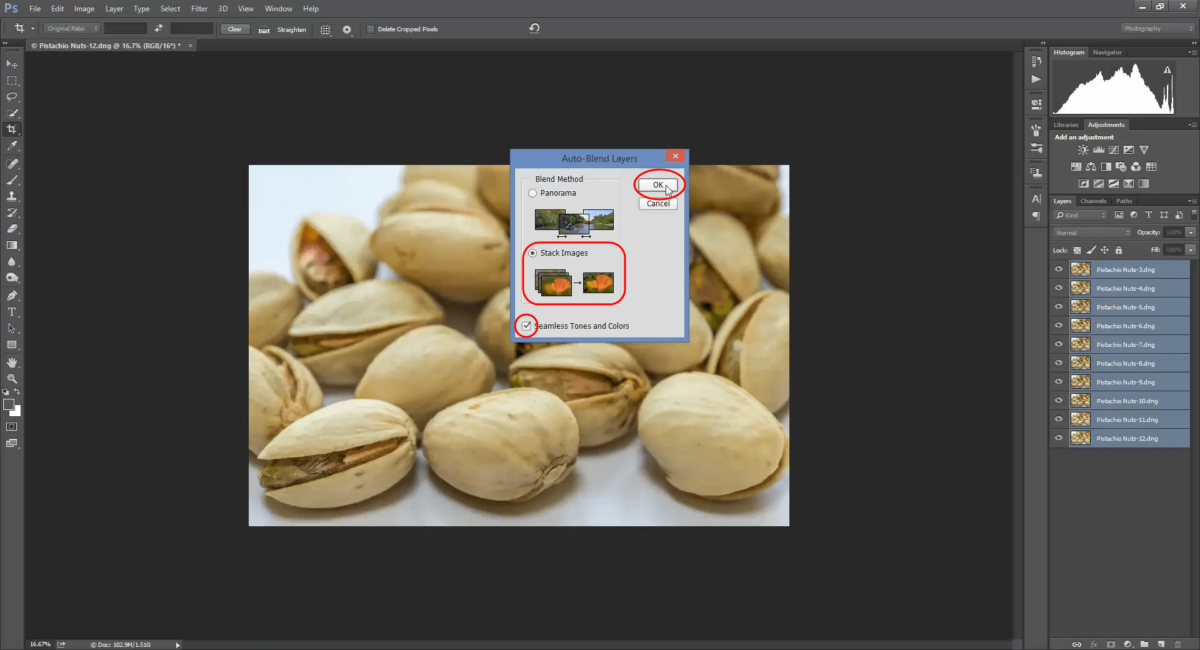
Stack Images dialogue

Processing the image-stack
Focus Stacking Step 6:
You now have a photograph which has sharp focus throughout. Photoshop has achieved this by analysing each layer and applying Layer Masks. These Layer Masks allows a portion of each layer to come through and be visible in the final composition. The complexity of each mask can be seen in the Layers Pallet and explains why Photoshop takes a minute or two to complete the stacking process.
However, the combination of all these layers and masks has resulted in a huge file. It is advisable to flatten the image before saving it into a format that will be appropriate to your intended use.
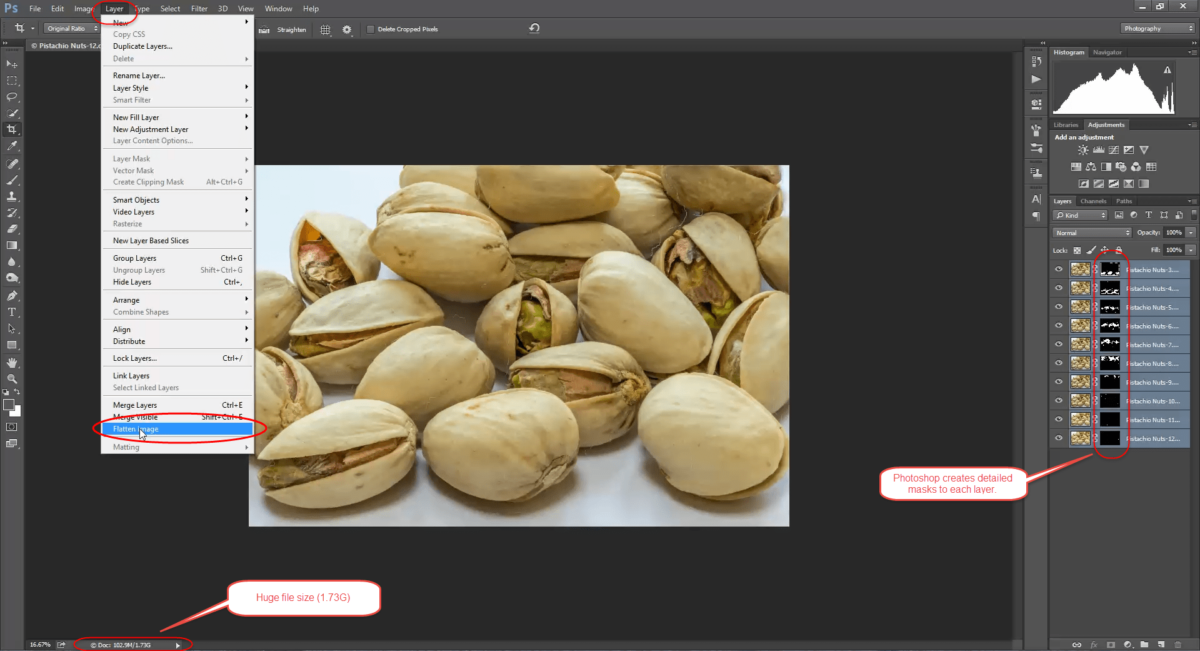
Flatten the image
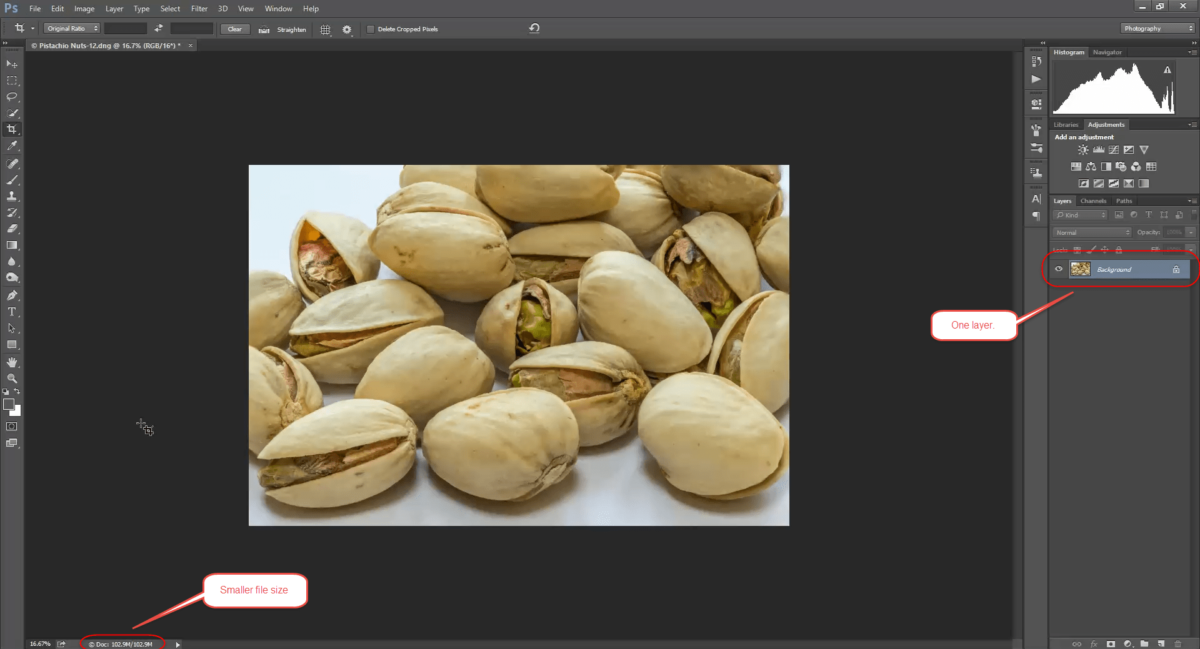
Single-layer and smaller file size
Conclusion
Performing focus stacking in Photoshop is a very easy task and the results can be rewarding. To ensure you have a truly sharp image, from to back, it is worthwhile taking your time to set up properly and only move the focus by small amounts between each image. Experiment with this technique and let us know how you get on. If you wish to send in some examples, we will post them into your own gallery for you.


Leave A Comment