
This article discusses the use of the new Creative Profiles in Lightroom Classic and Lightroom CC.
The new Profiles in Lightroom Classic and Lightroom CC are a new addition that was introduced in the April 2018 update. Profiles are not a new feature to Lightroom, but they have been enhanced with this latest update. It is this enhancement that I will cover in this article. First, let’s discuss what profiles are.
Profiles in Lightroom
Put simply, a Profile is a set of instructions that Lightroom uses to convert the camera raw information into the colours and tones that we see when we first open the image. All raw software packages will have profiles built in. Each software package will have its individual profile “recipes” which result in slightly different interpretations of the same camera raw information. These different interpretations explain why different raw converters make the same raw image look different when first opened. Some have more contrast and saturation while others produce a flatter image. For example, Capture One provides a more vibrant and contrasty image than RawTherapee.
Before this update, Adobe Lightroom and Adobe Camera Raw (ACR) interpreted the raw data and applied a profile that was relatively flat. This profile is called Adobe Standard and was applied as the default profile to all raw images. You did have the option to change this during post-processing or upon import into Lightroom. The majority of Lightroom and ACR users probably never altered this profile. In fact, I would guess that many photographers didn’t even realise that they could change the profile to one of the many built-in camera specific profiles. You see, the profiles were tucked away at the very bottom of the Develop panel under the Camera Calibration tab, and as such, they were not the first thing anyone thought of changing. Well, not anymore.
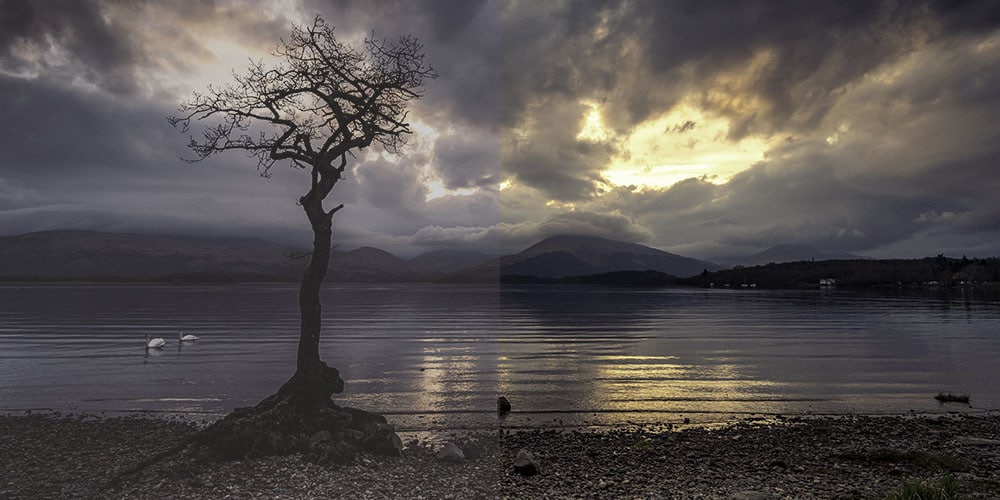
The new default profile that is applied to all raw images in Lightroom and ACR is called “Color”. No, I haven’t misspelt it, I’ve merely quoted it as it appears in the software. This new default profile is more contrasty and vibrant and may not be to everyone’s taste.
Profiles in Lightroom Have Been Promoted
Profiles had been hidden in the basement of the Develop module. Now, there are on the top floor. This elevation in position is designed to emphasise their status and usefulness. Let’s look more closely at how to use them and why.
Using Profiles in Lightroom
The new profiles in Lightroom can be used in the same way as they were before the April 2018 update. As I alluded to earlier, many people didn’t realise there was such a feature in Lightroom. And, if they did know about camera profiles, they rarely used them.
Camera profiles are used to emulate the profiles that are built into all cameras by the manufacturer. Some examples of these built-in profiles include:
- Standard;
- Vivid;
- Portrait;
- Landscape;
- Sunset;
- Black and White.
It is worth noting at this point that these profiles, or styles, are only applied in camera to jpg images. If you shoot raw, no profile is applied to your image. However, all your camera’s profiles are embedded into the raw data. This raw data then allows you to pick a profile in Lightroom at the post-production stage. This ability to select a profile is present in all raw processing software – not just Lightroom.
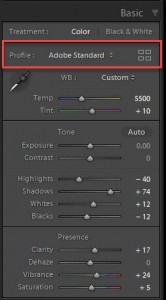
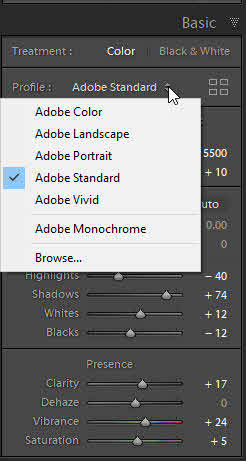
Once you have imported the raw files into Lightroom, the new Adobe Color profile is applied by default. However, you’re not stuck with this profile. To change the profile, click on drop-down list in the Profile section. The drop-down menu only contains a few of your favourite profiles. If this list does not include the profile you are looking for, click on the small icon to the right. This icon opens a new dialogue that will give you access to all the profiles.
![]()
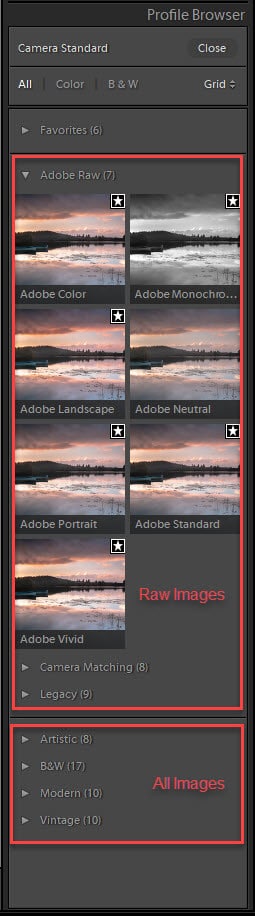
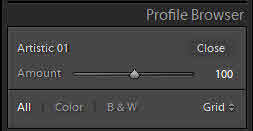
The profiles are divided into sections. The number of sections that you see will change between raw files and non-raw files. Each section contains individual profiles. Some of the profiles can only be applied to raw images. The Creative set of profiles can be applied to raw and non-raw images.
As you hover your mouse over the thumbnails of the profiles, you will see the main image update to show you a preview of the profile. You must click on the thumbnail to apply the profile to the image. All the profiles are applied non-destructively, and they will not alter any of the slider adjustments you may have already applied. This behaviour is what makes profiles different from presets.
Apply Profiles First
Profiles are designed to be applied at the beginning of the editing workflow. Hence they are now at the top of the Basic panel. Setting a profile will determine how the software interprets the raw data. This interpretation is what sets the colours and tone of the image. All adjustments that you make are based on this initial interpretation.
Once you have decided on a profile you can use the usual adjustments in the Develop module to fine tune your image. The profile is meant to do a lot of the heavy lifting for you as well as apply a consistent look over a collection of images. Also, the profiles container apply nuances to an image that would be very difficult, or impossible, to perform in Lightroom.
When you open a raw file, you will see an additional section of raw only profiles:
- Adobe Raw;
- Camera Matching, and;
- Legacy.
These profiles can only be applied to raw images. These profiles are quite subtle when juxtaposed to the Creative profiles found below. The Creative profiles can range from subtle to pronounced, but they do provide an additional Amount slider that will weaken or intensify the effect of the profile.
Remember, all profiles are applied non-destructive.
Why Use Profiles in Lightroom?
I’ll keep this part short and to the point. Using profiles in Lightroom, or any raw developer will allow you to edit your images more efficiently. By efficiently, I mean fleeter and more consistently. The profile that you select will apply an identical interpretation to every image, ensuring you have a consistent look across your pictures.
If you have a set of images that you want to convert to black and white, applying a profile to them all at once will be a massive timesaver over converting each image one by one.
Lastly, if you shoot raw you don’t have a choice; every raw image requires a profile. By default, Adobe Color is applied to all images imported into Lightroom or opened in Adobe Camera Raw.
Conclusion
This latest update to Lightroom and Adobe Camera Raw can only be described as significant. The introduction of Profiles is a feature that is here to stay, and will no doubt have many tweaks and updates in the following years. Additional profiles can also be added by the user to make workflow more efficient and allow a fast approach to creativity and consistency.
This addition of profiles will not be to everyone’s taste, and I would urge you to keep in mind that you don’t need ever to change a profile to use Lightroom. They are and have always been, an alternative starting point in your post-production process.
What do you think?


Makes an interesting read.