
This cool technique allows you to edit selections in Photoshop and Adobe Camera Raw. I am sure many photographers are unaware of this Photoshop feature. So let’s have a look at what you can do with selections in Photoshop and Adobe Camera Raw.
Before I explain the technique, let me outline what this technique does and why this is so useful.
Why Use Selections in Photoshop and Adobe Camera Raw?
The Adobe Camera Raw Filter inside Photoshop can be used to edit any file type. This ability allows you to adjust any image using the power of Adobe Camera Raw. This way you can make profound adjustments using all of the sliders available in the Adobe Camera Raw application.
For example, you can easily adjust tone, colour balance, sharpening, clarity, curves and many more settings with nothing more than sliders. Many of these Camera Raw adjustments can also be replicated inside Photoshop using a combination of the hundreds of controls available, but it is far easier to make these adjustments inside the Camera Raw Filter.
Plus, and this is a big plus, the adjustments are non-destructive and can be altered as often as you wish if you work with the Adobe Camera Filter on a Smart Layer. So let’s look at how to adjust selections in Photoshop and Adobe Camera Raw.
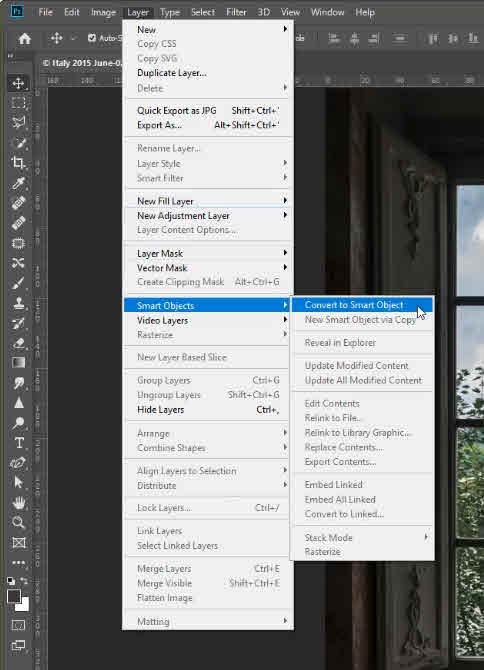
Step 1: Convert to Smart Object
After opening your image in Photoshop, you’ll need to convert the Background layer to a Smart Object. Converting the Background layer to a Smart Object will allow you to work non-destructively. Additionally, you will be able to alter the adjustments you make in Adobe Camera Raw Filter as often as you wish.
To convert the Background layer to a Smart Object:
- Select Layer > Smart Objects > Convert to Smart Object, or;
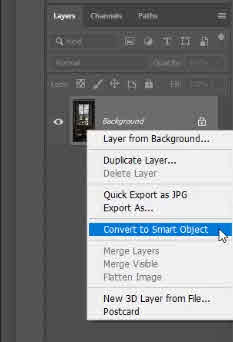
- Right-click on the Background layer and select Convert to Smart Object.
Convert to Smart Object menu location
Right-click layer to convert
The Background layer is now converted to a Smart Object. You can verify the change by noting the small icon in the bottom right of the layer thumbnail. The layer name also changes from Background to Layer 0.
Step 2: Make your selection
Select the area of the image that you want to edit in Adobe Camera Raw. In this example, I am going to make a selection of the wooden shutters on the window.

Selection of shutters
Step 3: Open Adobe Camera Raw
With the selection created, we are now going to edit the selection using the Adobe Camera Raw Filter.
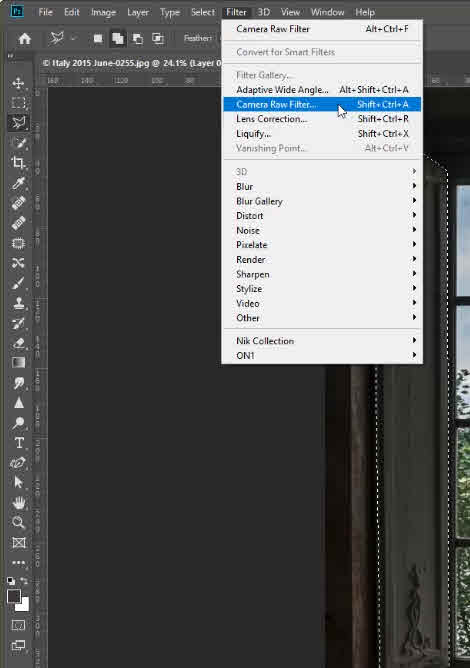
- Navigate to Filter > Camera Raw Filter;
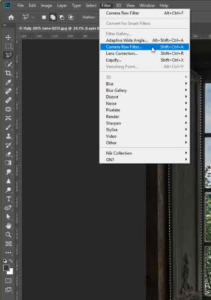
Camera Raw Filter menu location
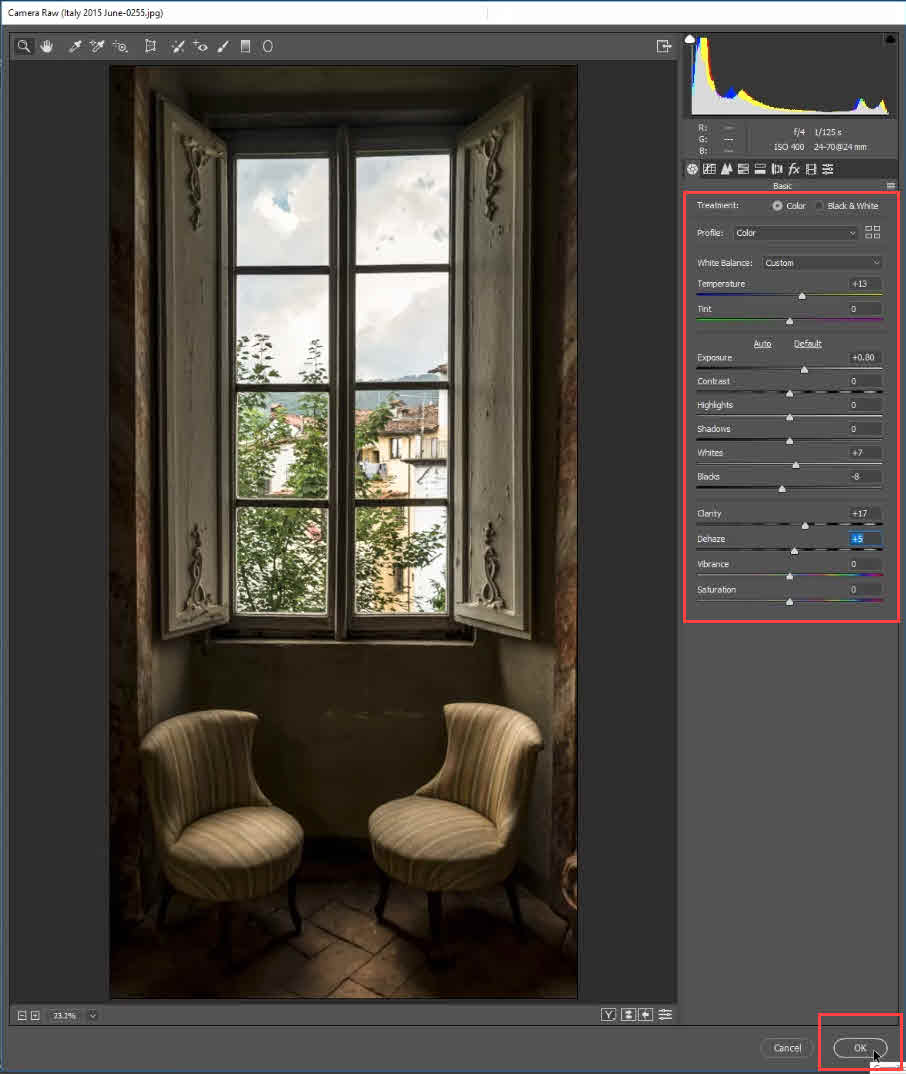
- The Camera Raw Filter will open. Do not pay too much attention to the preview image inside the Filter. The Camera Raw Filter dialogue is not capable of showing you only the selected areas of the image – not yet anyway;
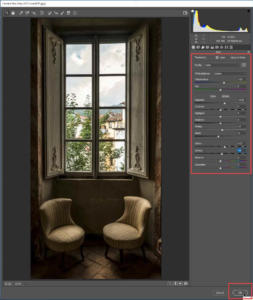
Camera Raw Filter dialogue
- Make your adjustments inside the Camera Raw Filter. The modifications will appear as if they are being applied to regions outwith your selection, but have faith;
- When you have made all your adjustments, click the Ok button at the bottom right of the filter window.
Step 4: Your selection is adjusted
The Camera Raw Filter dialogue will close, and you will see your adjustments applied only to the selected areas of your image. Now, if you look closely at the Smart Object layer, you will notice:
- A new layer mask underneath the Smart Object layer. The white areas of the mask are the areas where the effects of the Camera Raw Filter have been applied. This mask was created automatically from the selection you made;
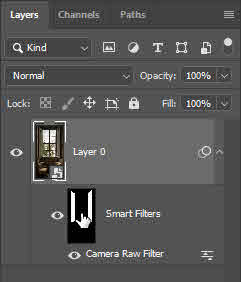
New Smart Filter adjustment layer and mask
- The words “Camera Raw Filter” underneath the layer mask;
- To the right of those words, you will also see a small icon. Double-clicking this icon will allow you to change the blending options of the Camera Raw Filter;
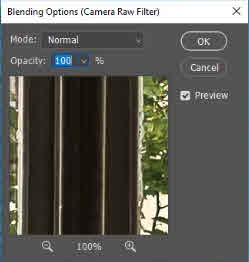
Blending Options
- Double-clicking the words “Camera Raw Filter” will open the Camera Raw Filter dialogue, and you can alter the adjustments you initially made.
Step 5: Save your image
Once you have adjusted the image to taste, it is time to save it. If you save the image as a native PSD format, the Smart Object information will be retained and available for future editing. However, if you save your image as a JPEG file, then the layers will be rasterised and flattened. In short, the Smart Object layer and information will be lost, but saving as a JPEG will reduce the size of the file. This reduction in file size will make it easier to upload your image for printing or sharing on social media.
Conclusion
I think having the ability to use selections in Photoshop and Adobe Camera Raw is a fantastic feature. It is a lesser known feature, but once you give it a try, you will see how useful it is, and you will appreciate the ability to make further tweaks to your selections. Just make sure you convert the layer to a Smart Object.
Give this technique a try and add your thoughts and questions below.


COOL!!!